Table of Contents
Important update:
Arch Anywhere is dead and the development has been stopped. Please look for other alternatives.
Looks like Arch Anywhere is rebranded to Anarchy Linux and is being actively developed. The project's link is added at the end of the guide.
About Arch Anywhere
As the name implies, Arch Anywhere let's you to install a fully functional, custom Arch Linux system with graphical desktop environment and extra software can be installed in minutes without much hassle. Arch anywhere has a graphical installer script that allows the users to easily install Arch Linux with a simple menu system. Arch anywhere is made for especially for beginners, and of course as well as for advanced users too. It has a built-in Arch Linux wiki, so that the users can browse through any pages on the Arch Wiki page. For instance, if you want to refer the 'Arch Linux beginners guide', then just type "arch-wiki beginners guide" without quotes. This will pull entire the 'Arch Linux beginners guide' in the command line. Cool, isn't it?
Features
The prominent features of Arch anywhere are given below.
Install types:
- Arch Linux base and base-devel packages
- Arch LinuxLTS base and base-devel packages
Partitioning methods such as;
- Full drive automatic partitioning with optional SWAP partition ;
- Full drive automatic partitioning full luks on LVM encryption for root and tmp partition with optional enctypted SWAP partition ;
- Manual partition (advanced users) with your choice of partitioning tool: cfdisk, fdisk, gdisk, parted etc.
Supported Desktop Environments and Window Managers:
- AwesomeWM
- Cinnamon Desktop
- DWM DynamicWM
- EnlightenmentWM
- FluxboxWM
- Gnome Desktop
- I3 i3WM
- KDE/Plasma Desktop
- LXDE Desktop
- LXQT Desktop
- Mate Desktop
- OpenboxWM
- XFCE4 Desktop
Supported Graphics Drivers:
- ATI/AMD xf86-video-ati open source drivers
- Intel xf86-video-intel open source drivers
- NVIDIA: Stable, 340xx, 304xx closed source drivers
- VirtualBox Guest Utilities Drivers
Bootloader support:
- Grub (Grand Unified Bootloader)
- Support for UEFI boot
- OsProber (Dual-Boot Support)
Network Utilities:
- Netctl
- NetworkManager + Applet (Recommended for desktop)
- WPA Supplicant
- WPA ActionD
- Wireless Tools
For the complete list of features, refer the link given below.
Installation
Download the latest version from here. Arch anywhere is a dual Arch Linux installer ISO, containing both 32 bit, and 64 bit architectures. Write the installer ISO to any CD or USB drive and boot up the system.
The following screen should appear.
You can either select 32bit (i686) or 64 bit( x86_64) installer. I go with 64bit installer.
![Arch anywhere [Running] - Oracle VM VirtualBox_001](https://ostechnix.com/wp-content/uploads/2016/02/Arch-anywhere-Running-Oracle-VM-VirtualBox_001.jpg)
Here it is how the installer screen looks like.
To start Arch Linux installation, just type arch-anywhere in the command prompt.
To search through the Arch wiki page, type:
arch-wiki
Or
arch-wiki <search args>
For more details about Arch anywhere, simply type: help
To return to the main screen (the above screen), type: start
Let us start to install Arch Linux. To do so, type:
arch-anywhere
![Arch anywhere [Running] - Oracle VM VirtualBox_002](https://ostechnix.com/wp-content/uploads/2016/02/Arch-anywhere-Running-Oracle-VM-VirtualBox_002.jpg)
Select your installer language:
![Arch anywhere [Running] - Oracle VM VirtualBox_003](https://ostechnix.com/wp-content/uploads/2016/02/Arch-anywhere-Running-Oracle-VM-VirtualBox_003.jpg)
Select Yes to start Arch anywhere installer.
![Arch anywhere [Running] - Oracle VM VirtualBox_004](https://ostechnix.com/wp-content/uploads/2016/02/Arch-anywhere-Running-Oracle-VM-VirtualBox_004.jpg)
Select your desired locale:
![Arch anywhere [Running] - Oracle VM VirtualBox_005](https://ostechnix.com/wp-content/uploads/2016/02/Arch-anywhere-Running-Oracle-VM-VirtualBox_005.jpg)
Select your Time zone:
![Arch anywhere [Running] - Oracle VM VirtualBox_006](https://ostechnix.com/wp-content/uploads/2016/02/Arch-anywhere-Running-Oracle-VM-VirtualBox_006.jpg)
Select sub zone:
![Arch anywhere [Running] - Oracle VM VirtualBox_007](https://ostechnix.com/wp-content/uploads/2016/02/Arch-anywhere-Running-Oracle-VM-VirtualBox_007.jpg)
Select your key map:
![Arch anywhere [Running] - Oracle VM VirtualBox_008](https://ostechnix.com/wp-content/uploads/2016/02/Arch-anywhere-Running-Oracle-VM-VirtualBox_008.jpg)
Here comes the important section. Arch anywhere supports three methods of partitioning:
- Automatic partition ;
- Automatic partition with encrypted LVM ;
- Manual partition.
If it is a fresh installation with single hard drive, you can either choose first or second partitioning method. In these two methods, the entire hard disk data will be erased and automatically partitioned.
If you have multiple drives and want to setup different partitions on multiple drives, try manual partitioning method.
I go with default option, i.e Automatic partition.
![Arch anywhere [Running] - Oracle VM VirtualBox_009](https://ostechnix.com/wp-content/uploads/2016/02/Arch-anywhere-Running-Oracle-VM-VirtualBox_009.jpg)
Select the hard drive to install Arch Linux.
![Arch anywhere [Running] - Oracle VM VirtualBox_010](https://ostechnix.com/wp-content/uploads/2016/02/Arch-anywhere-Running-Oracle-VM-VirtualBox_010.jpg)
Select your filesystem type and select OK.
![Arch anywhere [Running] - Oracle VM VirtualBox_011](https://ostechnix.com/wp-content/uploads/2016/02/Arch-anywhere-Running-Oracle-VM-VirtualBox_011.jpg)
Next create SWAP partition. Click Yes to create Swap partition.
![Arch anywhere [Running] - Oracle VM VirtualBox_012](https://ostechnix.com/wp-content/uploads/2016/02/Arch-anywhere-Running-Oracle-VM-VirtualBox_012.jpg)
Enter the Swap partition size (2XRAM size).
![Arch anywhere [Running] - Oracle VM VirtualBox_013](https://ostechnix.com/wp-content/uploads/2016/02/Arch-anywhere-Running-Oracle-VM-VirtualBox_013.jpg)
I don't need GPT partitioning, so I chose No.
![Arch anywhere [Running] - Oracle VM VirtualBox_014](https://ostechnix.com/wp-content/uploads/2016/02/Arch-anywhere-Running-Oracle-VM-VirtualBox_014.jpg)
Verify the partition details and select Write-Changes to continue.
![Arch anywhere [Running] - Oracle VM VirtualBox_015](https://ostechnix.com/wp-content/uploads/2016/02/Arch-anywhere-Running-Oracle-VM-VirtualBox_015.jpg)
Then the Installer will ask you to update the mirrorlist. It is recommended to have the updated mirrorlist. Select Yes and hit enter.
![Arch anywhere [Running] - Oracle VM VirtualBox_016](https://ostechnix.com/wp-content/uploads/2016/02/Arch-anywhere-Running-Oracle-VM-VirtualBox_016.jpg)
Select your country or nearest mirror location:
![Arch anywhere [Running] - Oracle VM VirtualBox_017](https://ostechnix.com/wp-content/uploads/2016/02/Arch-anywhere-Running-Oracle-VM-VirtualBox_017.jpg)
Finally, select the type of system you would like to install. If you are not sure, use Base or Base-devel.
![Arch anywhere [Running] - Oracle VM VirtualBox_018](https://ostechnix.com/wp-content/uploads/2016/02/Arch-anywhere-Running-Oracle-VM-VirtualBox_018.jpg)
Select Yes to install Grub boot loader.
![Arch anywhere [Running] - Oracle VM VirtualBox_019](https://ostechnix.com/wp-content/uploads/2016/02/Arch-anywhere-Running-Oracle-VM-VirtualBox_019.jpg)
If you have wifi network card, select Yes, else select No and hit enter key.
![Arch anywhere [Running] - Oracle VM VirtualBox_020](https://ostechnix.com/wp-content/uploads/2016/02/Arch-anywhere-Running-Oracle-VM-VirtualBox_020.jpg)
Select Yes, if you want to install multiboot option:
![Arch anywhere [Running] - Oracle VM VirtualBox_021](https://ostechnix.com/wp-content/uploads/2016/02/Arch-anywhere-Running-Oracle-VM-VirtualBox_021.jpg)
Select Install to continue installing Arch Linux on your hard drive.
![Arch anywhere [Running] - Oracle VM VirtualBox_022](https://ostechnix.com/wp-content/uploads/2016/02/Arch-anywhere-Running-Oracle-VM-VirtualBox_022.jpg)
It will take a while depending upon your Internet speed.
![Arch anywhere [Running] - Oracle VM VirtualBox_023](https://ostechnix.com/wp-content/uploads/2016/02/Arch-anywhere-Running-Oracle-VM-VirtualBox_023.jpg)
Select Yes to add multilib repository.
![Arch anywhere [Running] - Oracle VM VirtualBox_024](https://ostechnix.com/wp-content/uploads/2016/02/Arch-anywhere-Running-Oracle-VM-VirtualBox_024.jpg)
Select Yes to enable DHCP. If you don't have DHCP server, simply select No and configure your network manually.
![Arch anywhere [Running] - Oracle VM VirtualBox_025](https://ostechnix.com/wp-content/uploads/2016/02/Arch-anywhere-Running-Oracle-VM-VirtualBox_025.jpg)
Setup your Arch system's hostname:
![Arch anywhere [Running] - Oracle VM VirtualBox_027](https://ostechnix.com/wp-content/uploads/2016/02/Arch-anywhere-Running-Oracle-VM-VirtualBox_027.jpg)
Enter the password for root user account.
![Arch anywhere [Running] - Oracle VM VirtualBox_028](https://ostechnix.com/wp-content/uploads/2016/02/Arch-anywhere-Running-Oracle-VM-VirtualBox_028.jpg)
Re-enter the root user's password:
![Arch anywhere [Running] - Oracle VM VirtualBox_029](https://ostechnix.com/wp-content/uploads/2016/02/Arch-anywhere-Running-Oracle-VM-VirtualBox_029.jpg)
Create a new user account, for example ostechnix.
![Arch anywhere [Running] - Oracle VM VirtualBox_030](https://ostechnix.com/wp-content/uploads/2016/02/Arch-anywhere-Running-Oracle-VM-VirtualBox_030.jpg)
![Arch anywhere [Running] - Oracle VM VirtualBox_031](https://ostechnix.com/wp-content/uploads/2016/02/Arch-anywhere-Running-Oracle-VM-VirtualBox_031.jpg)
Enter the login password for the new user:
![Arch anywhere [Running] - Oracle VM VirtualBox_032](https://ostechnix.com/wp-content/uploads/2016/02/Arch-anywhere-Running-Oracle-VM-VirtualBox_032.jpg)
Re-enter the password:
![Arch anywhere [Running] - Oracle VM VirtualBox_033](https://ostechnix.com/wp-content/uploads/2016/02/Arch-anywhere-Running-Oracle-VM-VirtualBox_033.jpg)
Select Yes to enable sudo privileges for the newly created user. So that the new user can perform administrative commands with prefix 'sudo'.
![Arch anywhere [Running] - Oracle VM VirtualBox_034](https://ostechnix.com/wp-content/uploads/2016/02/Arch-anywhere-Running-Oracle-VM-VirtualBox_034.jpg)
Next, the installer will ask whether you want to install a Desktop environment or not. Select Yes and hit enter if you wanted to install a DE or select No.
![Arch anywhere [Running] - Oracle VM VirtualBox_035](https://ostechnix.com/wp-content/uploads/2016/02/Arch-anywhere-Running-Oracle-VM-VirtualBox_035.jpg)
Select your desired DE:
![Arch anywhere [Running] - Oracle VM VirtualBox_052](https://ostechnix.com/wp-content/uploads/2016/02/Arch-anywhere-Running-Oracle-VM-VirtualBox_052.jpg)
![Arch anywhere [Running] - Oracle VM VirtualBox_053](https://ostechnix.com/wp-content/uploads/2016/02/Arch-anywhere-Running-Oracle-VM-VirtualBox_053.jpg)
Select your desired graphics driver. If you not sure about driver, just go with default selection. It will automatically detect the drivers.
![Arch anywhere [Running] - Oracle VM VirtualBox_038](https://ostechnix.com/wp-content/uploads/2016/02/Arch-anywhere-Running-Oracle-VM-VirtualBox_038.jpg)
If you're installing Arch anywhere on a Laptop, select yes to install Synaptics touchpad.
![Arch anywhere [Running] - Oracle VM VirtualBox_039](https://ostechnix.com/wp-content/uploads/2016/02/Arch-anywhere-Running-Oracle-VM-VirtualBox_039.jpg)
Select Yes to install graphical login manager:
![Arch anywhere [Running] - Oracle VM VirtualBox_040](https://ostechnix.com/wp-content/uploads/2016/02/Arch-anywhere-Running-Oracle-VM-VirtualBox_040.jpg)
Select Yes to confirm installing your DE:
![Arch anywhere [Running] - Oracle VM VirtualBox_041](https://ostechnix.com/wp-content/uploads/2016/02/Arch-anywhere-Running-Oracle-VM-VirtualBox_041.jpg)
This may take a while depending upon the size of your selected DE.
![Arch anywhere [Running] - Oracle VM VirtualBox_042](https://ostechnix.com/wp-content/uploads/2016/02/Arch-anywhere-Running-Oracle-VM-VirtualBox_042.jpg)
Select Yes to install some common software for day to day usage:
![Arch anywhere [Running] - Oracle VM VirtualBox_043](https://ostechnix.com/wp-content/uploads/2016/02/Arch-anywhere-Running-Oracle-VM-VirtualBox_043.jpg)
Then go through each menu and select your list of additional software.
![Arch anywhere [Running] - Oracle VM VirtualBox_044](https://ostechnix.com/wp-content/uploads/2016/02/Arch-anywhere-Running-Oracle-VM-VirtualBox_044.jpg)
![Arch anywhere [Running] - Oracle VM VirtualBox_045](https://ostechnix.com/wp-content/uploads/2016/02/Arch-anywhere-Running-Oracle-VM-VirtualBox_045.jpg)
![Arch anywhere [Running] - Oracle VM VirtualBox_046](https://ostechnix.com/wp-content/uploads/2016/02/Arch-anywhere-Running-Oracle-VM-VirtualBox_046.jpg)
Once you selected all required software, select Done Install option to continue installing the software.
![Arch anywhere [Running] - Oracle VM VirtualBox_047](https://ostechnix.com/wp-content/uploads/2016/02/Arch-anywhere-Running-Oracle-VM-VirtualBox_047.jpg)
Select Install and hit enter to continue the installation of extra software.
![Arch anywhere [Running] - Oracle VM VirtualBox_048](https://ostechnix.com/wp-content/uploads/2016/02/Arch-anywhere-Running-Oracle-VM-VirtualBox_048.jpg)
Wait for a while:
![Arch anywhere [Running] - Oracle VM VirtualBox_049](https://ostechnix.com/wp-content/uploads/2016/02/Arch-anywhere-Running-Oracle-VM-VirtualBox_049.jpg)
Congratulations! Arch Linux has been successfully installed. Remove the installation media and select Reboot system option from the menu to complete the installation.
![Arch anywhere [Running] - Oracle VM VirtualBox_050](https://ostechnix.com/wp-content/uploads/2016/02/Arch-anywhere-Running-Oracle-VM-VirtualBox_050.jpg)
In case you forgot to add a user account, install a DE or install an additional software, you can browse through the respective link in the above wizard and complete the installation.
After rebooting, Select the Arch Linux from the boot menu.
![Arch anywhere [Running] - Oracle VM VirtualBox_051](https://ostechnix.com/wp-content/uploads/2016/02/Arch-anywhere-Running-Oracle-VM-VirtualBox_051.jpg)
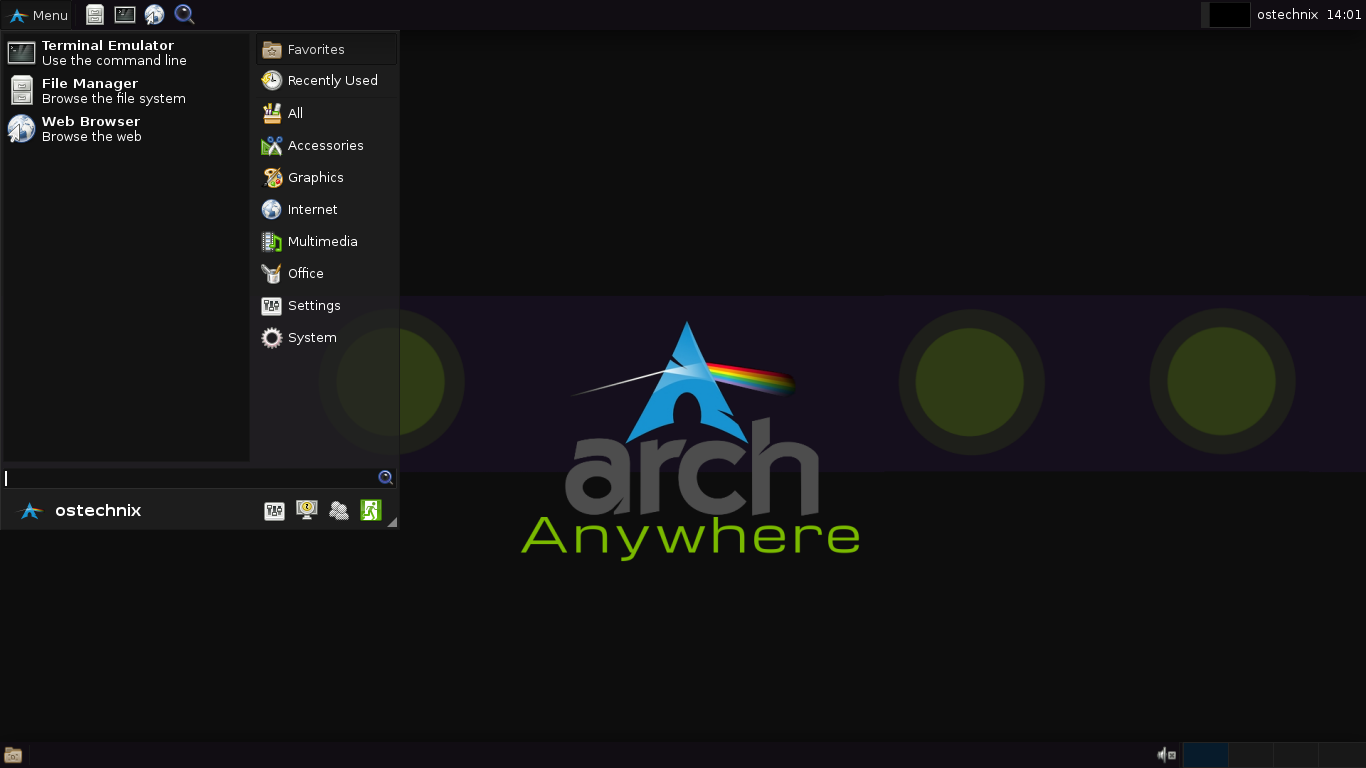
Log in to the newly installed Arch Linux.
![Arch Anywhere [Running] - Oracle VM VirtualBox_001](https://ostechnix.com/wp-content/uploads/2016/02/Arch-Anywhere-Running-Oracle-VM-VirtualBox_001.jpg)
Start using your newly installed Arch Linux system.

Have fun!
For any questions, bug reports, comments or suggestions, Email to the developer or leave a message in the comment section below.
The developer of Arch Anywhere have created a video tutorial for Arch Anywhere installation. Check out the following link.
That's all for now. If you find this tutorial helpful, please share it on your social networks and support OSTechNix.
Thanks for reading!
Links:
8 comments
Since I only plan to have Arch installed on my laptop, is there anyway I can remove the boot menu or at least hide it?
I am not sure, but I think you can. Refer this link. https://wiki.archlinux.org/index.php/GRUB/Tips_and_tricks
got ERROR: ‘/dev/disk/by-label/’ device did not show up after 30seconds…
how could i solve this problem?
Thabk you for the information…
Where is the download link on your website? There are just 4 ads on the page
Hi Harshal,
Arch Anywhere is dead and the development has been stopped. Please look for other alternatives.
This is incorrect. It was rebranded to AnarchyLinux
https://www.anarchylinux.org/download/
Thanks for the update. I have added the link.