Haskell is an advanced, purely functional, and general purpose programming language. This guide addresses how to install Haskell and how to getting started with Haskell programming language in Linux and Unix-like operating systems.
Haskell can be installed in three ways; manually installing, using stack, and using Haskell Platform. Installing Haskell using stack is the officially recommended and easiest method so far.
Table of Contents
Install Haskell tool stack
Haskell Tool Stack is a cross-platform program for building Haskell projects. With the Haskell Stack we get a comprehensive development environment for Haskell. Using Haskell tool stack, we can easily install the following components:
- Stack: A project builder for multi-package Haskell projects,
- GHC: A compiler and interpreter for Haskell programs,
- Haddock: A documentation generator for Haskell packages,
- And thousands of packages can be installed on demand.
First, let us install Haskell stack using command:
$ wget -qO- https://get.haskellstack.org/ | sh
Or,
$ curl -sSL https://get.haskellstack.org/ | sh
The above commands will download the latest Stack version and install it right away.
These commands are same for almost all Linux distributions and FreeBSD. However, Arch community is maintaining an official version in the [community] repository. So, if you're running Arch Linux and/or any Arch based systems, just run the following command to install the latest stable Stack version.
$ sudo pacman -S stack
Once installed, run the following command to set your PATH environment variable to include $HOME/.local/bin:
$ echo 'export PATH=$HOME/.local/bin:$PATH' >> ~/.bashrc
Updates the changes made in the ~/.bashrc file using command:
$ source ~/.bashrc
Let us see the installed version of Stack:
$ stack --version
Version 1.6.1, Git revision f25811329bbc40b0c21053a8160c56f923e1201b (5435 commits) x86_64 hpack-0.20.0
To update Stack at any time, just run:
$ stack upgrade
To update the package index, run:
$ stack update
We have installed Stack. Let us go ahead and create a new project.
Getting Started with Haskell Programming Language
Setting up a new project
To get our new project going, we need some files such as some haskell source code, a package.yaml, a stack.yaml and a .cabal file and few other directories. We can create these files manually. However, Haskell has many predefined templates. So, we can use one instead of creating them manually.
To list all available templates, run:
$ stack templates
Now, I am going to create a new project called "ostechnix" and use "new-template". To do so, run:
$ stack new ostechnix new-templateSample output would be:
Downloading template "new-template" to create project "ostechnix" in ostechnix/ ...

The following parameters were needed by the template but not provided: author-email, author-name, category, copyright, github-username
You can provide them in /home/sk/.stack/config.yaml, like this:
templates:
 params:
 author-email: value
 author-name: value
 category: value
 copyright: value
 github-username: value
Or you can pass each one as parameters like this:
stack new ostechnix new-template -p "author-email:value" -p "author-name:value" -p "category:value" -p "copyright:value" -p "github-username:value"

Looking for .cabal or package.yaml files to use to init the project.
Using cabal packages:
- ostechnix/

Selecting the best among 12 snapshots...

Downloaded lts-10.0 build plan.
Populated index cache.
* Matches lts-10.0

Selected resolver: lts-10.0
Initialising configuration using resolver: lts-10.0
Total number of user packages considered: 1
Writing configuration to file: ostechnix/stack.yaml
All done.
Installing GHC
Go to the newly created project's directory and run 'stack setup' download and install the required compiler.
$ cd ostechnix/
$ stack setup
This command will install the correct GHC compiler to your new Haskell project. GHC will be installed in an isolated location. That means this will not interfere with any system-level installation.
Please note that GHC will be installed on your global stack root directory. So, you can't just call it from your shell using command ghc. Instead, consider using: stack ghc, stack ghci, stack runghc, or stack exec. For more information on paths, run:
$ stack path
and..
$ stack exec env
We have now created a new project and installed the correct compiler for our project. It is time to build it.
Building project
To build the project, run:
$ stack build
Make sure you run this command inside your project's directory. Once build complete, run the executable using command:
$ stack exec ostechnix-exe
Sample output would be:
someFunc

Please note that the executable "ostechnix-exe" will be hidden in the ./.stack-work directory in your project's main directory.
Playing with Haskell
Open the ghci compiler:
$ stack exec ghci
Or,
$ stack exec -- ghci
You will be landed in the ghci prompt.
GHCi, version 8.2.2: http://www.haskell.org/ghc/ :? for help
Prelude>
Like everyone else, let us start with "hello world!".
Prelude> "hello world!"
"hello world!"
Let us try some arithmetic operations.
Prelude> 14+90
104
Prelude> 14-90
-76
Prelude> 34/2
17.0
Some complex operations:
Prelude> (67*98) - 50 - (24-2)
6494
Let us find out which number is bigger or smaller:
Prelude> max 34 17
34
Prelude> min 45 98
45
Find the successor:
Prelude> succ 89
90
Find the given inputs are equal or not:
Prelude> 10 == 10
True
Prelude> 10 == 20
False
Prelude> "ostechnix" == "ostechnix"
True
Prelude> "ostechnix" == "windows"
False
It's also easy to use Boolean values like below:
Prelude> True && False
False
Prelude> True && True
True
Prelude> False || True
True
Prelude> False && False
False
Be default, the prompt name is Prelude>. You can change this to something else, for instance ghci>, by typing:
:set prompt "ghci> "
For help, type:
:?
To exit, type:
:quit
Or,
:q
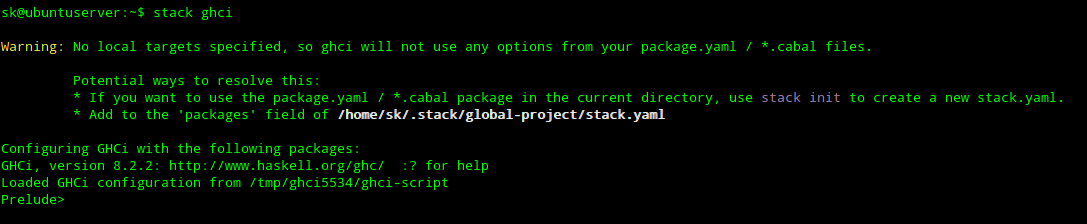
Please note that we don't have to create a project's directory. We can start working with Stack by just running 'stack ghci' from the shell. It will download the correct GHC version and land you inside the prelude> prompt.
Compiling and running Haskell code
It is easy to run a Haskell code. Check the following example.
Create a file called "ostechnix.hs" with following contents.
#!/usr/bin/env stack
-- stack --install-ghc runghc

main :: IO ()
main = putStrLn "Welcome To OSTechNix"
Now you can run this program using command:
$ stack ostechnix.hs
Welcome To OSTechNix
Here is another example.
Create a haskell program named myhaskell.hs with the following code:
module Main where

main :: IO ()
main = putStrLn "Welcome To OSTechNix!"
Then compile it using command:
stack exec -- ghc myhaskell.hs -o test.hs
Sample output would be:
[1 of 1] Compiling Main ( myhaskell.hs, myhaskell.o )
Linking ostechnix.hs ...
Finally, run it as shown below:
$ ./test.hs
Welcome To OSTechNix!
We just covered the basics. There is much more to learn! If you're interested to learn more about Haskell programming, refer the following resources to learn Haskell from basics to advanced level.