
This detailed guide explains how to analyze websites from the Linux command line, identify technical issues, fix them, and verify the fixes.
Using command-line tools such as curl, grep, awk, and Bash scripts, we can inspect HTTP responses, check redirects, examine crawling and indexing signals, analyze server logs, measure response times, and audit multiple URLs.
The goal is to identify technical problems that may affect SEO, investigate their root causes, and determine how to resolve them.
We can fix issues ourselves or share our findings with a web developer or SEO specialist, then run the same tests again to verify the fixes.
The guide has seven phases:
- Understanding HTTP requests and responses
- Investigating crawling and indexing signals
- Auditing URLs and redirects
- Analyzing web server logs
- Measuring response times and performance signals
- Automating a basic technical SEO audit
- Fixing issues and verifying the fixes
Table of Contents
Important Note
This guide provides a practical, low-cost approach to website analysis using free Linux command-line tools and scripts. It helps identify potential technical SEO issues, investigate their root causes, and support evidence-based improvements.
However, command-line tools and custom scripts are not a complete replacement for dedicated SEO platforms. Paid SEO tools often provide broader website crawling capabilities, visual reports, backlink analysis, keyword research, and other specialized features.
Think of this guide as a value addition to your SEO toolkit, not a complete replacement for professional SEO auditing tools. It focuses on understanding website behavior, investigating technical issues, and automating checks using tools that are readily available for free.
Always keep these two rules in mind:
- Test only what you own or have permission to audit. Even simple scripts can put load on a server.
- Be polite. Use a delay between requests, identify your tool with a User-Agent, and avoid hammering small sites.
Let us get started.
Phase 1: Understanding HTTP Requests and Responses
Objective
Learn how a browser or search-engine crawler requests a webpage and how a server responds. Use Linux commands to inspect status codes, response headers, redirects, and HTML content.
1.1 Prepare your Linux environment
On Ubuntu or Debian, install the tools used throughout this guide:
sudo apt update
sudo apt install curl dnsutils grep gawk sed coreutils
dnsutils provides dig and host, which are used later for DNS checks and crawler verification.
1.2 Check an HTTP response
curl -I https://example.com/
This displays the response headers. Look for:
HTTP/2 200or another status code.Content-Type, which describes the returned content.Location, which may indicate a redirect.- Cache-related headers, if present.
A healthy response looks like the output below:
HTTP/1.1 200 OK
Date: Wed, 11 Nov 2026 13:57:25 GMT
Content-Type: text/html; charset=utf-8
Connection: keep-alive
Server: cloudflare
last-modified: Wed, 11 Nov 2026 12:01:58 GMT
allow: GET, HEAD
Accept-Ranges: bytes
Age: 4
cf-cache-status: HIT
CF-RAY: a58dce4f7f6dd276-FRA
alt-svc: h3=":443"; ma=86400
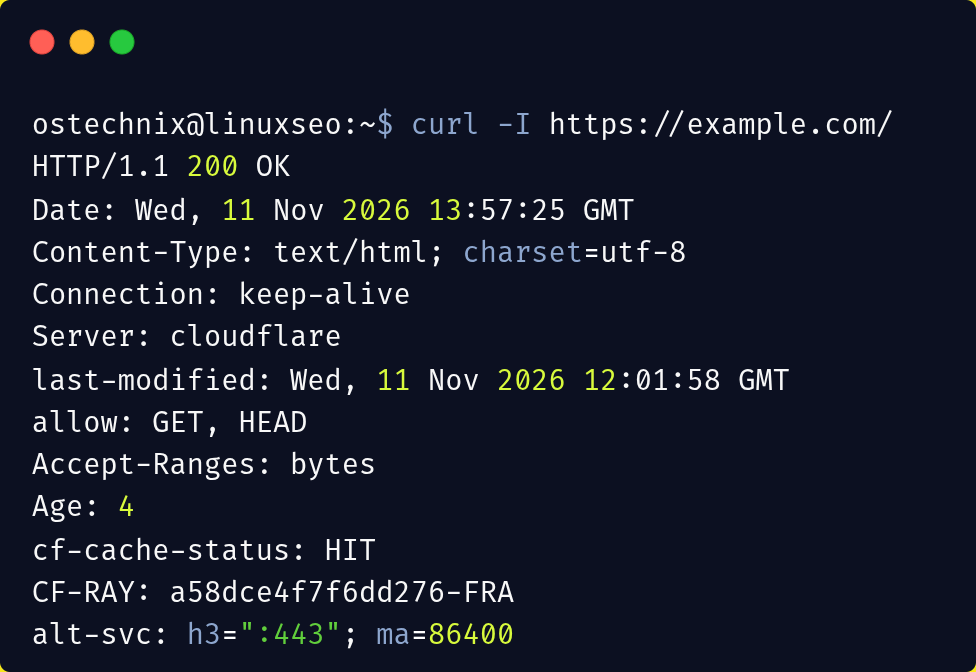
A 200 response usually means the request succeeded. It does not prove that the page is indexed or ranks in search results.
Note:
-Isends aHEADrequest. A few servers answerHEADdifferently fromGET. Section 3 shows how to see the headers of a realGETrequest.
1.3 Display headers and status information (GET request)
curl -sS -D - -o /dev/null https://example.com/
This sends a normal GET request, prints the response headers (-D -), and discards the response body (-o /dev/null). Use it whenever you want to see exactly what a browser or crawler would receive.
1.4 Save the HTML
curl -sS https://example.com/ -o page.html
Inspect the page title:
grep -i '<title' page.html
Search for canonical and robots tags:
grep -oiE '<link[^>]*rel=.canonical.[^>]*>' page.html
grep -oiE '<meta[^>]*name=.robots.[^>]*>' page.html
The -o option prints only the matching tag. In these patterns, a . matches either kind of quote, so they work with rel="canonical" and rel='canonical'.
Many sites serve minified HTML on a single line. Without -o, grep would print the entire page whenever one tag matches.
These searches are not complete HTML parsers, so complex pages may require additional tools.
1.5 Check redirects
Show the status and Location header of every hop in a redirect chain:
curl -sSIL http://example.com/ | grep -iE '^(HTTP/|location:)'
The -L option follows redirects, while -I requests headers only. Example of a chain with two hops, which is worth fixing:
HTTP/1.1 301 Moved Permanently
location: https://example.com/
HTTP/2 301
location: https://www.example.com/
HTTP/2 200
Here http://example.com/ first moves to HTTPS and then to the www hostname. Ideally it would go straight to the final URL in one hop.
For a summary of the final result:
curl -sS -o /dev/null -L --max-redirs 10 \
  -w 'Status: %{http_code}\nRedirects: %{num_redirects}\nFinal URL: %{url_effective}\n' \
  https://example.com/
--max-redirs 10 stops redirect loops instead of following them forever.
1.6 Check a list of URLs
Create a file called urls.txt:
https://example.com/
https://example.com/about
https://example.com/contact
Run a basic status check:
while IFS= read -r url || [[ -n "$url" ]]; do
  [[ -z "$url" ]] && continue
  curl -sS -o /dev/null -L --max-redirs 10 --max-time 20 \
    -w '%{http_code} redirects=%{num_redirects} %{url_effective}\n' \
    "$url"
done < <(tr -d '\r' < urls.txt)
The tr -d '\r' removes Windows line endings, a common cause of mysterious failures when a URL list was created on Windows. Note that %{num_redirects} makes redirects visible even though -L follows them.
This provides a starting point for a simple URL audit.
1.7 Know what curl cannot see
curl downloads the raw HTML the server sends. It does not run JavaScript. On sites built with React, Vue, or other client-side frameworks, the title, canonical tag, meta robots, links, and main content may be added or changed by JavaScript after the page loads. Googlebot renders JavaScript, so what it indexes may differ from what curl shows.
If you suspect a difference:
- Compare View Source (raw HTML) with Inspect Element (rendered DOM) in your browser.
- Use the URL Inspection tool in Google Search Console to see the rendered page Google crawled.
- Optionally, dump the rendered DOM with headless Chrome:
chromium --headless --dump-dom https://example.com/
Treat curl results as "what the server sends", not "what Google sees after rendering."
Phase 2: Investigating Crawling and Indexing Signals
Objective
Learn to inspect the files, tags, and HTTP headers that influence how search engines access and interpret website pages.
2.1 Inspect robots.txt
curl -sS https://example.com/robots.txt
Look for directives such as:
User-agent: *
Disallow: /private/
Sitemap: https://example.com/sitemap.xml
Two things to check:
- An overly broad
Disallow. A singleDisallow: /blocks crawling of the entire site, a common mistake after a staging site goes live. - A
Sitemap:line. It helps crawlers find your sitemap.
A robots.txt rule can restrict crawling, but it does not guarantee that a URL will be excluded from Google's index.
2.2 Inspect the XML sitemap
curl -sS https://example.com/sitemap.xml | head -n 30
If the website uses a sitemap index or a sitemap at another location, inspect the actual URL specified by the website (check the Sitemap: line in robots.txt).
A sitemap helps search engines discover URLs. Inclusion does not guarantee crawling, indexing, or ranking. A good sitemap lists only canonical URLs that return 200. Phase 3 shows how to test that.
2.3 Check meta robots directives
curl -sS https://example.com/ | grep -oiE '<meta[^>]*name=.robots.[^>]*>'
A page might contain:
<meta name="robots" content="noindex">
The noindex directive tells compliant search engines not to index the page when they can crawl and process that directive. An accidental noindex (often left over from staging, or caused by a CMS "discourage search engines" setting) is one of the most damaging technical SEO mistakes.
2.4 Check the X-Robots-Tag header
curl -sSI https://example.com/ | grep -i '^x-robots-tag:'
Some indexing directives are delivered through HTTP headers rather than HTML. This is common for PDFs and other non-HTML files, and it is easy to miss because it never appears in the page source.
2.5 Inspect canonical tags
curl -sS https://example.com/ | grep -oiE '<link[^>]*rel=.canonical.[^>]*>'
Canonical tags indicate a preferred URL among duplicate or similar pages. Search engines treat them as signals, not absolute commands. Check that the canonical URL is the final, indexable URL (HTTPS, preferred hostname, status 200).
2.6 Check how the server treats crawler User-Agents (optional)
curl -sS -o /dev/null -w '%{http_code}\n' -A 'Googlebot' https://example.com/If this returns a different status from a normal request, the server may treat crawlers differently. This only changes the User-Agent text. Real Googlebot is identified by its IP address too, so a firewall may treat the real crawler differently from your test.
2.7 Check DNS resolution
dig example.com
dig www.example.com
DNS problems can prevent users and crawlers from reaching a website. Compare the results with the website's intended DNS configuration.
Phase 3: Auditing URLs and Redirects
Objective
Use Linux to check many URLs consistently, identify unexpected responses, and create reports for further investigation.
3.1 Build a URL list
Create urls.txt with one URL per line. Use URLs from a website you own or have permission to audit.
Rather than typing URLs by hand, you can extract them from your sitemap:
curl -sS https://example.com/sitemap.xml | grep -oP '(?<=<loc>)[^<]+' > urls.txt
If the file is a sitemap index (it contains <sitemapindex> and lists other sitemaps), fetch each child sitemap:
curl -sS https://example.com/sitemap.xml | grep -oP '(?<=<loc>)[^<]+' |
while read -r sitemap; do
  curl -sS "$sitemap" | grep -oP '(?<=<loc>)[^<]+'
done > urls.txt
Compressed sitemaps (.xml.gz) need | zcat after curl. For a first run, test a sample: head -n 50 urls.txt > sample.txt.
Extracting URLs from the sitemap also lets you audit the sitemap itself: any URL in it that does not return a clean 200 is a finding.
3.2 Check status codes, redirect counts, and final URLs
while IFS= read -r url || [[ -n "$url" ]]; do
  [[ -z "$url" ]] && continue
  curl -sS -o /dev/null -L --max-redirs 10 --max-time 20 \
    -w '%{http_code},%{num_redirects},%{url_effective}\n' "$url"
done < <(tr -d '\r' < urls.txt)
This reports the final HTTP status, the number of redirects followed, and the final URL.
Because -L follows redirects, the status shown is the final status. A 301 will not appear in this output, but a non-zero redirect count will.
3.3 Check only the first hop
To see the original response (such as 301 or 302) and where it points, remove -L:
curl -sS -o /dev/null -w '%{http_code} -> %{redirect_url}\n' http://example.com/Example output:
301 -> https://example.com/
3.4 Check hostname and protocol variants
Search engines can treat these as four different URLs, so all four should end at the same single final URL:
for u in http://example.com/ http://www.example.com/ \
         https://example.com/ https://www.example.com/; do
  curl -sS -o /dev/null -L --max-redirs 10 \
    -w "%{http_code} hops=%{num_redirects} $u -> %{url_effective}\n" "$u"
done
Healthy output: every line ends with 200 and the same final URL, with at most one hop each. Warning signs: two variants both returning 200 with no redirect (duplicate versions of the site), or any variant needing two or more hops.
3.5 Test for soft 404s
A soft 404 is an error page that returns 200 instead of 404. It confuses crawlers and wastes crawl budget.
curl -sS -o /dev/null -w '%{http_code}\n' https://example.com/this-page-should-not-exist-12345The result should be 404 (or 410). If it is 200, or if it redirects to the homepage, investigate how your site handles missing pages.
3.6 Identify unexpected responses
Look for:
404: the requested resource was not found.500or other5xxresponses: server-side errors.301or302: redirects that may need review (use the first-hop check from section 3).- Redirect counts of
2or more: redirect chains. - Unexpected final URLs: possible redirect or canonicalization issues.
000or a curl error: the connection failed or timed out.
Do not assume every 404 or redirect is an SEO problem. Compare the result with the intended website behavior.
3.7 Check query parameters and duplicate URLs
Compare URLs that differ only by tracking parameters, session IDs, or other query strings. Determine whether they represent distinct content or duplicate versions of the same page.
Use canonicalization, internal links, and sitemap configuration to investigate whether the site sends consistent signals.
3.8 Save a basic CSV report
printf 'input_url,status,redirects,final_url\n' > report.csv

while IFS= read -r url || [[ -n "$url" ]]; do
  [[ -z "$url" ]] && continue

  result=$(curl -sS -o /dev/null -L --max-redirs 10 --max-time 20 \
    -w '%{http_code},%{num_redirects},%{url_effective}' "$url" 2>/dev/null) \
    || result="ERROR,0,"

  printf '"%s",%s\n' "$url" "$result" >> report.csv
done < <(tr -d '\r' < urls.txt)
This is a simple starting point. The script in Phase 6 adds proper CSV escaping and collects more data.
Phase 4: Analyzing Web Server Logs
Objective
Learn how server logs record requests and how those records can help diagnose crawler behavior, errors, and frequently requested paths.
4.1 Locate the access logs
Common locations include:
- Apache:
/var/log/apache2/access.log - Nginx:
/var/log/nginx/access.log
You need appropriate permissions to read these files. Hosted platforms may store logs elsewhere or provide them through a dashboard.
Rotated logs. Older logs are usually rotated and compressed (access.log.1, access.log.2.gz, and so on). To search across all of them, use zcat -f, which reads both plain and gzipped files:
sudo zcat -f /var/log/nginx/access.log* | wc -l
The examples below use access.log alone for simplicity. Replace it with zcat -f /var/log/nginx/access.log* | to include history.
4.2 Handle log data responsibly
Access logs contain IP addresses, which are personal data in many jurisdictions (for example under GDPR). Do not paste raw logs into public forums or share them without removing or masking IPs. Follow your organization's retention policy.
4.3 View recent requests
sudo tail -n 50 /var/log/nginx/access.log
Replace the path if your server uses another log location.
A typical line in the "combined" format looks like this:
66.249.66.1 - - [29/Oct/2026:10:15:32 +0000] "GET /blog/post-1 HTTP/1.1" 200 5123 "-" "Mozilla/5.0 (compatible; Googlebot/2.1; +http://www.google.com/bot.html)"
In this format, $1 is the client IP, $4 the timestamp, $7 the requested path, $9 the status code, and the final quoted field the User-Agent.
4.4 Count HTTP status codes
For a standard combined or common log format, the status code is often the ninth whitespace-separated field:
sudo awk '{print $9}' /var/log/nginx/access.log | sort | uniq -c | sort -nrConfirm the log format before relying on field positions. Custom formats can place fields elsewhere. If your site is behind a CDN or proxy, $1 may be the proxy's IP rather than the visitor's.
4.5 Find frequently requested paths
sudo awk '{print $7}' /var/log/nginx/access.log | sort | uniq -c | sort -nr | head -20This can reveal frequently requested paths, although query strings and log-format differences may affect the results.
4.6 Analyze Googlebot activity
Which URLs does Googlebot request most?
sudo grep -i 'Googlebot' /var/log/nginx/access.log |
  awk '{print $7}' | sort | uniq -c | sort -nr | head -20
Which errors did Googlebot run into?
sudo grep -i 'Googlebot' /var/log/nginx/access.log |
  awk '$9 ~ /^(404|410|5[0-9][0-9])$/ {print $9, $7}' | sort | uniq -c | sort -nr | head -20
How many Googlebot requests per day?
sudo grep -i 'Googlebot' /var/log/nginx/access.log |
  awk '{print substr($4, 2, 11)}' | sort | uniq -c
How much crawling goes to parameterized URLs (often low-value duplicates)?
sudo grep -i 'Googlebot' /var/log/nginx/access.log | awk '$7 ~ /\?/' | wc -l
For a visual overview, goaccess (sudo apt install goaccess) can read the same logs, for example goaccess /var/log/nginx/access.log --log-format=COMBINED.
4.7 Verify that a request really came from Googlebot
A user-agent string alone does not prove that a request came from Google, because anyone can fake it. For important investigations, use Google's documented reverse-then-forward DNS check.
First, list the IPs claiming to be Googlebot:
sudo grep -i 'Googlebot' /var/log/nginx/access.log | awk '{print $1}' | sort -u | headThen, for one IP, run a reverse lookup and a forward lookup:
host 66.249.66.1
# expected: ... domain name pointer crawl-66-249-66-1.googlebot.com.

host crawl-66-249-66-1.googlebot.com
# expected: ... has address 66.249.66.1
The request is genuine only if both conditions hold:
- The reverse lookup returns a hostname ending in
googlebot.com,google.com, orgoogleusercontent.com. - The forward lookup of that hostname returns the original IP.
(The IP above is only an example. Google also publishes its crawler IP ranges.)
4.8 Use log findings to guide investigation
Investigate patterns such as:
- Large numbers of requests to URLs that return errors.
- Important pages that receive little crawler activity.
- Repeated requests to low-value URL variants.
- Spikes in server errors.
Logs show requests received by the server. They do not, by themselves, prove that a page is indexed or explain its ranking.
Phase 5: Measuring Response Times and Checking Performance Signals
Objective
Use command-line tools to measure connection and response timings, inspect caching and compression headers, and identify areas that may need deeper performance testing.
5.1 Measure request timings
curl -sS -o /dev/null \
  -w 'DNS: %{time_namelookup}s\nConnect: %{time_connect}s\nTLS: %{time_appconnect}s\nFirst byte: %{time_starttransfer}s\nTotal: %{time_total}s\n' \
  https://example.com/
These measurements help separate DNS, connection, TLS, and server-response timing. They are affected by your network, location, connection reuse, and test conditions.
A single measurement is noisy. Repeat it and compare:
for i in {1..5}; do
  curl -sS -o /dev/null -w '%{time_starttransfer}\n' https://example.com/
done
The first request after a quiet period is often slower because caches are cold.
5.2 Inspect caching headers
curl -sSI https://example.com/ | grep -iE '^(cache-control|expires|age|etag|last-modified):'
The anchors (^ and :) matter. Without them, age would also match unrelated headers such as Content-Language.
Review whether caching behavior matches the intended policy for the resource. Different pages and assets may need different cache settings. Check a CSS or JavaScript file as well as the homepage:
curl -sSI https://example.com/path/to/style.css | grep -iE '^(cache-control|expires|etag):'
5.3 Check compression support
curl -sS -D - -o /dev/null -H 'Accept-Encoding: gzip, br' https://example.com/ |
  grep -iE '^(content-encoding|vary):'
This uses a real GET request, because some servers leave out Content-Encoding on HEAD responses, which could make a compressed site look uncompressed.
Look for Content-Encoding: gzip (or br). Support depends on the server and the requested resource. Images and other already-compressed files are not expected to be compressed again.
To see the size difference:
curl -sS -o /dev/null -w 'uncompressed: %{size_download} bytes\n' https://example.com/
curl -sS -o /dev/null -H 'Accept-Encoding: gzip' -w 'gzip: %{size_download} bytes\n' https://example.com/
5.4 Check HTTPS redirects
curl -sSIL http://example.com/ | grep -iE '^(HTTP/|location:)'
Inspect the redirect chain to confirm that HTTP requests reach the intended HTTPS destination without unnecessary loops or extra hops. Combine this with the four-variant check from Phase 3, including www versus non-www.
5.5 Understand the limits of command-line timings
A quick curl test does not measure the full user experience. For browser-based performance, use PageSpeed Insights, Chrome DevTools, and real-user field data where available.
Lighthouse can also run from the command line (npx lighthouse https://example.com --only-categories=performance,seo --view), but it reports lab data from a simulated test.
Google's Core Web Vitals thresholds are:
- Largest Contentful Paint (LCP): 2.5 seconds or less.
- Interaction to Next Paint (INP): 200 milliseconds or less.
- Cumulative Layout Shift (CLS): 0.1 or less.
These thresholds are evaluated at the 75th percentile of page visits. A single command-line request cannot establish whether a site meets them.
Phase 6: Automating a Basic Technical SEO Audit
Objective
Combine the skills from the previous phases into a simple Bash script that checks URLs and creates a report for further analysis.
6.1 Create the script
Create a file called seo-audit.sh:
#!/usr/bin/env bash
# seo-audit.sh - basic technical SEO audit from a list of URLs
# Usage: ./seo-audit.sh [urls.txt] [seo-report.csv]
# Optional: DELAY=2 ./seo-audit.sh   (seconds to wait between requests)

set -u

input="${1:-urls.txt}"
output="${2:-seo-report.csv}"
delay="${DELAY:-1}"
ua="TechSEOAudit/1.0 (+https://yoursite.example/about-audit)"

if [[ ! -f "$input" ]]; then
  echo "Input file not found: $input" >&2
  exit 1
fi

# One temp file for the whole run, cleaned up on exit
html_file=$(mktemp)
trap 'rm -f "$html_file"' EXIT

# Wrap a value in quotes and double any embedded quotes (basic CSV escaping)
csv() {
  local s=${1//\"/\"\"}
  printf '"%s"' "$s"
}

printf 'input_url,http_status,redirects,final_url,seconds,page_title,canonical,meta_robots\n' > "$output"

# tr -d '\r' removes Windows line endings, a common cause of odd failures
while IFS= read -r url || [[ -n "$url" ]]; do
  [[ -z "$url" ]] && continue
  [[ "$url" =~ ^[[:space:]]*# ]] && continue

  : > "$html_file"   # empty the temp file so a failed request can't reuse the last page

  # One request per URL: body saved for parsing, details from --write-out
  result=$(curl -sS -L --max-redirs 10 --max-time 20 -A "$ua" \
    -o "$html_file" \
    -w '%{http_code}\t%{num_redirects}\t%{url_effective}\t%{time_total}' \
    "$url" 2>/dev/null)
  rc=$?

  status="" redirects="" final_url="" seconds=""
  IFS=$'\t' read -r status redirects final_url seconds <<< "$result"
  [[ $rc -ne 0 ]] && status="ERROR(curl $rc)"
  : "${status:=ERROR}"

  # Flatten the HTML to one line so tags split across lines still match
  flat=$(tr '\n\r' '  ' < "$html_file")

  title=$(grep -oiE '<title[^>]*>[^<]*</title>' <<< "$flat" | head -n 1 |
    sed -E 's/<[^>]+>//g; s/[[:space:]]+/ /g; s/^ //; s/ $//')

  canonical=$(grep -oiE '<link[^>]*rel=.canonical.[^>]*>' <<< "$flat" | head -n 1 |
    sed -nE "s/.*href=[\"']([^\"']+).*/\1/p")

  meta_robots=$(grep -oiE '<meta[^>]*name=.robots.[^>]*>' <<< "$flat" | head -n 1 |
    sed -nE "s/.*content=[\"']([^\"']*).*/\1/p")

  printf '%s,%s,%s,%s,%s,%s,%s,%s\n' \
    "$(csv "$url")" "$(csv "$status")" "$(csv "$redirects")" \
    "$(csv "$final_url")" "$(csv "$seconds")" "$(csv "$title")" \
    "$(csv "$canonical")" "$(csv "$meta_robots")" >> "$output"

  sleep "$delay"
done < <(tr -d '\r' < "$input")

echo "Audit complete: $output"
What this version does differently from a basic loop:
- One request per URL. Status, redirect count, final URL, timing, and the page body all come from a single request, so the data is consistent.
- Redirects are visible through the
redirectscolumn. - Polite crawling: a descriptive User-Agent,
--max-redirs,--max-time, and a delay between requests (DELAY=2 ./seo-audit.shto slow it down). - Reliable parsing: the HTML is flattened first, so tags split across lines still match. The title is whitespace-cleaned, and canonical and meta robots values are extracted.
- Safe cleanup: one temp file and one
trapfor the whole run. - Failures are recorded (for example
ERROR(curl 7)for a refused connection) instead of silently stopping.
This script illustrates automation rather than a complete production crawler. It extracts only the first matching tag, does not produce a full redirect history, does not run JavaScript, and does not determine indexability.
A more robust version would use a proper HTML parser (for example Python with BeautifulSoup) and record errors separately.
6.2 Run the script
chmod +x seo-audit.sh
./seo-audit.sh urls.txt seo-report.csv
Open seo-report.csv with a spreadsheet application to review the results. A row looks like this:
"https://example.com/old","200","1","https://example.com/new","0.231","New Page Title","https://example.com/new","noindex, follow"
6.3 Interpret the results
Use the report to identify URLs that need investigation:
http_statusother than200, orERROR(...).redirectsof2or more (a chain), or1for URLs that appear in your sitemap or internal links (they should point straight to the final URL).final_urldifferent from the input URL or from thecanonical.page_titleempty or duplicated across pages.canonicalempty, or pointing to a different URL than expected.meta_robotscontainingnoindexon a page that should be indexed.secondsunusually high compared with other pages.
Check whether these are genuine problems. Then inspect the relevant pages and configuration before deciding what to fix.
6.4 Run it on a schedule (optional)
To turn the audit into monitoring, schedule it with cron. For example, a daily run at 06:00 with a dated report:
crontab -e
# add this line:
0 6 * * * cd /home/youruser/seo && ./seo-audit.sh urls.txt "reports/audit-$(date +\%F).csv"
Remember to create the reports/ folder first, and note that % must be escaped as \% inside a crontab. Compare reports over time to catch regressions, such as a deployment that adds a noindex or breaks a redirect.
Phase 7: Fixing Issues and Verifying the Fixes
Objective
Turn audit findings into changes, apply only the changes you are authorized to make, and prove that they worked.
7.1 From symptom to fix
| Symptom | Likely cause | Typical fix |
|---|---|---|
| Redirect chain (2+ hops) | Stacked rules (HTTP to HTTPS, then non-www to www) | Redirect directly to the final URL in one hop; update internal links and sitemap URLs to the final URL |
Both www and non-www return 200 | No canonical hostname redirect | 301 the non-preferred version to the preferred one |
404 on internal links | Deleted or moved page, typo | Fix the link, or 301 to the closest replacement page |
Soft 404 (error page returns 200) | CMS or app returns 200 for missing pages | Make the server or app return a real 404 or 410 |
5xx errors | Application error, overload, misconfiguration | Check /var/log/nginx/error.log (or the Apache equivalent), fix the application or capacity |
Unexpected noindex | Staging setting, CMS "discourage search engines", template, X-Robots-Tag | Remove the directive in the template, plugin, or server config |
| Important pages blocked in robots.txt | Disallow too broad | Narrow the rule; add a Sitemap: line |
| Missing or wrong canonical | Template or plugin settings | Add a self-referencing canonical to indexable pages |
| No compression | Not enabled on the server | Enable gzip (and Brotli if available) |
| No caching headers on static files | Server defaults | Set Cache-Control or expires for static assets |
| High first-byte time | Slow backend, no server-side caching, distant server | Add caching, optimize queries, consider a CDN |
| Missing or duplicate titles | Template or content gaps | Write unique, descriptive titles |
7.2 Example fixes: Nginx
Always back up the config before editing, and test before reloading:
sudo cp /etc/nginx/sites-available/example.com /etc/nginx/sites-available/example.com.bak
sudo nginx -t && sudo systemctl reload nginx
HTTP to HTTPS and www to non-www, each in one hop:
# All HTTP traffic goes straight to the final HTTPS URL
server {
    listen 80;
    listen [::]:80;
    server_name example.com www.example.com;
    return 301 https://example.com$request_uri;
}

# HTTPS on the www hostname goes to non-www
server {
    listen 443 ssl;
    listen [::]:443 ssl;
    server_name www.example.com;
    # ssl_certificate and ssl_certificate_key lines go here
    return 301 https://example.com$request_uri;
}
Your main server block for example.com on port 443 stays as it is. This example uses non-www as the preferred hostname; swap the names if you prefer www.
Enable gzip compression:
gzip on;
gzip_vary on;
gzip_min_length 256;
gzip_types text/css application/javascript application/json application/xml image/svg+xml text/plain;
HTML is compressed automatically once gzip on is set. Brotli requires an additional module.
Cache static assets:
location ~* \.(?:css|js|woff2|png|jpe?g|webp|svg|ico)$ {
    expires 30d;
}
Only use long cache times for files whose names change when their content changes (versioned or fingerprinted assets). Otherwise visitors may see stale files.
7.3 Example fixes: Apache (.htaccess)
RewriteEngine On

# HTTP to HTTPS (straight to the non-www final URL, one hop)
RewriteCond %{HTTPS} off
RewriteRule ^ https://example.com%{REQUEST_URI} [R=301,L]

# www to non-www over HTTPS
RewriteCond %{HTTP_HOST} ^www\.example\.com$ [NC]
RewriteRule ^ https://example.com%{REQUEST_URI} [R=301,L]
If your site sits behind a CDN or reverse proxy, %{HTTPS} may not reflect the visitor's real protocol, and this rule could loop. Check your host's documentation. For compression, enable mod_deflate and use AddOutputFilterByType DEFLATE text/html text/css application/javascript application/json image/svg+xml. Test syntax with sudo apache2ctl configtest.
On shared hosting or managed platforms you may not have access to these files. Use the control panel, the platform's redirect settings, or a plugin instead.
7.4 Fixing robots.txt and noindex
- robots.txt: remove accidental
Disallow: /, allow important sections, and add aSitemap:line. Keep a copy of the old file. noindex: find where it comes from. It may be in the page template, an SEO or CMS plugin setting, or anX-Robots-Tagheader in the server config. The rawcurloutput from Phase 2 tells you which one to look at.
7.5 Verify every fix
Use the same cycle each time: measure, change, verify.
- Save the "before" output of the relevant command.
- Make one change.
- Re-run the exact same command and compare.
- Re-run the full audit script and compare the new report with the old one.
- In Google Search Console, use URL Inspection and the Validate fix option where available, then monitor the Pages report over the following weeks.
Remember that search engines need time to recrawl, so rankings and indexing may take days or weeks to reflect your changes. Your command-line checks will show the fix immediately.
Final Project: Audit a Website You Own
Use the seven-phase skills to perform a small, documented technical audit.
- Collect a list of website URLs (from the sitemap and your key pages).
- Check their HTTP status codes and redirect behavior, including the four hostname and protocol variants.
- Inspect robots.txt, sitemap entries, canonical tags, and indexing directives, and test for soft 404s.
- Review available server logs for crawler activity and errors, verifying any Googlebot traffic that matters to your findings.
- Measure response timings and inspect caching and compression headers.
- Generate a report that separates confirmed issues from items requiring further investigation.
- Recommend fixes, implement only the changes you are authorized to make, and retest after the changes. Keep the before and after outputs as evidence.
Final Checklist
By the end of this guide, you should be able to:
- Inspect HTTP requests and responses using Linux.
- Identify redirects, redirect chains, and unexpected status codes.
- Examine crawling and indexing signals, and know the limits of what
curlcan see (for example, JavaScript-rendered content). - Audit lists of URLs, including URLs extracted from a sitemap, and generate reports.
- Analyze server logs, investigate crawler activity, and verify that a request really came from Googlebot.
- Measure basic response timings and inspect performance-related headers.
- Automate repeatable checks with Bash.
- Apply common fixes safely and verify whether a technical fix worked.
- Document and explain your findings clearly.
Conclusion
In this guide, we explained how to use Linux commands to investigate websites, use technical SEO knowledge to interpret the evidence. We also explained how to use the findings to guide improvements to website performance and technical SEO.
Knowing the issues is only half the job. The real goal is to fix them and verify that the fixes work.
Please note that SEO is an ongoing job, not a one-time fix. The checks in this guide give you evidence. If a fix involves server configuration or changes you're not confident making, ask an experienced web developer or SEO professional to help. Finally, run the same tests again to verify the result.
