This tutorial explains what Tmux Plugin Manager is, how to install it on Linux, and how to use Tmux Plugin Manager to install Tmux plugins to enhance the Tmux functionality.
Table of Contents
What is a Tmux Plugin?
Tmux, as a terminal multiplexer, comes with a basic set of features for managing multiple terminal sessions, windows, and panes. However, these features may not cover all your specific needs.
You can extend the functionality of Tmux using plugins. Tmux plugins are extensions that can be added to Tmux to add new features and functionality.
There are a wide variety of plugins available, covering a wide range of use cases, including:
- Productivity: Plugins can help to make Tmux more efficient and productive, for example by providing new keyboard shortcuts, commands, and integrations with other tools.
- Customization: Plugins can be used to customize Tmux to your liking, for example by changing the status bar, adding new themes, or modifying the default behavior of Tmux.
- New features: Plugins can add entirely new features to Tmux, such as the ability to synchronize sessions across multiple machines or to remotely control Tmux sessions.
Overall, Tmux plugins can be used to make Tmux more powerful, flexible, and enjoyable to use. Here are some specific examples of how Tmux plugins can be useful:
- The tmux-sensible plugin provides a number of sensible defaults for Tmux, such as enabling mouse support and making it easier to split and resize panes.
- The tmux-continuum plugin automatically saves and restores your Tmux sessions, so that you can pick up where you left off even if your computer crashes or you lose your connection.
- The tmux-yank plugin allows you to copy and paste text to and from the system clipboard.
- The tmux-powerline plugin provides a powerful and customizable status bar for Tmux.
- The tmux-resurrect plugin allows you to resume a Tmux session after it has been killed or terminated.
These are just a few examples of the many useful Tmux plugins that are available.
Manually downloading and installing each plugin can be a bit difficult. This is where Tmux Plugin Manager comes in help.
What is Tmux Plugin Manager?
Tmux Plugin Manager (TPM) is a tool that makes it easy to install, update, and manage Tmux plugins. It is a popular choice for Tmux users because it offers a number of advantages over manually managing plugins, including:
- Plugin Management: TPM simplifies the process of adding, removing, and updating Tmux plugins. This is particularly helpful because Tmux doesn't have built-in support for plugins, so managing them manually can be cumbersome.
- Easy Installation: TPM makes it simple to install new Tmux plugins by adding a single line of code in the Tmux config file. This is especially useful for users who want to extend Tmux's functionality but don't want to spend time manually downloading and configuring each plugin.
- Update Management: TPM provides an easy way to update all your installed plugins with a single keystroke.
- Community Support: TPM has a strong community of users and contributors who create and maintain Tmux plugins. This means you can benefit from a wide range of third-party plugins that add various features and improvements to Tmux.
- Improved Workflow: With TPM, you can streamline your Tmux workflow by easily integrating plugins that enhance navigation, session management, status bars, and more.
In summary, Tmux Plugin Manager (TPM) simplifies the management of Tmux plugins, making it easier for users to extend Tmux's functionality and customize their terminal environment.
Install Tmux Plugin Manager
TPM is compatible with Linux, macOS, and Cygwin, and requires Tmux 1.9 or higher, Git, and Bash.
If you haven't installed Tmux yet, refer the link given below.
Tmux Commands Examples To Manage Multiple Terminal Sessions In Linux
To install Tmux Plugin Manager in Linux, follow the below steps.
1. Open a terminal window.
2. Clone the Tmux Plugin Manager repository to your home directory:
$ git clone https://github.com/tmux-plugins/tpm ~/.tmux/plugins/tpm
3. Open your ~/.tmux.conf file in a text editor. You can use a command-line text editor like nano or vim:
Add the following line at the bottom of your ~/.tmux.conf file:
# List of plugins
set -g @plugin 'tmux-plugins/tpm'
set -g @plugin 'tmux-plugins/tmux-sensible'

# Initialize TMUX plugin manager (keep this line at the very bottom of tmux.conf)
run '~/.tmux/plugins/tpm/tpm'
4. Run the following command to initialize TPM:
$ tmux source ~/.tmux.conf
How to Install a Tmux Plugin using Tmux Plugin Manager
Once TPM is installed, you can add your favorite tmux plugins as shown in the following steps.
1. Open a Tmux session.
2. Open your ~/.tmux.conf file in a text editor.
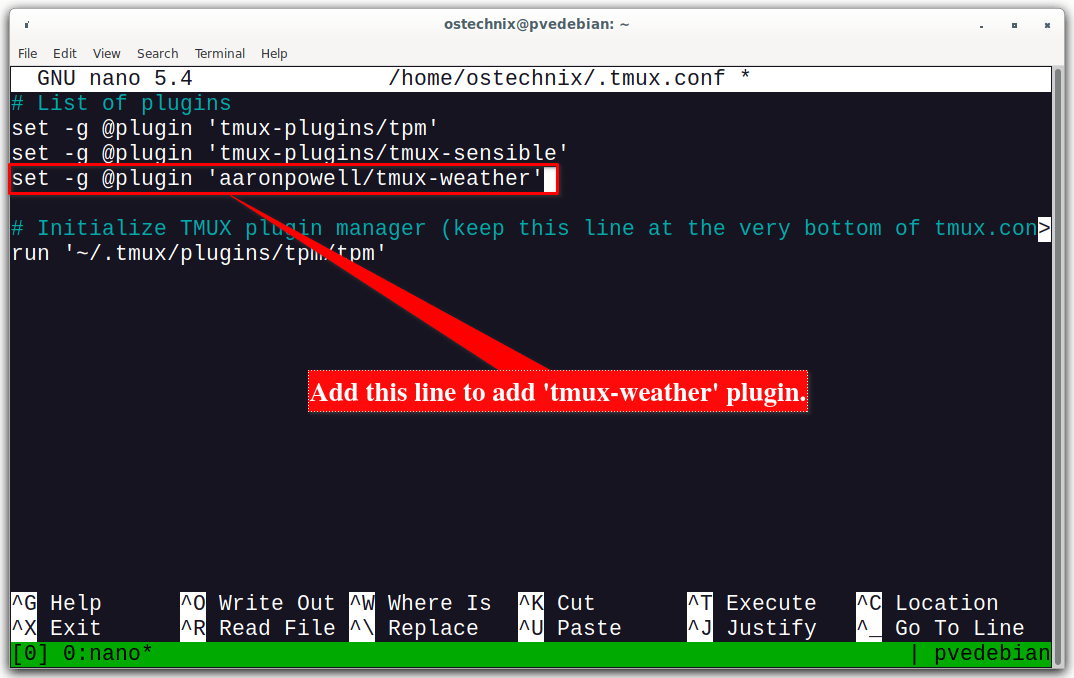
3. Add the plugin you want to install to your ~/.tmux.conf file. For example, to install the tmux-weather plugin, you would add the following line to your ~/.tmux.conf file:
set -g @plugin 'aaronpowell/tmux-weather'
Save the file and close it.
4. While in tmux session, press prefix + I (capital i, as in Install) to fetch the plugin.
Heads Up: The default prefix to tmux is Ctrl+b.
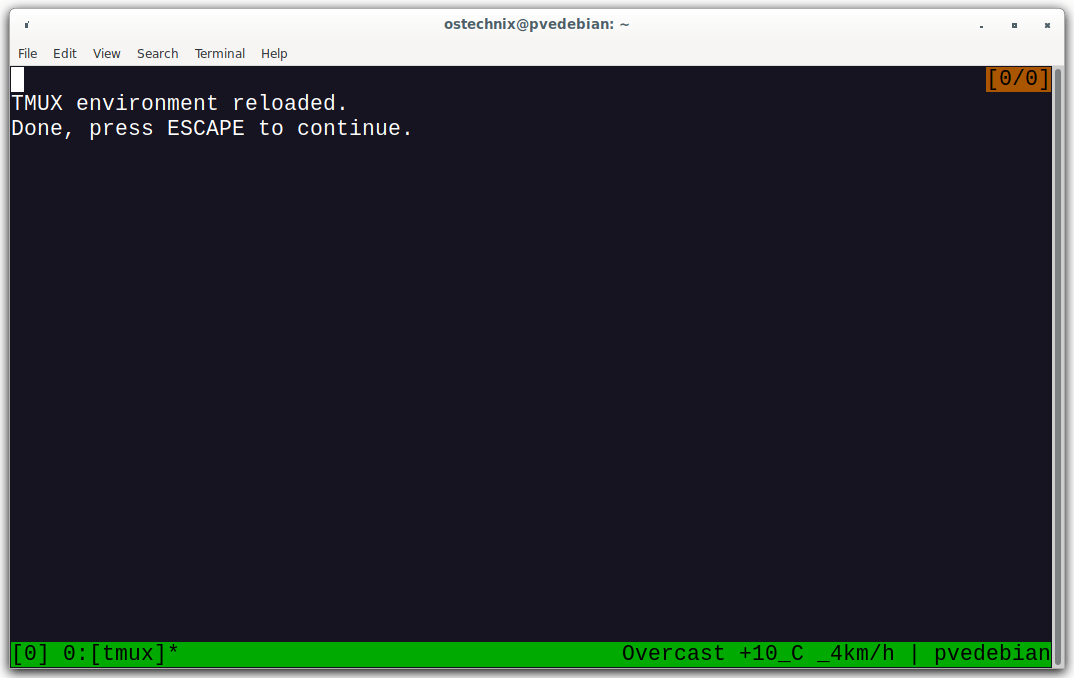
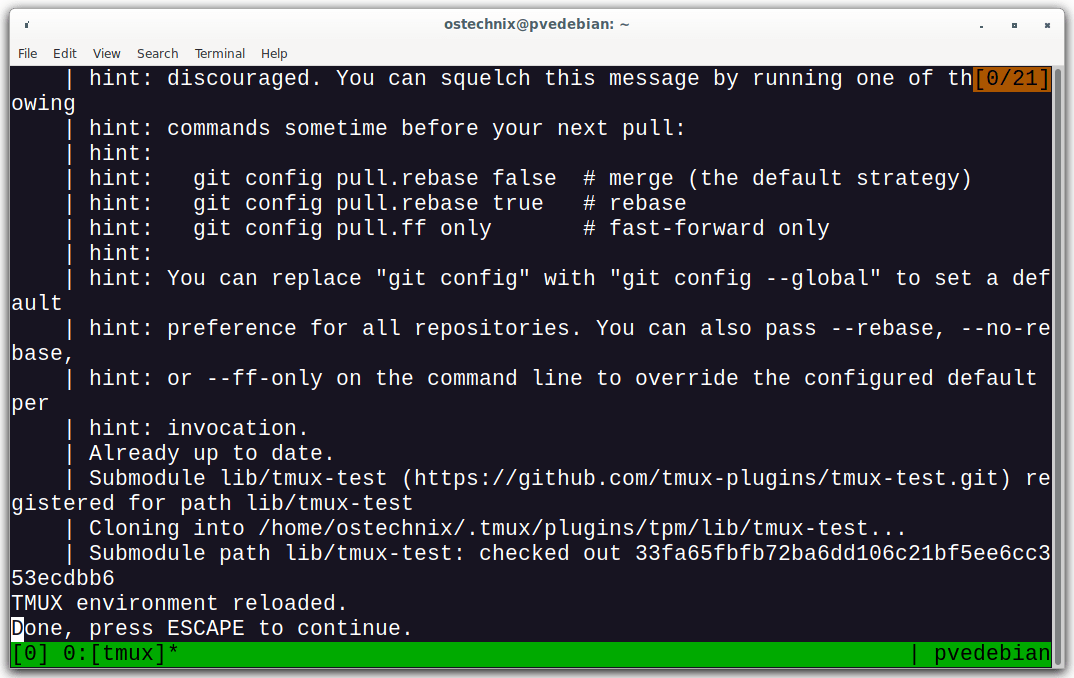
TPM will download the plugin, add it to your tmux environment, and finally reload the tmux environment.
Press ESCAPE key to continue.
5. You can also reload the Tmux configuration file by running the following command to add the plugin.
$ tmux source ~/.tmux.conf
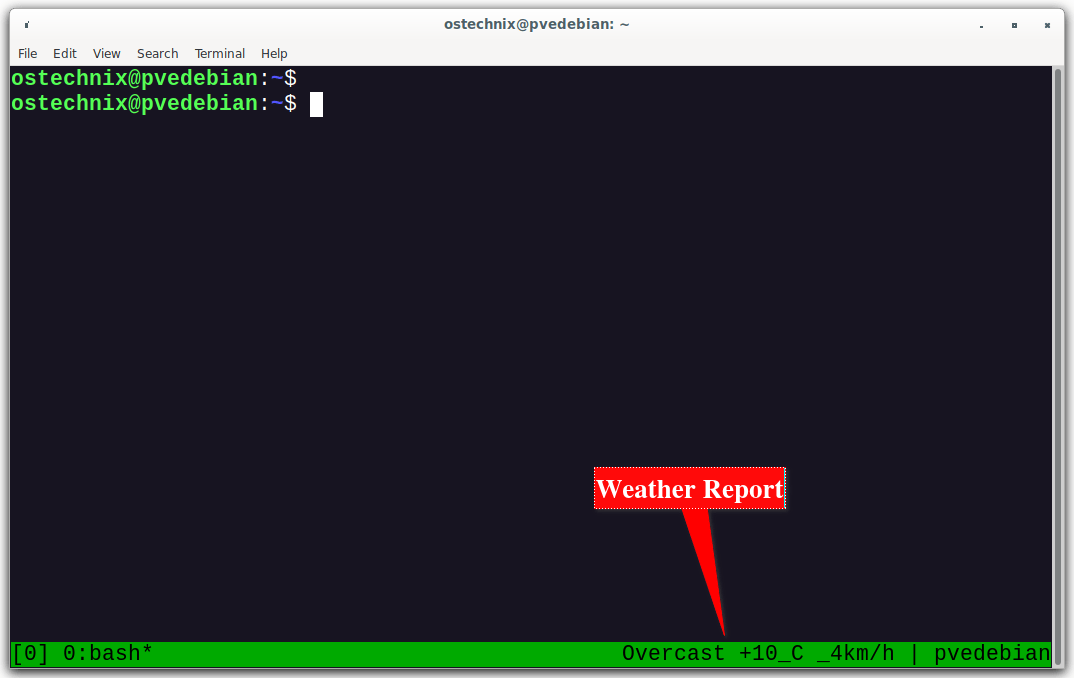
6. You will now see the weather report at the status bar of tmux pane.
How to Update a Tmux Plugin
To update all plugins, press the following key combination while in the tmux session:
prefix + U
Make sure to use a uppercase "u".
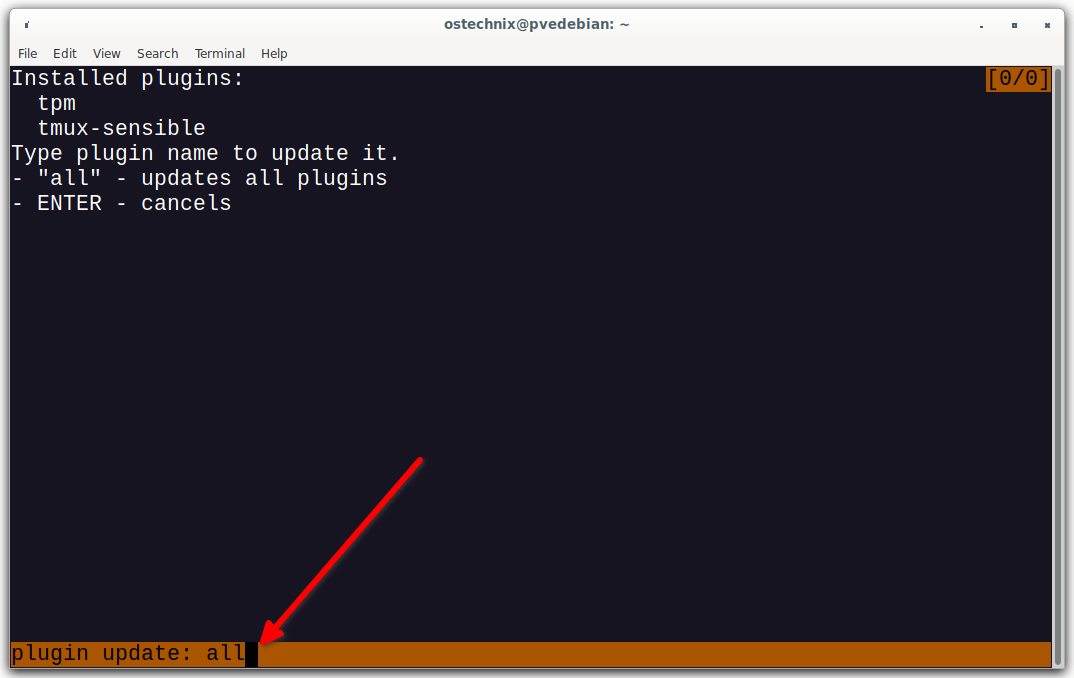
TPM will list the installed plugins. Simply type a plugin name to update. To update all plugins, type "all".
Installed plugins:                                                         [0/0]
  tpm
  tmux-sensible
Type plugin name to update it.
- "all" - updates all plugins
- ENTER - cancels
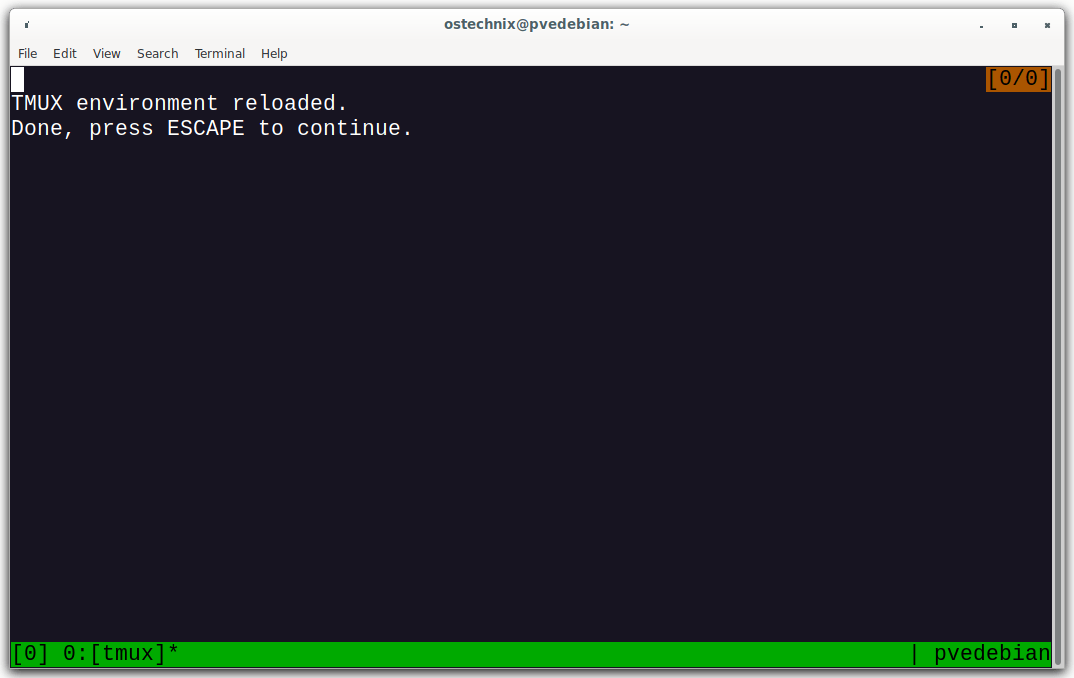
After the update is completed, TPM will reload the TMUX environment. Press ESCAPE to continue.
How to Delete a Tmux Plugin
1. Remove (or Comment Out) Plugin from the List:
Open your ~/.tmux.conf file in a text editor. You can use a command-line text editor like nano or vim:
$ nano ~/.tmux.conf
Locate the line in your configuration file that lists the plugin you want to delete. It should look something like this:
set -g @plugin 'plugin-name'
To delete the plugin, you can either remove the entire line or comment it out by adding a # at the beginning of the line:
# set -g @plugin 'plugin-name'
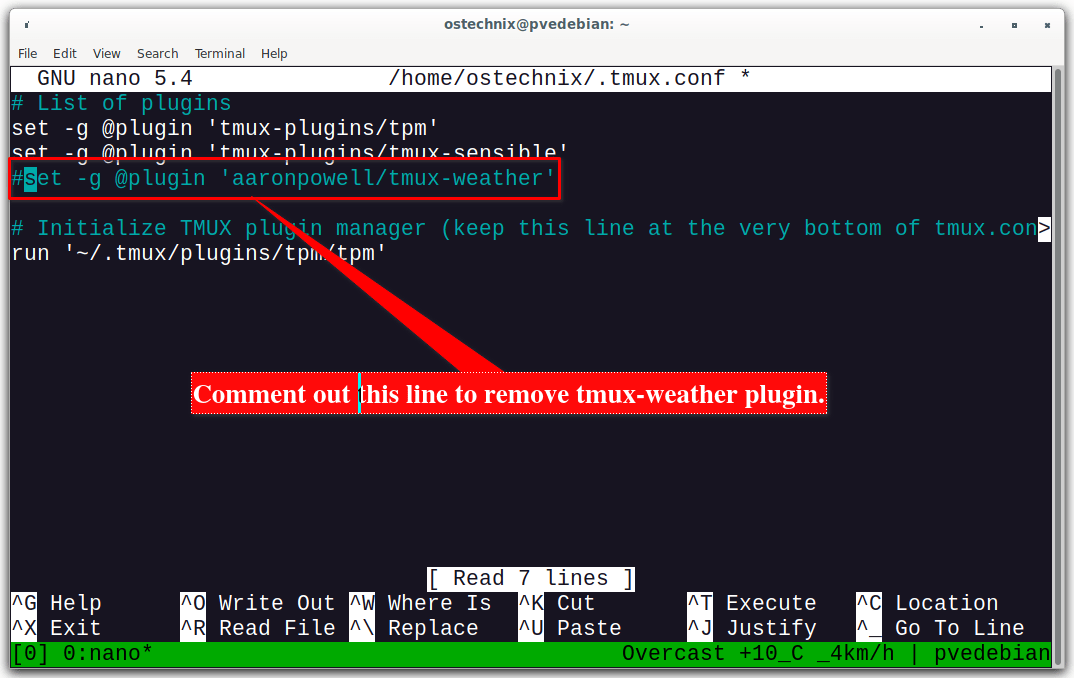
For example, to delete the tmux-weather plugin, you would comment out the following line:
#set -g @plugin 'aaronpowell/tmux-weather'
Save your changes and exit the text editor.
2. Uninstall the Plugin Using TPM:
Open a Tmux session if its not opened already.
While in Tmux, press the following key combination to uninstall the plugin:
prefix + alt + u
Make sure to use a lowercase "u" for uninstall.
TPM will remove the specified plugin, and reload the TMUX environment.
After removing the weather plugin, you will notice that the weather details are gone from the status bar.
3. Alternative Method: Removing the Plugin Directory:
If you prefer to remove the plugin manually, you can navigate to the ~/.tmux/plugins/ directory using your terminal:
$ cd ~/.tmux/plugins/
Inside this directory, you will find a subdirectory for each installed plugin. Locate the directory associated with the plugin you want to delete.
Use the rm command to delete the entire plugin directory. Replace plugin-name with the actual name of the plugin directory:
$ rm -r plugin-name
That's it! The plugin is now deleted from your Tmux configuration, and you have successfully removed it from your system.
Tmux Plugin Manager Key Bindings
Here's the important key bindings for TPM.
| Key Binding | Description |
prefix + I (Uppercase 'i') | Installs new plugins from GitHub or any other git repository and reload TMUX environment. |
prefix + U (Uppercase 'u') | Updates plugin(s). |
prefix + alt + u (Lowercase 'u') | Removes/uninstalls plugins not on the plugin list. |
Automatic TPM Installation (Optional)
If you want to set up automatic TPM installation and plugin initialization when Tmux starts, follow steps below.
1. Open your ~/.tmux.conf file for editing. You can use a text editor like nano or vim:
$ nano ~/.tmux.conf
2. Add the following snippet to your ~/.tmux.conf file before the final run '~/.tmux/plugins/tpm/tpm' line:
if "test ! -d ~/.tmux/plugins/tpm" \
   "run 'git clone https://github.com/tmux-plugins/tpm ~/.tmux/plugins/tpm && ~/.tmux/plugins/tpm/bin/install_plugins'"
This snippet checks if the TPM directory exists. If it doesn't, it clones the TPM repository from GitHub and then runs the install_plugins script to install any defined plugins.
3. Save your changes and exit the text editor.
4. To ensure that the changes take effect, either restart your Tmux session or reload your Tmux configuration by running:
$ tmux source-file ~/.tmux.conf
The next time you start a Tmux session, TPM will be automatically installed if it's not already present, and any defined plugins in your configuration will be initialized.
Related Read: How To Save And Restore Tmux Environments Across Reboots In Linux
Frequently Asked Questions (FAQ) about TPM
A: TPM, or Tmux Plugin Manager, is a tool that simplifies the management of Tmux plugins. You can use use it to easily install, update and remove Tmux plugins.
A: Installation is straightforward. You can clone the TPM repository from GitHub and configure your Tmux configuration file to use it. Detailed installation instructions is the included in the installation section above.
A: Tmux plugins are add-ons that add new features and functionality to Tmux. They benefit you by allowing you to customize your Tmux environment, automate tasks, and integrate with external tools, making your terminal sessions more efficient.
A: After TPM is installed, you can use keybindings like prefix + I to install plugins, prefix + U to update them, and prefix + alt + u to remove plugins. You can also define your plugins in your Tmux configuration file.
A: Popular Tmux plugins include Tmux Resurrect for session saving, Tmuxinator for session management, and Tmux Powerline for status bar customization.
A: Yes, you can create custom Tmux plugins to cater to your specific needs. Check the TPM official documentation to learn how to create a new plugin.
A: Yes, you can uninstall Tmux plugins using TPM by pressing prefix + alt + u. TPM will safely remove the plugin from your configuration.
Conclusion
In this detailed tutorial, we discussed what is Tmux Plugin Manager and how to install, update and remove Tmux plugins with Tmux Plugin Manager in Linux.
TPM can save you a lot of time and effort when managing your Tmux plugins. It is a must-have tool for any serious Tmux user.
Resource:

