This comprehensive tutorial describes how to install and configure DNS server in Ubuntu 16.04 LTS 64 bit server edition. As you may know already, DNS is the short form of Domain name system, which is used to resolve hostnames into IP addresses and vice versa. For the purpose of this guide, I will be using three systems, one for Primary DNS server, other for secondary DNS, and the third one for DNS client. All systems are running with Ubuntu 16.04 operating systems. Here is the IP and host name of each system.
Primary DNS server:
- Operating system : Ubuntu 16.04 LTS 64 bit server
- Hostname : pri.ostechnix.lan
- IP address : 192.168.1.200/24
Secondary DNS server:
- Operating system : Ubuntu 16.04 LTS 64 bit server
- Hostname : sec.ostechnix.lan
- IP address : 192.168.1.201/24
DNS Client:
- Operating system : Ubuntu 16.04 LTS 64 bit server
- Hostname : client.ostechnix.lan
- IP address : 192.168.1.202/24
Let us get started.
Table of Contents
Install and Configure DNS server in Ubuntu 16.04
I will split this guide as as three parts for the sake of simplicity and easy understanding.
- Install and configure Caching-only name server,
- Install and configure Primary DNS server or Master DNS server
- Install and configure Secondary DNS server or Slave DNS server
Let us do it step by step.
Part 1 : Install and configure Caching-only name server,
Make sure your Ubuntu server is up-to-date.
sudo apt-get update
sudo apt-get upgrade
sudo apt-get dist-upgrade
Install BIND9
After updating the system, run the following command to install BIND9 packages which are used to setup DNS server.
sudo apt-get install bind9 bind9utils bind9-doc

Configuring Caching name server
Caching name server saves the DNS query results locally for a particular period of time. It reduces the DNS server's traffic by saving the queries locally, therefore it improves the performance and efficiency of the DNS server.
To configure Caching name server, edit /etc/bind/named.conf.options file:
sudo nano /etc/bind/named.conf.options
Uncomment the following lines. And then, add your ISP or Google public DNS server IP addresses.
forwarders {
 8.8.8.8;
 };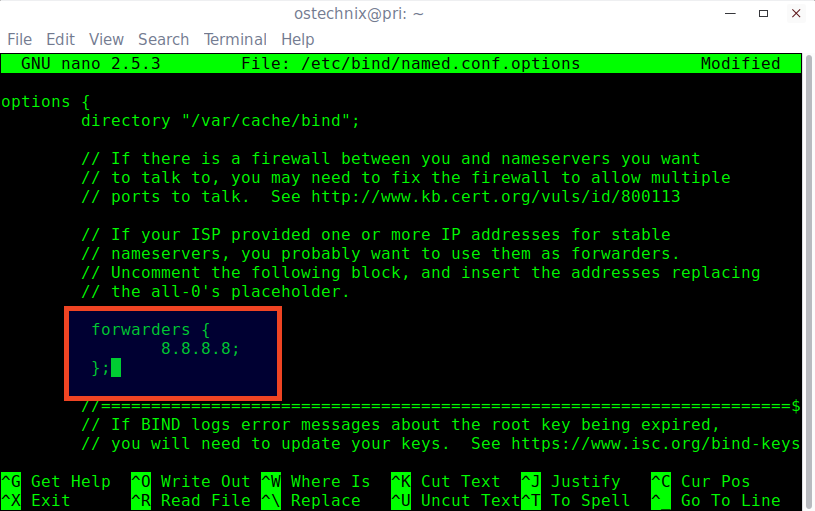
Save and close the file.
And then restart bind9 service to take effect the changes.
sudo systemctl restart bind9
We have successfully installed the caching name server.
Testing Caching name server
Now let us check if it is working or not using command:
dig -x 127.0.0.1
If you see something like below, congratulations! Caching name server is working!
; <<>> DiG 9.10.3-P4-Ubuntu <<>> -x 127.0.0.1
;; global options: +cmd
;; Got answer:
;; ->>HEADER<<- opcode: QUERY, status: NOERROR, id: 22769
;; flags: qr aa rd ra; QUERY: 1, ANSWER: 1, AUTHORITY: 1, ADDITIONAL: 3

;; OPT PSEUDOSECTION:
; EDNS: version: 0, flags:; udp: 4096
;; QUESTION SECTION:
;1.0.0.127.in-addr.arpa. IN PTR

;; ANSWER SECTION:
1.0.0.127.in-addr.arpa. 604800 IN PTR localhost.

;; AUTHORITY SECTION:
127.in-addr.arpa. 604800 IN NS localhost.

;; ADDITIONAL SECTION:
localhost. 604800 IN A 127.0.0.1
localhost. 604800 IN AAAA ::1

;; Query time: 0 msec
;; SERVER: 192.168.1.200#53(192.168.1.200)
;; WHEN: Tue Aug 23 15:53:59 IST 2016
;; MSG SIZE rcvd: 132

Part 2 : Install and configure Primary DNS server
Make sure your Ubuntu server is up-to-date using the following commands:
sudo apt-get update
sudo apt-get upgrade
sudo apt-get dist-upgrade
Install BIND9
Run the following command to install BIND9 packages.
sudo apt-get install bind9 bind9utils bind9-doc
Configuring Primary DNS server
All configuration file be will be available under /etc/bind/ directory.
Let us edit bind9 configuration file
Edit ‘/etc/bind/named.conf’ using any editor of your choice:
sudo nano /etc/bind/named.conf
This file should have the following lines in it. If the lines are not there, just add them.
include "/etc/bind/named.conf.options";
include "/etc/bind/named.conf.local";
include "/etc/bind/named.conf.default-zones";
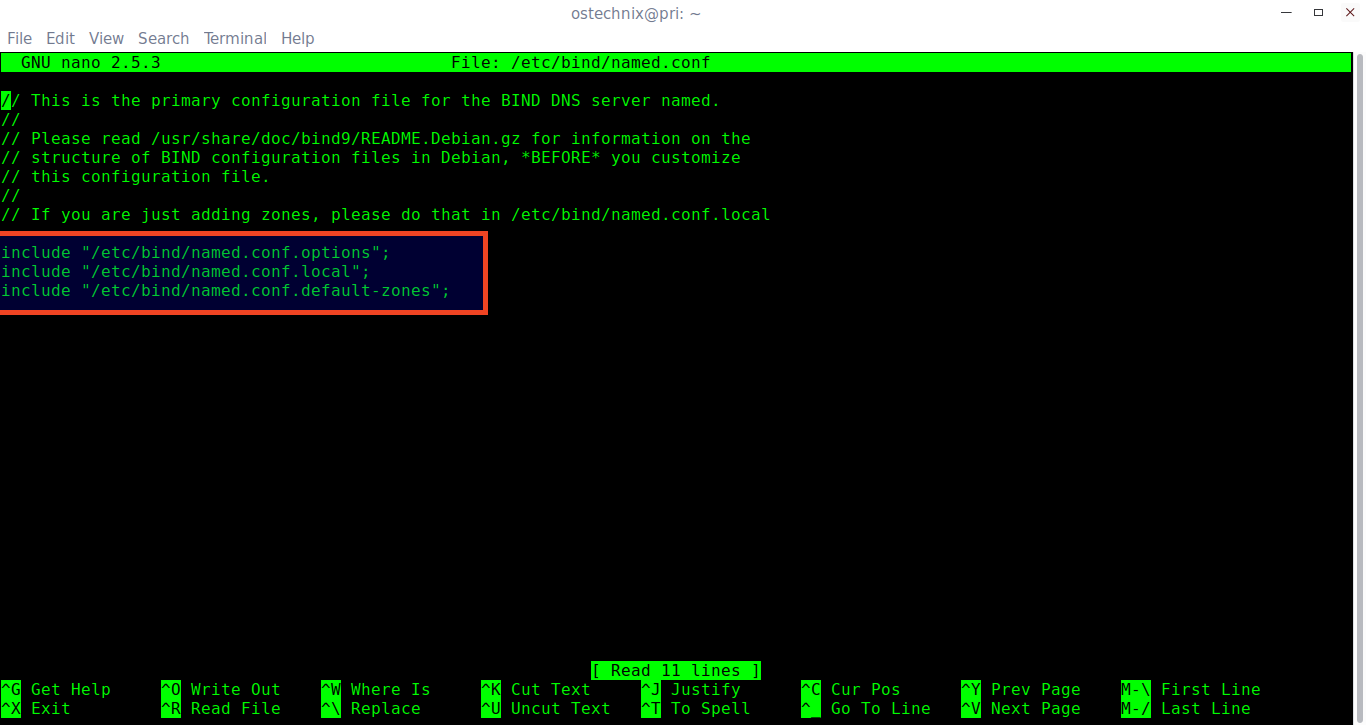
Save the changes and exit the file.
We need to define the forward and reverse zone files.
To do so, edit named.conf.local file:
sudo nano /etc/bind/named.conf.local
Define the forward and reverse files as shown below.
zone "ostechnix.lan" {
        type master;
        file "/etc/bind/for.ostechnix.lan";
        allow-transfer { 192.168.1.201; };
        also-notify { 192.168.1.201; };
 };
zone "1.168.192.in-addr.arpa" {
        type master;
        file "/etc/bind/rev.ostechnix.lan";
        allow-transfer { 192.168.1.201; };
        also-notify { 192.168.1.201; };
 };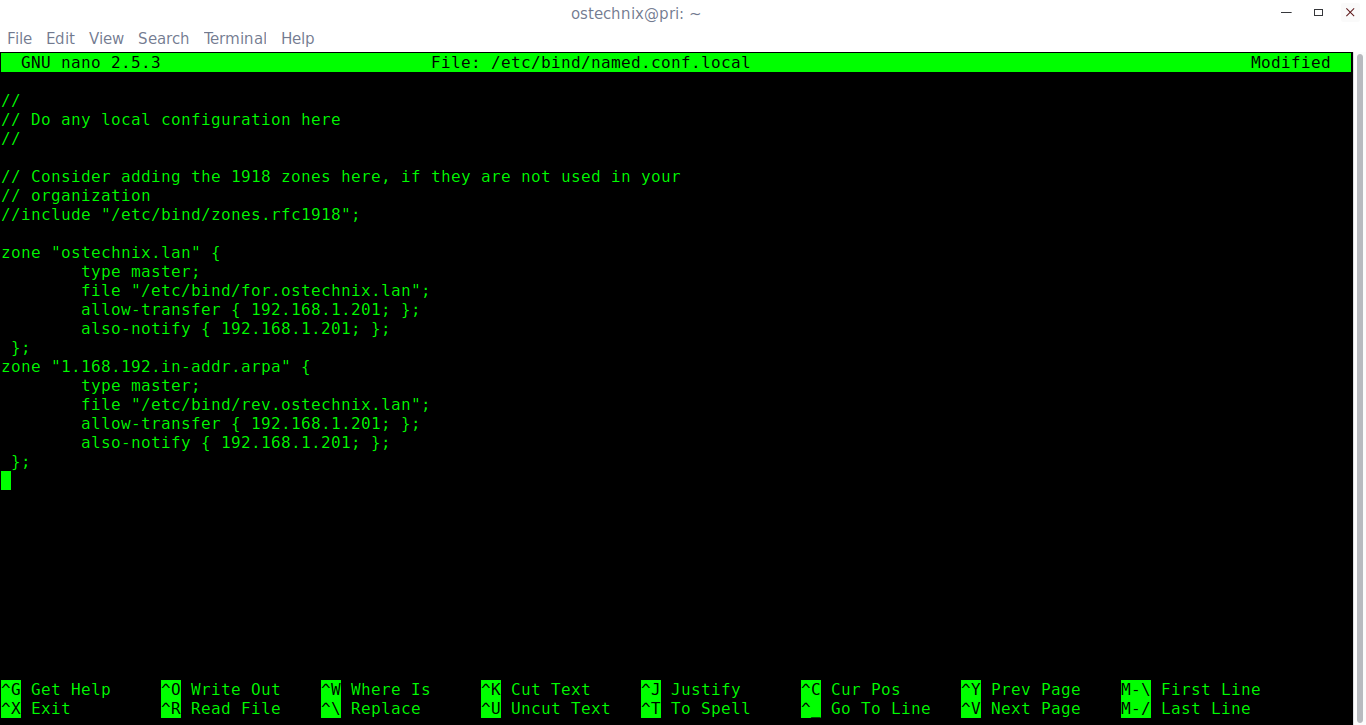
Here, for.ostechnix.lan is the forward zone file. rev.ostechnix.lan is the reverse zone files. And 192.168.1.202 is the IP address of secondary DNS server. We do this because, the secondary DNS will start to fetch the queries if primary server is down.
Save and close the file.
Let us now create the zone files which we defined in the previous step.
First let us create forward zone file as shown below.
sudo nano /etc/bind/for.ostechnix.lan
Add the following lines:
$TTL 86400
@   IN  SOA     pri.ostechnix.lan. root.ostechnix.lan. (
        2011071001  ;Serial
        3600        ;Refresh
        1800        ;Retry
        604800      ;Expire
        86400       ;Minimum TTL
)
@       IN  NS          pri.ostechnix.lan.
@       IN  NS          sec.ostechnix.lan.
@       IN  A           192.168.1.200
@       IN  A           192.168.1.201
@       IN  A           192.168.1.202
pri     IN  A           192.168.1.200
sec     IN  A           192.168.1.201
client  IN  A           192.168.1.202

Similarly, you can add the other client records as defined in the above file.
Save and close the file. Next create reverse zone.
sudo nano /etc/bind/rev.ostechnix.lan
Add the following lines:
$TTL 86400
@   IN  SOA     pri.ostechnix.lan. root.ostechnix.lan. (
        2011071002  ;Serial
        3600        ;Refresh
        1800        ;Retry
        604800      ;Expire
        86400       ;Minimum TTL
)
@       IN  NS          pri.ostechnix.lan.
@       IN  NS          sec.ostechnix.lan.
@       IN  PTR         ostechnix.lan.
pri     IN  A           192.168.1.200
sec     IN  A           192.168.1.201
client  IN  A           192.168.1.202
200     IN  PTR         pri.ostechnix.lan.
201     IN  PTR         sec.ostechnix.lan.
202     IN  PTR         client.ostechnix.lan.
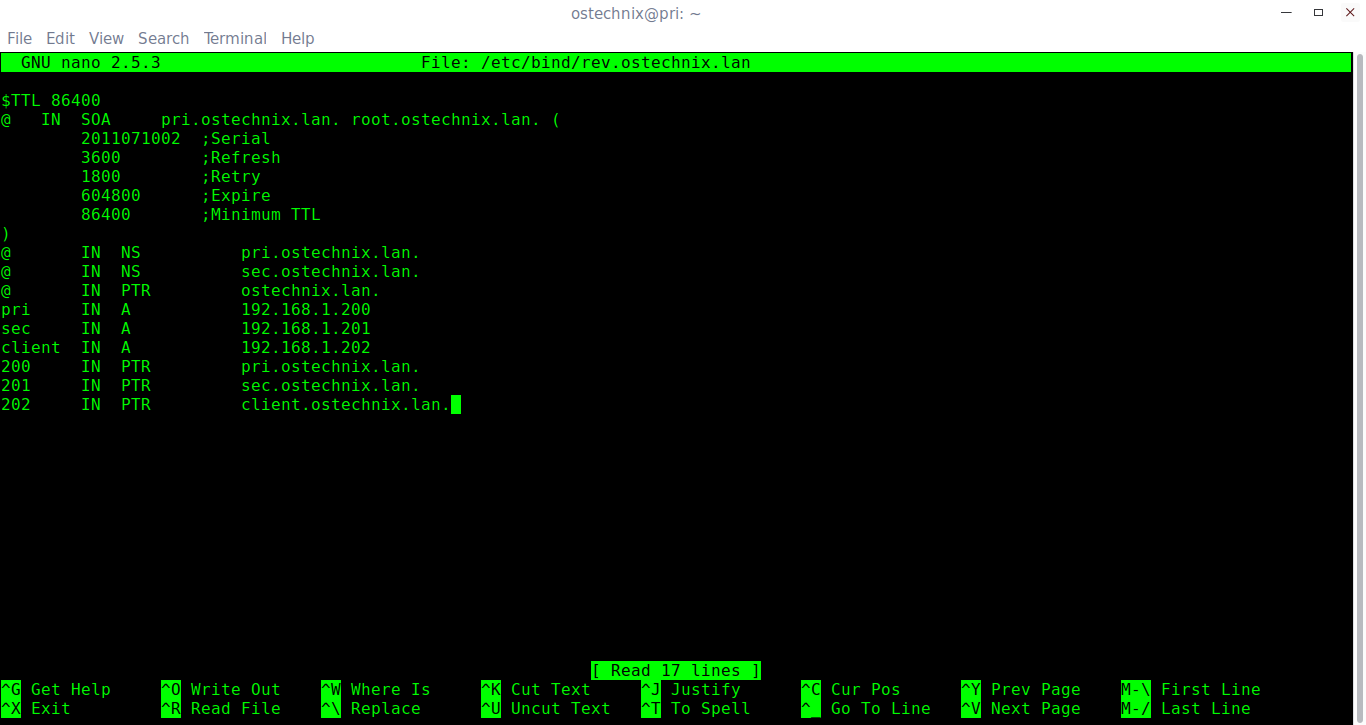
Save and close the file.
Set the proper permissions and ownership to the bind9 directory.
sudo chmod -R 755 /etc/bind
sudo chown -R bind:bind /etc/bind
Next, we need to verify the DNS configuration files and zone files.
Check the DNS configuration files with commands:
sudo named-checkconf /etc/bind/named.conf
sudo named-checkconf /etc/bind/named.conf.local
If the above commands returns nothing, it means DNS configuration is valid.
Next, check the zone files using commands:
sudo named-checkzone ostechnix.lan /etc/bind/for.ostechnix.lan
Sample output:
zone ostechnix.lan/IN: loaded serial 2011071001
OK
Check the reverse zone file:
sudo named-checkzone ostechnix.lan /etc/bind/rev.ostechnix.lan
Sample output:
 zone ostechnix.lan/IN: loaded serial 2011071002
OK
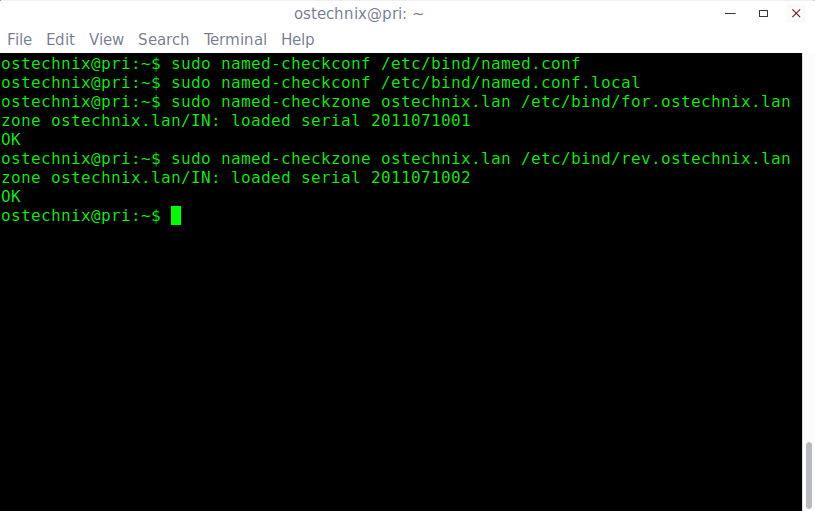
If you got the results as shown above, then everything is good.
Now, it is time to check whether the primary DNS server is working or not.
Edit /etc/network/interfaces file:
sudo vi /etc/network/interfaces
Add the DNS server IP address. In our case, the DNS server IP is the same IP address of this machine itself.
dns-nameservers 192.168.1.200

Save and close the file.
Finally, restart Bind9 service.
sudo systemctl restart bind9
Testing primary DNS server
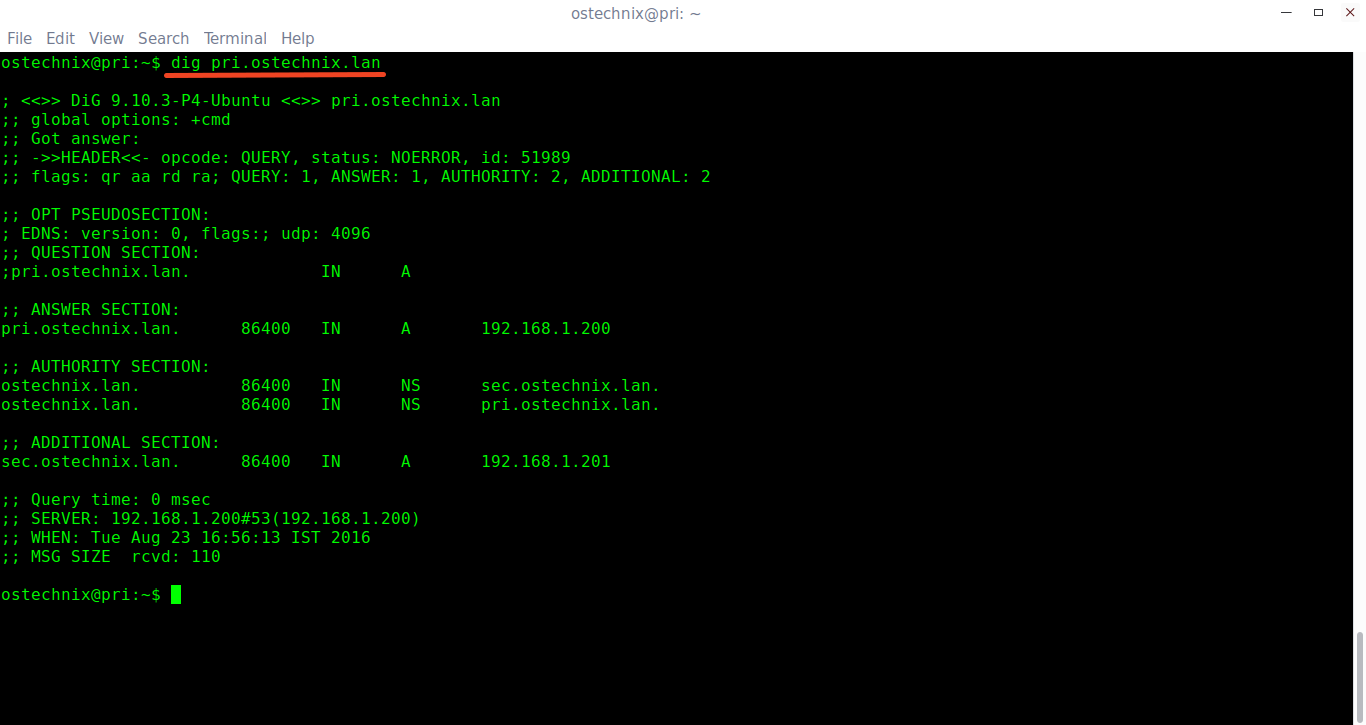
Verify DNS server using dig or nslookup commands.
dig pri.ostechnix.lan
Sample output:
; <<>> DiG 9.10.3-P4-Ubuntu <<>> pri.ostechnix.lan
;; global options: +cmd
;; Got answer:
;; ->>HEADER<<- opcode: QUERY, status: NOERROR, id: 51989
;; flags: qr aa rd ra; QUERY: 1, ANSWER: 1, AUTHORITY: 2, ADDITIONAL: 2

;; OPT PSEUDOSECTION:
; EDNS: version: 0, flags:; udp: 4096
;; QUESTION SECTION:
;pri.ostechnix.lan. IN A

;; ANSWER SECTION:
pri.ostechnix.lan. 86400 IN A 192.168.1.200

;; AUTHORITY SECTION:
ostechnix.lan. 86400 IN NS sec.ostechnix.lan.
ostechnix.lan. 86400 IN NS pri.ostechnix.lan.

;; ADDITIONAL SECTION:
sec.ostechnix.lan. 86400 IN A 192.168.1.201

;; Query time: 0 msec
;; SERVER: 192.168.1.200#53(192.168.1.200)
;; WHEN: Tue Aug 23 16:56:13 IST 2016
;; MSG SIZE rcvd: 110
Or, use nslookup command as shown below:
nslookup ostechnix.lan
Sample output:
Server: 192.168.1.200
Address: 192.168.1.200#53

Name: ostechnix.lan
Address: 192.168.1.200
Name: ostechnix.lan
Address: 192.168.1.201
Name: ostechnix.lan
Address: 192.168.1.202
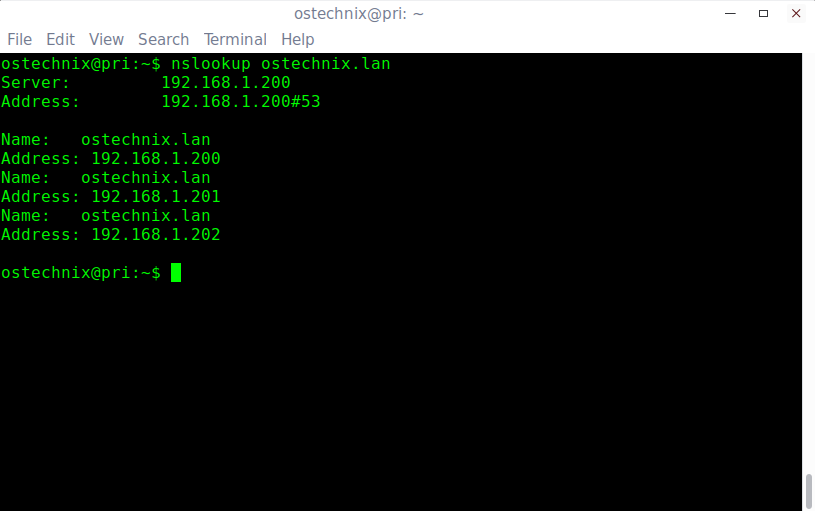
If you got results something like above, then primary DNS server is up and is working perfectly!
Part 2: Install and configure Secondary DNS server
You need a separate system to setup this server. We need secondary DNS server, because in case of any problem with Primary DNS, then secondary dns server will still resolve quries.
First, Update server using commands:
sudo apt-get update
sudo apt-get upgrade
sudo apt-get dist-upgrade
Install BIND9
Install required bind9 packages:
sudo apt-get install bind9 bind9utils bind9-doc
Configure secondary DNS server
Edit bind9 configuration file:
sudo nano /etc/bind/named.conf
Add the following lines if they are not there.
include "/etc/bind/named.conf.options";
include "/etc/bind/named.conf.local";
include "/etc/bind/named.conf.default-zones";
Save and close the file.
Next, we need to define zone files.
To do so, edit named.conf.local file:
sudo nano /etc/bind/named.conf.local
Add or modify the following lines. Replace IP address and zone files with your own values.
zone "ostechnix.lan" {
        type slave;
        file "/var/cache/bind/for.ostechnix.lan";
        masters { 192.168.5.200; };
 };
zone "1.168.192.in-addr.arpa" {
        type slave;
        file "/var/cache/bind/rev.ostechnix.lan";
        masters { 192.168.5.200; };
 };
Here, 192.168.1.200 is the IP address of the primary DNS server.
Please note that the path of zone files must be /var/cache/bind/ directory. It is because AppArmor only allow write access inside it by default.
Next set the proper permission and ownership to the bind directory.
sudo chmod -R 755 /etc/bind
sudo chown -R bind:bind /etc/bind
Then, edit network configuration file and add the primary and secondary DNS server's IP address.
sudo nano /etc/network/interfaces
[...]
dns-nameservers 192.168.1.200
dns-nameservers 192.168.1.201

Save and close the file.
Finally, reboot your system to take effect the all changes.
Testing Secondary DNS server
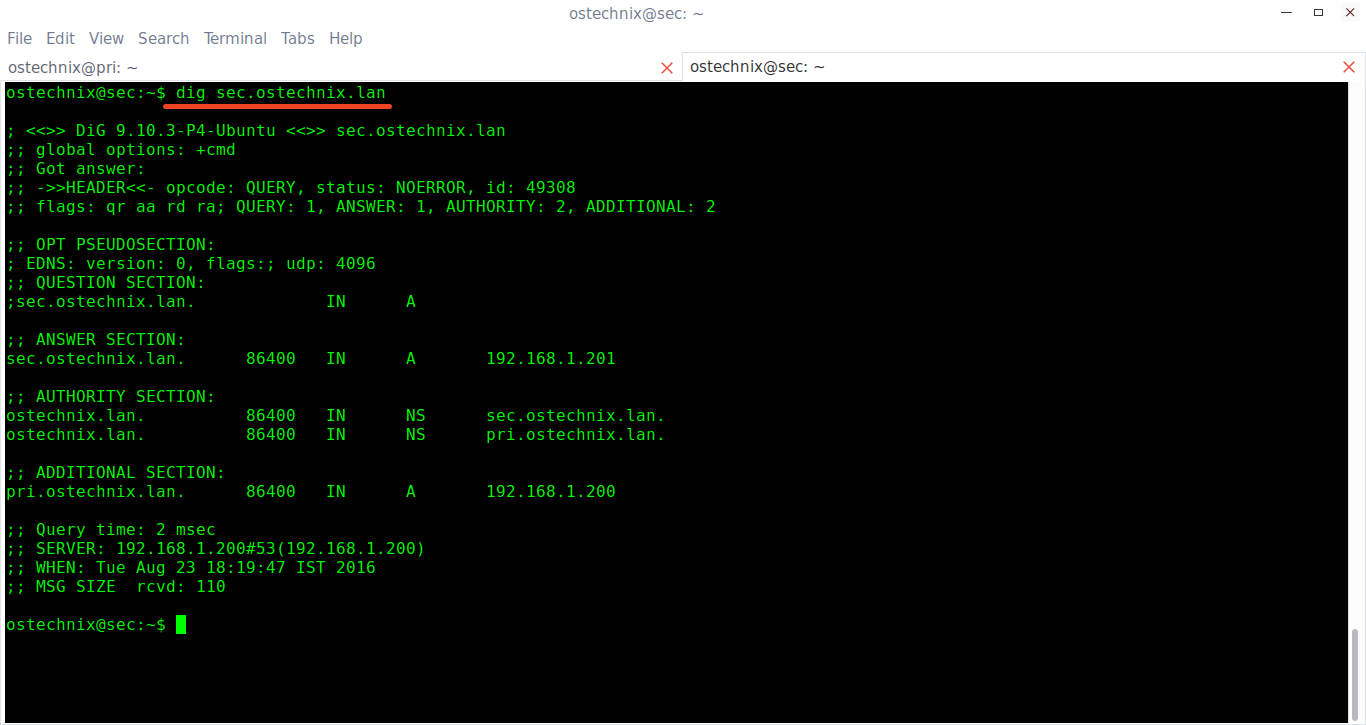
As I mentioned already, we use "dig" or "nslookup" commands to test DNS server.
Let us verify the secondary DNS server with command:
dig sec.ostechnix.lan
Sample Output:
; <<>> DiG 9.10.3-P4-Ubuntu <<>> sec.ostechnix.lan
;; global options: +cmd
;; Got answer:
;; ->>HEADER<<- opcode: QUERY, status: NOERROR, id: 49308
;; flags: qr aa rd ra; QUERY: 1, ANSWER: 1, AUTHORITY: 2, ADDITIONAL: 2

;; OPT PSEUDOSECTION:
; EDNS: version: 0, flags:; udp: 4096
;; QUESTION SECTION:
;sec.ostechnix.lan. IN A

;; ANSWER SECTION:
sec.ostechnix.lan. 86400 IN A 192.168.1.201

;; AUTHORITY SECTION:
ostechnix.lan. 86400 IN NS sec.ostechnix.lan.
ostechnix.lan. 86400 IN NS pri.ostechnix.lan.

;; ADDITIONAL SECTION:
pri.ostechnix.lan. 86400 IN A 192.168.1.200

;; Query time: 2 msec
;; SERVER: 192.168.1.200#53(192.168.1.200)
;; WHEN: Tue Aug 23 18:19:47 IST 2016
;; MSG SIZE rcvd: 110
Similarly, you can verify primary DNS server with command:
dig pri.ostechnix.lan
Or, just use nslookup command as shown below.
nslookup ostechnix.lan
Note: Please note that the zone files will be transferred only when the Serial Number on the Primary DNS server is higher than the Secondary DNS server's serial number.
Configuring DNS client
Edit network configuration file in the client system:
sudo nano /etc/network/interfaces
Add the nameserver IP addresses.
[...]
nameserver 192.168.1.200
nameserver 192.168.1.201
Save and close the file. Then, reboot your system to take effect the changes.
Test the DNS servers using any one of the following commands:
dig pri.ostechnix.lan
dig sec.ostechnix.lan
dig client.ostechnix.lan
nslookup ostechnix.local
At this stage, you will have working primary and secondary DNS servers.
That's all for now. If you find this guide useful, please share it on your social networks and support OSTechNix.
Cheers!
Thanks for stopping by!
How can I benefit from this blog:
- Subscribe to our Email Newsletter : Sign Up Now
- Download free E-Books and Videos : OSTechNix on TradePub
- Connect with us: Facebook | Twitter | Google Plus | LinkedIn | RSS feeds
Have a Good day!!
27 comments
Thanks for this guide but i found the problems when i do following your.
When i check : dig -x 127.0.0.1, or : dig pri.ostechnix.lan
The server i see if diffirence
SERVER: 127.0.0.1#53(127.0.0.1)
;; WHEN: Fri Dec 09 17:40:03 ICT 2016
;; MSG SIZE rcvd: 132
That’s all wrong the IP ADDRESS. (I’m a newbie using ubuntu)
Any help ! Tks.
If you have followed the exact steps, you shouldn’t have got this message. Did you add the DNS server IP in your /etc/network/interfaces file? If not, add it and try again. It should work. I have checked this guide multiple times on my local network. It worked every time as I explained.
I tried it once it worked properly..thanks But i have a question.. Where should i add the secondary DNS zone. I’m trying to use primary,secondary, and client in the same server. I couldn’t figure out if your instructions for secondary DNS zone were to add it on sudo nano /etc/bind/named.conf.local where primary is installed or if its has to be installed in another machine? please help me with that, and if you can add some tips MX records configuration. thanks.
How can you use the same server for primary and secondary DNS? As far as I know it’s impossible.
alyt! Thanks.
it have to be another machine
Hi, a question this steps is only for local network or this found for a real domain…??
Thanks for you reply and very nice tutorial.
Due to the limited resources, I didn’t check it for real domain. But the same steps should work on wither local or wan.
Ok…
Thank you very much.
everything worked fine up until i did a NSLOOKUP, guess you forgot once small step:
the step to edit /etc/resolv.conf file, and add DNS server IP address.
sudo nano /etc/resolv.conf
nameserver 192.168.1.200
please add to your tutorial, thanks for the tutorial, everything else worked fine.
Great tutorial SK
I got primary DNS working on a server because of the this very informative tutorial.
Glad it helped you. Keep visiting!
Hi, thank you for the tutorial
I have a question, i want to build a mail server just for my campus homework, can i just build 1 DNS to operate the mail server?
and if i need more than 1 DNS, is it mean i need another OS to make the 2nd DNS?
Yes. We need two systems to setup primary and secondary dns servers.
Here, for.ostechnix.lan is the forward zone file. rev.ostechnix.lan is the reverse zone files. And 192.168.1.202 is the IP address of secondary DNS server. We do this because, the secondary DNS will start to fetch the queries if primary server is down. Shouldn’t this line say 192.168.1.201 because 202 is not the secondary dns according to opening statement.
Secondary DNS server:
Operating system : Ubuntu 16.04 LTS 64 bit server
Hostname : sec.ostechnix.lan
IP address : 192.168.1.201/24
agree
Thank you for the tuto.
I have a problem, client can ping server address but can’t ping with domain name, when I use dig, I got the message : (connection timed out: no server could be reach )
i installed with your insruction working well in local network i want to use as puplic dns server i have ns1.mydomain.com with a record point with public ip how to do that kindly help me we are internet service provider
I’ve followed the step by step of the document but changed the names and addresses wherever necessary. After dig pri.*****.lan , my output is not showing the answer. It says answer : 0 . But in the output of yours the answer :1
will you please evaluate that how we can create a forward lookup zone and reverse lookup zone i tried thrice but nothing is working, so i need your help..
To configure a DNS server is it necessary for the domain to be registered?
Yes, you should register the domain. If it is local DNS server, it is not required.
Hi
When I run “dig pri.ostechnix.lan” in the output part I am not getting details related to secondary domain name server. Is there anything need to be configured.
Hello when i type nslookup “localhost” the server says “server can’t find “localhost”: SERVFAIL
Great guide. It helped me a lot!
I didn’t find where to rate, but you got five of five stars.
Thanks!!!
Hi, i am following this guide and I have a question.
Do you have to configure a specific hostname or IP to the catching only server or do you leave it by default?
Thanks in advance!
You can configure your own IP and hostname of your chioce for the caching server.