This tutorial walks you through how to install Oracle VirtualBox in FreeBSD. For the purpose of this tutorial, I will be using FreeBSD 10.3 with MATE desktop environment. If you don't know how to install MATE desktop in FreeBSD, refer the following link.
Well, let us get started.
Table of Contents
Update FreeBSD system and Ports tree
First of all, update your FreeBSD system using command as root user:
freebsd-update fetch install
Then, update the ports tree using command:
portsnap fetch update
portsnap extract
This will take a few moments. Please be patient.
Install Oracle VirtualBox in FreeBSD
After updating the ports tree, Cd to virtualbox-ose directory.
cd /usr/ports/emulators/virtualbox-ose
Run the following command to build and install VirtualBox.
make install clean
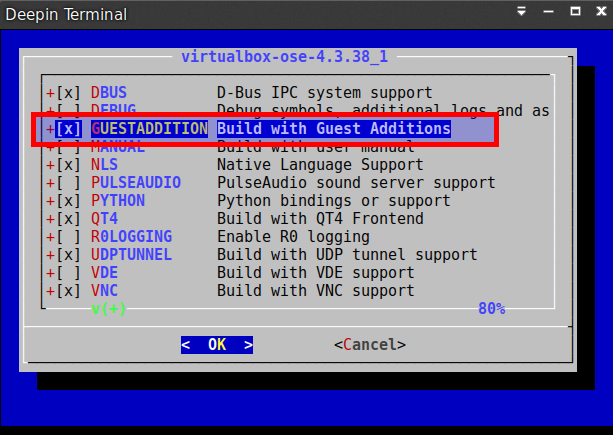
Don't forget to select the GUESTADDITION option along with default selection. We need Guest additions for the FreeBSD guests to provide the following support.
- Clipboard sharing
- Mouse pointer integration
- Host Time synchronization
- Window scaling
- Seamless mode
Select GUESTADDITION option and click OK to continue.
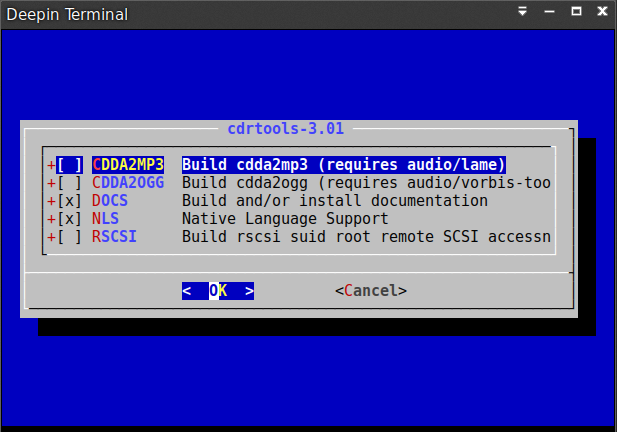
During installation, you'll be asked to answer a couple of questions. Just Click OK to accept the default values and continue. Please note that this process will take a quite long time (Around 1-3 hours depending upon the machine configuration).
And, You will have to answer a lot of questions like below. So, don't leave your system. Just click OK whenever it ask you to continue.
Click OK to continue.

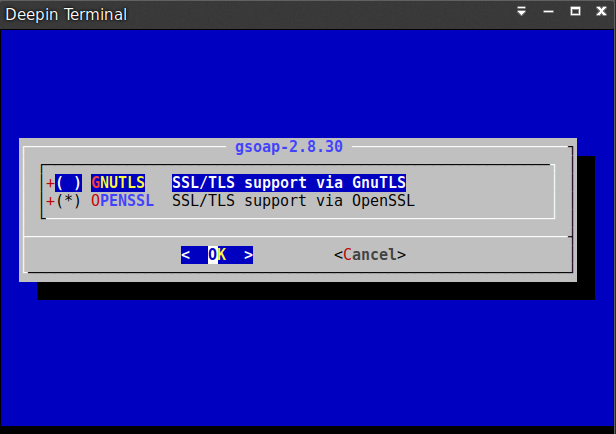
Like I said, this will take quite long time, may be 2-3 hours to complete.
Post installation
After installing VirtualBox, we need to do couple of tasks.
First, add the local system's users to vboxusers group.
To do so, run:
pw groupmod vboxusers -m ostechnix
Here, ostechnix is my FreeBSD system's username.
Next load the virtualbox Kernel modules at boot time as shown below.
Edit /boot/loader.conf file.
nano /boot/loader.conf
Add the following line in it.
vboxdrv_load="YES"
For bridged or host-only networking support, edit /etc/rc.conf file,
nano /etc/rc.conf
Add the following line:
vboxnet_enable="YES"
Also, add the users to the operator group as shown below.
pw groupmod operator -m ostechnix
Replace ostechnix with your own username.
Then enable USB read/write permissions to the users in the operator group.
To do so, edit /etc/devfs.rules file,
nano /etc/devfs.rules
If the above file doesn't exist, create it.
Add the following line in it.
[system=10]
add path 'usb/*' mode 0660 group operator
To load these rules, edit /etc/rc.conf file,
nano /etc/rc.conf
Add the following line:
devfs_system_ruleset="system"
Restart defs service to apply these changes.
/etc/rc.d/devfs restart
Next, enable Host CD/DVD access to all guest machines. It is very important.
Enable atapicam kernel module at boot.
To do so, edit /boot/loader.conf file:
nano /boot/loader.conf
Add the following line:
atapicam_load="YES"
Enable HAL Kernel module too.
To do so, edit /etc/rc.conf file:
nano /etc/rc.conf
Add the following line:
hald_enable="YES"
Start the hald service.
/usr/local/etc/rc.d/hald start
Your user account needs permissions to access /dev/xpt0, /dev/cdN and /dev/passN . TO do so, Edit /etc/devfs.conf file:
nano /etc/devfs.conf
Add the following lines:
perm cd0 0660
perm xpt0 0660
perm pass0 0660
Finally, restart your FreenBSD system to apply all changes.
Now, Oracle VirtualBox is ready to run guest machines.
You might want to download the following free EBooks related to Oracle VirtualBox.
That's all for now. If you like this tutorial, please share it on your social networks and support OSTechNix.
Cheers!
Source and Reference links:
Thanks for stopping by!
How can I benefit from this blog:
- Subscribe to our Email Newsletter : Sign Up Now
- Download free E-Books and Videos : OSTechNix on TradePub
- Connect with us: Facebook | Twitter | Google Plus | LinkedIn | RSS feeds
Have a Good day!!
2 comments
I appreciate your help here – but I would like to download the further resources.
However, the Linkdin link doesn’t work, and as I am retired (kindof) I don’t want to fill in the full contact form; it wouldn’t be of any use to you anyway.
Please let me know how to download the resources – thanks
It is not own resources. We have no rights over them. We just receive a small amount for each download. Please use any temporary or throw-away mail, phone no and address to download the resources. You need not to give your actual contact details. Thanks.