There is no doubt that WordPress is the popular and most widely used Content Management System for websites and blogs. It is free, open source CMS based on PHP and MYSQL. As of April 2016, more than 60 million websites are powered by WordPress, and sure, the list will go on every year. We are also using WordPress CMS right now for our blog OSTechNix. WordPress CMS is created by Matt Mullenweg and Mike Little, and the first version of wordpress was released on May 27, 2003. WordPress is released under GPLv2 license, so anyone can download, modify and use it.
Table of Contents
Install WordPress 4.6 in Ubuntu 16.04 LTS
In this tutorial, we will be discussing how to install WordPress 4.6 in Ubuntu 16.04 LTS server edition with LAMP stack. As of writing this guide, the latest stable version was 4.6.
Setup LAMP stack
Since WordPress is web-based CMS, we need to have a working LAMP (Apache, MySQL/MariaDB, PHP) stack in the Ubuntu server. To install LAMP stack, refer the following guide.
Create database for WordPress
After installing LAMP stack, we need to create a database and database user for WordPress. For the purpose of this tutorial, I am going to create a database called "wpdb" and database user called "wpuser" with password "ubuntu". I recommend you to use any strong password for the database user.
To do so, log in to MariaDB (Working with MYSQL and MariaDB is same) as root user:
mysql -u root -p
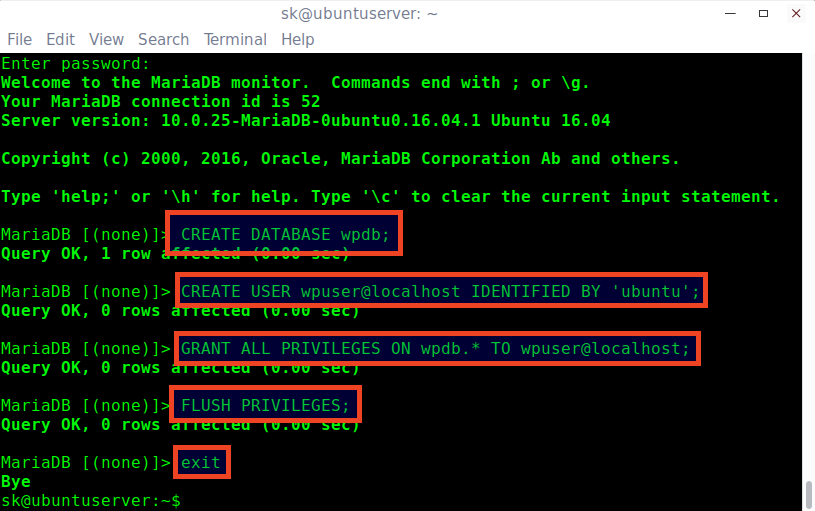
Run the following commands shown in black letters one by one to create database and database user.
Sample output:
Welcome to the MariaDB monitor. Commands end with ; or \g.
Your MariaDB connection id is 52
Server version: 10.0.25-MariaDB-0ubuntu0.16.04.1 Ubuntu 16.04

Copyright (c) 2000, 2016, Oracle, MariaDB Corporation Ab and others.

Type 'help;' or '\h' for help. Type '\c' to clear the current input statement.

MariaDB [(none)]> CREATE DATABASE wpdb;
Query OK, 1 row affected (0.00 sec)

MariaDB [(none)]> CREATE USER wpuser@localhost IDENTIFIED BY 'ubuntu';
Query OK, 0 rows affected (0.00 sec)

MariaDB [(none)]> GRANT ALL PRIVILEGES ON wpdb.* TO wpuser@localhost;
Query OK, 0 rows affected (0.00 sec)

MariaDB [(none)]> FLUSH PRIVILEGES;
Query OK, 0 rows affected (0.00 sec)

MariaDB [(none)]> exit
Bye
Restart mysql and Apache services:
sudo systemctl restart mysql
sudo systemctl restart apache2
Download and Install WordPress 4.6
We have completed the necessary prerequisites. Now, it is time to deploy wordpress in our Ubuntu server.
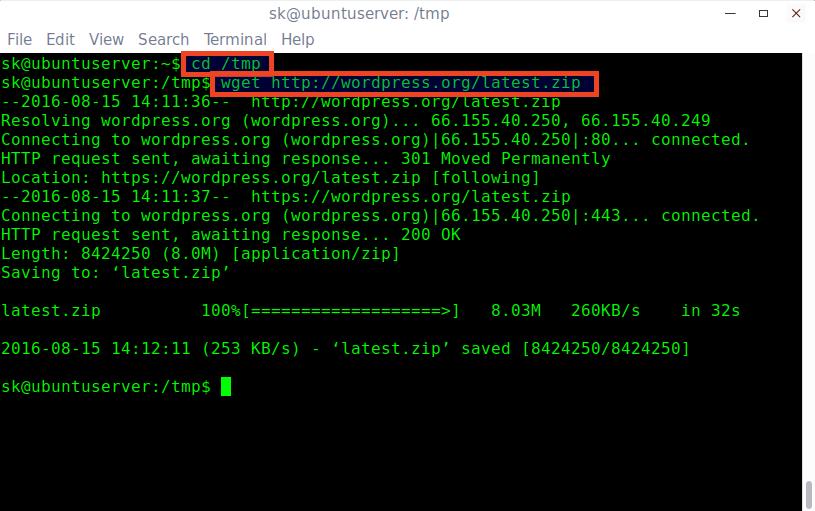
Download the latest WordPress version using the following commands:
cd /tmp
wget http://wordpress.org/latest.zip
Extract the downloaded file as shown below:
sudo apt-get install unzip
unzip latest.zip
The above command will extract the zip file and saves the contents in a directory called "wordpress" in the /tmp directory.
Move the extracted folder (i.e wordpress) to the web root folder.
sudo mv wordpress/ /var/www/html/
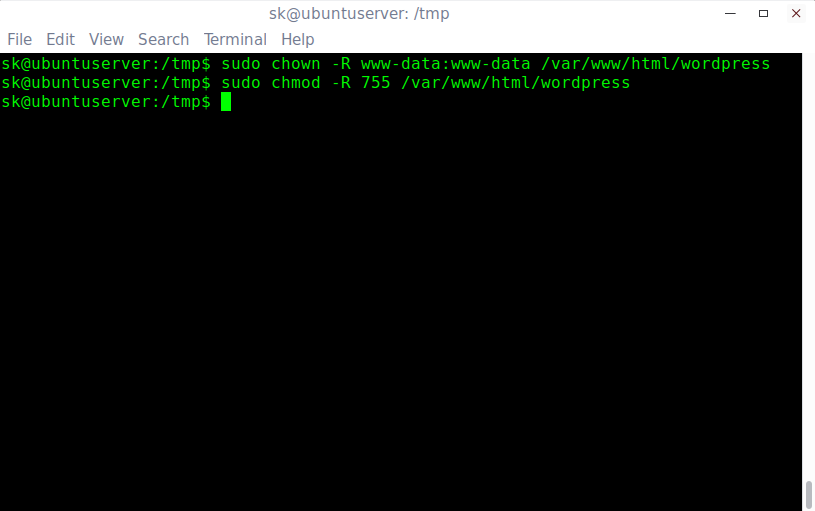
Then, we need to set appropriate permissions to the following directories.
sudo chown -R www-data:www-data /var/www/html/wordpress
sudo chmod -R 755 /var/www/html/wordpress
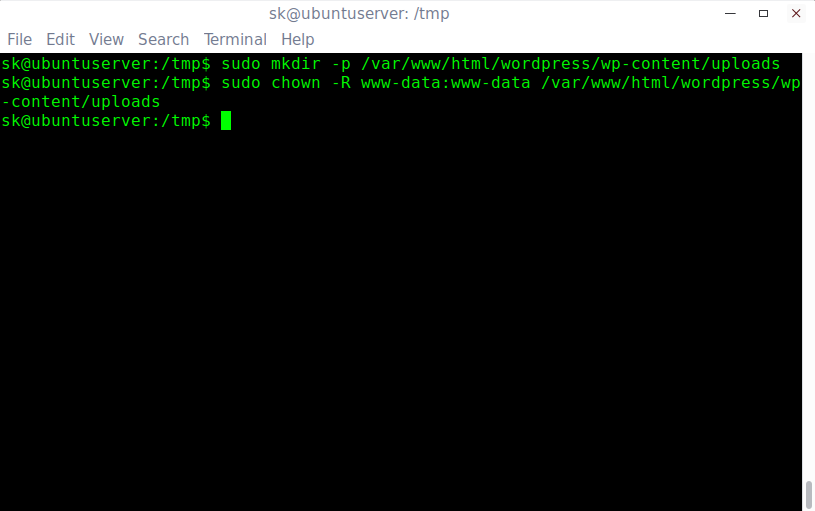
Create a directory called 'uploads' within the 'wordpress' folder, and set the appropriate permissions to that directory as shown below.
sudo mkdir -p /var/www/html/wordpress/wp-content/uploads
sudo chown -R www-data:www-data /var/www/html/wordpress/wp-content/uploads
Now, open up the web browser of your choice and start the WordPress web installer by navigating to the URL: http://IP-Address/wordpress/ or http://domain-name/wordpress/.
You will be pleased with the following screen. Select your preferred language and click Continue.

Next, we need the following details.
- Database name
- Database username
- Database password
- Database host
- Table prefix (if you want to run more than one WordPress in a single database)
Once you have these details, click Let's go, else go back the section 'Create Database for wordpress', and create the required database details.

Enter the correct database connection details which we have created earlier in the respective boxes below.

If you have entered valid database details, you should see the following screen. Click 'Run the install' button.

Next, enter your blog details, such as blog name, username, and password etc.

Congratulations! WordPress has been successfully installed in your Ubuntu server. Click Login to continue.

Enter your wordpress username and password.

This is how my Worpdress site dashboard looks like.

Post installation
Here is some basic things to do after installing WordPress.
Fix upload problems in WordPress
When you try to export contents of your existing wordpress site, you might encounter with the following errors.
Sorry, there has been an error.
File is empty. Please upload something more substantial. This error could also be caused by uploads being disabled in your php.ini or by post_max_size being defined as smaller than upload_max_filesize in php.ini.

To fix this, edit php.ini file:
sudo nano /etc/php/7.0/apache2/php.ini
Find the following two values and set it to sufficient size, for example 50 MB.
[...]

post_max_size = 50M

[...]

upload_max_filesize = 50M

[...]
Save and close the file.
Restart Apache service to take effect the changes.
sudo systemctl restart apache2
Fix Permalinks error
WordPress offers you different cusotm URL structure. By default, the default URL of your posts will look like below.
http://site-name/?p=123
To change it to something human-readable format, you must do some tweaks in the Apache configuration file.
To do so, edit /etc/apache2/sites-available/000-default.conf file:
sudo nano /etc/apache2/sites-available/000-default.conf
Add or modify the lines marked in bold letters.
 ServerName 192.168.1.105
 <Directory /var/www/html/>
 AllowOverride All
 </Directory>
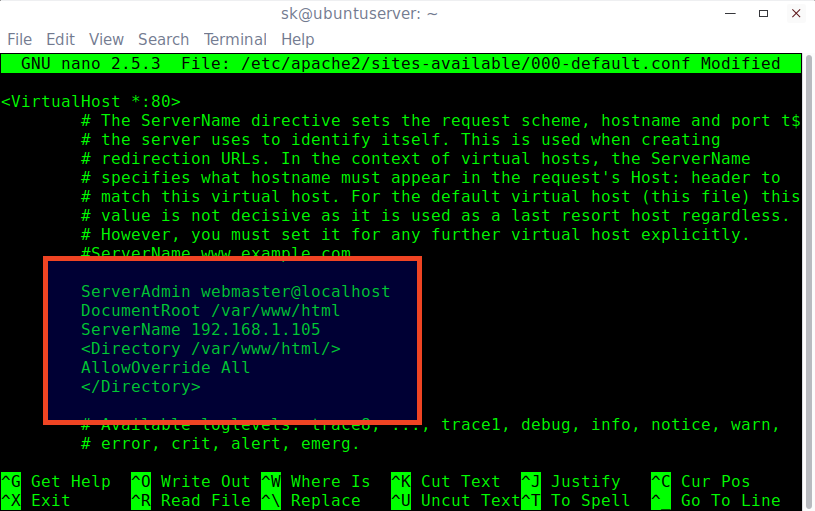
Replace 192.168.1.105 with your own IP address or domain name.
Then, enable the apache rewrite module that allows you to modify URLs using command:
sudo a2enmod rewrite
Finally, restart apache service to take effect the changes.
sudo systemctl restart apache2
Now, you can change the permalinks into user-friendly format in the Permalinks section.
You can check the Permalinks settings in Dashboard -> Settings -> Permalinks.

Delete default pages and posts
WordPress fresh installation should come with a sample page, post, comment. We don't them any more.
Just log in to your dashboard and delete them.

Similarly, go to posts and comments section, and delete all of them.
Comment moderation
This another important section to avoid spam comments. In this section, you can define section whether your comments should be moderated before appearing under your posts.
Here is my preferred settings:

That's it. At this stage, you have a basic working WordPress blogging platform. Start writing your articles.
Want to learn for about WordPress? Download the following WordPress guides and resources for free:
Happy blogging!
Cheers!!
Thanks for stopping by!
How can I benefit from this blog:
- Subscribe to our Email Newsletter : Sign Up Now
- Download free E-Books and Videos : OSTechNix on TradePub
- Connect with us: Facebook | Twitter | Google Plus | LinkedIn | RSS feeds
Have a Good day!!