
Atomic Chat is a free, open-source AI coding assistant that runs open-weight LLMs entirely on your own machine and exposes them through a built-in OpenAI-compatible server at http://localhost:1337/v1. That means you can point your existing code, or a coding agent, at a local endpoint and get completions with no cloud API key or usage caps. Keep a local model selected and network tools off, and your prompts stay on your device.
In this guide, we will explain how to install Atomic Chat on Linux, download a coding model, and use it to complete a real programming task both in the GUI and from the terminal.
The installation commands target Ubuntu 22.04+ or Debian 12+ (x86_64, glibc 2.35+). Download the app, inference backend and model before going offline.
Table of Contents
What you need
- A 64-bit Linux desktop (x86_64): Ubuntu 22.04+ or Debian 12+
- Around 8 GB RAM for a small quantized 3B model; 16 GB gives more room for a 7B. Context length and other apps also affect memory use.
- Roughly 5–10 GB free disk for the app plus one model
- On Linux, Atomic Chat runs GGUF models only. Keep that in mind when picking a model.
Step 1: Install Atomic Chat on Linux
Atomic Chat ships as an AppImage for Linux, so there's nothing to compile. Download the latest Atomic Chat appimage from the official releases page.
For demo purpose, we will be downloading the Atomic.Chat_2.0.35_amd64.AppImage from release v2.0.35.
Go to the location where you downloaded the file. I have downloaded it in ~/Downloads directory:
cd ~/Downloads
Make it executable:
chmod +x ./Atomic.Chat_2.0.35_amd64.AppImage
And run Atomic Chat appimage using command:
./Atomic.Chat_2.0.35_amd64.AppImage
If launch fails with a missing libfuse.so.2 error, install the FUSE compatibility library. On Ubuntu 24.04 systems, you can install it using command:
sudo apt update
sudo apt install libfuse2t64
On Ubuntu 22.04, use libfuse2 instead. Do not replace an existing FUSE 3 installation:
sudo apt install libfuse2
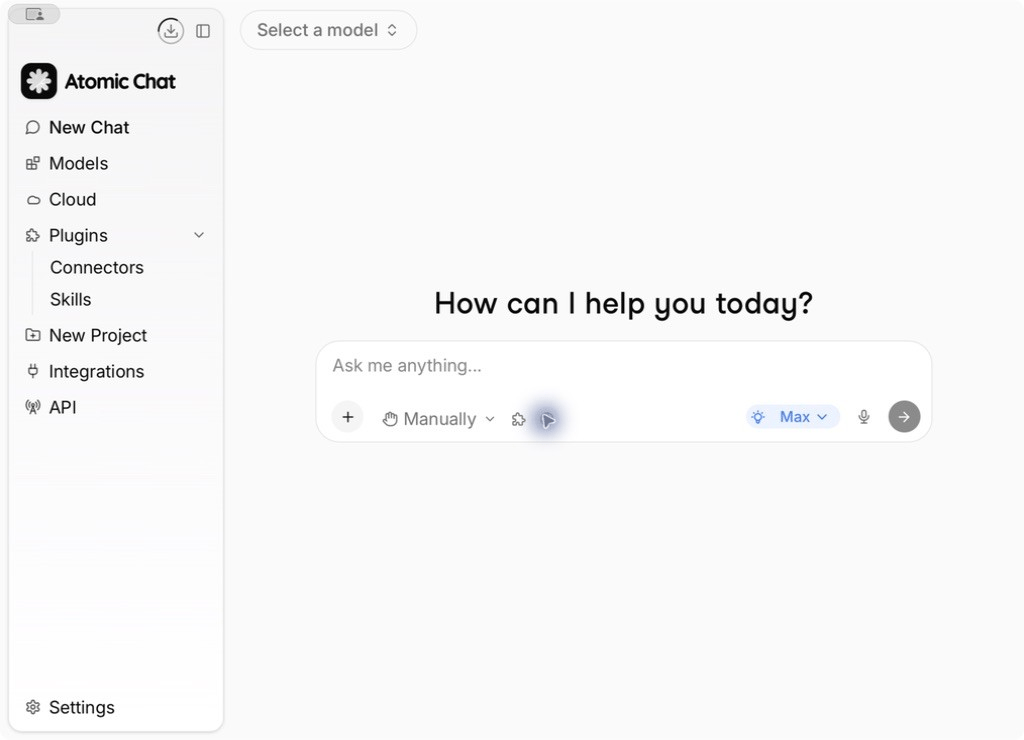
Here's how Atomic Chat default interface looks like:
Step 2: Download a Coding Model
Atomic Chat has a built-in Hugging Face browser, so you don't have to touch the terminal to get a model.
Open the model browser, search for a GGUF build of a coding model. Here, we will download Qwen/Qwen2.5-Coder-3B-Instruct-GGUF, Q4_K_M.
On an 8 GB machine, start with a 3B model; try 7B with 16 GB, allowing room for context and other apps.
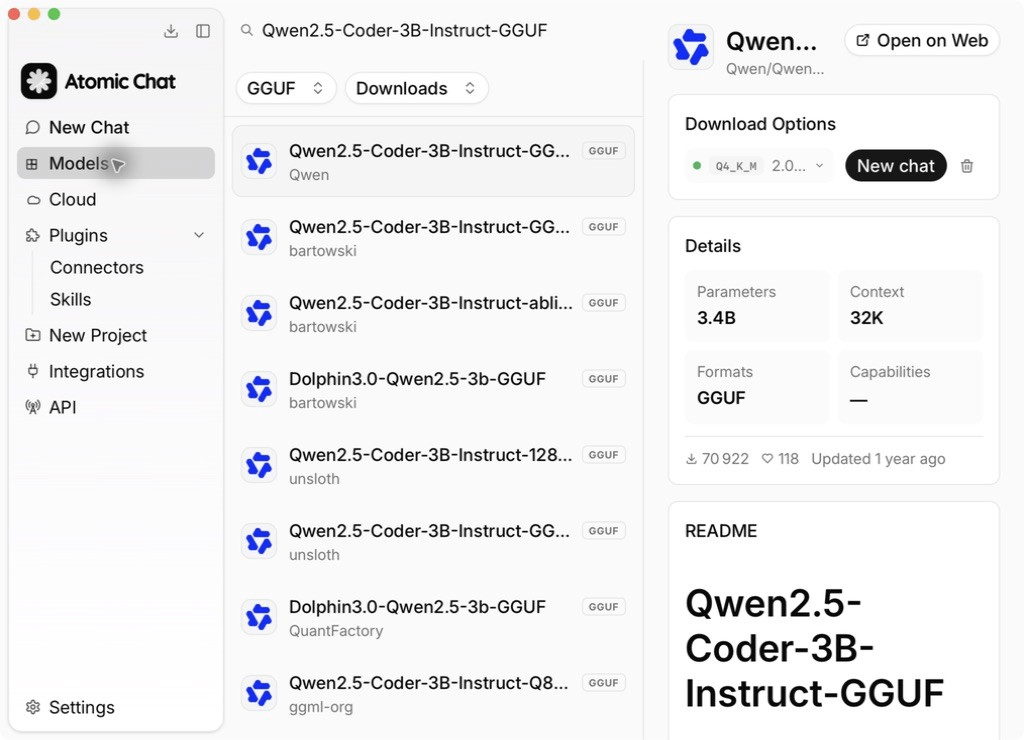
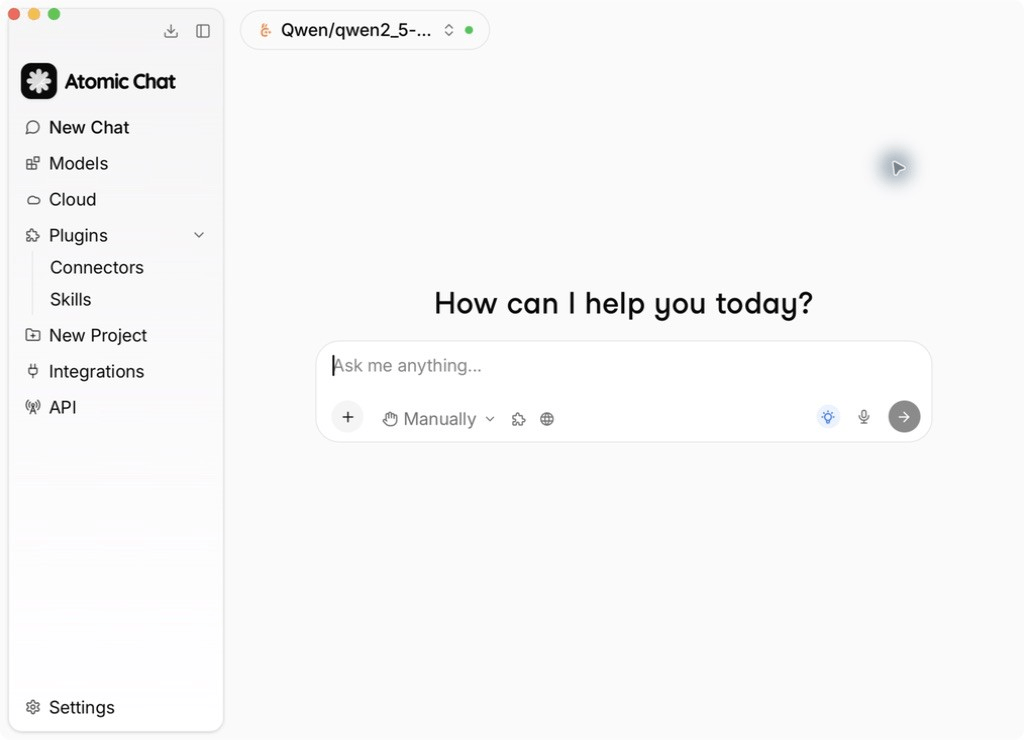
Once the download finishes, select the model so the local engine loads it. The model is now running fully on your hardware.
Step 3: Generate and Refactor a Python Script in the Atomic GUI
Let’s give it a real job rather than a toy prompt. In the chat, enter the following prompt:
Write a Python script dirscan.py that walks a directory given as a command-line argument and prints the 10 largest files with human-readable sizes. Use only the standard library.
You’ll get a script back in a few seconds. Review it and fix any errors before running it. Save it, then run it against a folder of test files.
Create dirscan-demo and put a few disposable files in it first.
python3 dirscan.py ./dirscan-demo
Now test refactoring, the real value of a coding assistant. Follow up with:
Refactor it to accept a --limit flag (default 10) and handle permission errors without crashing.
Apply the change and run it again:
python3 dirscan.py --limit 5 ./dirscan-demo
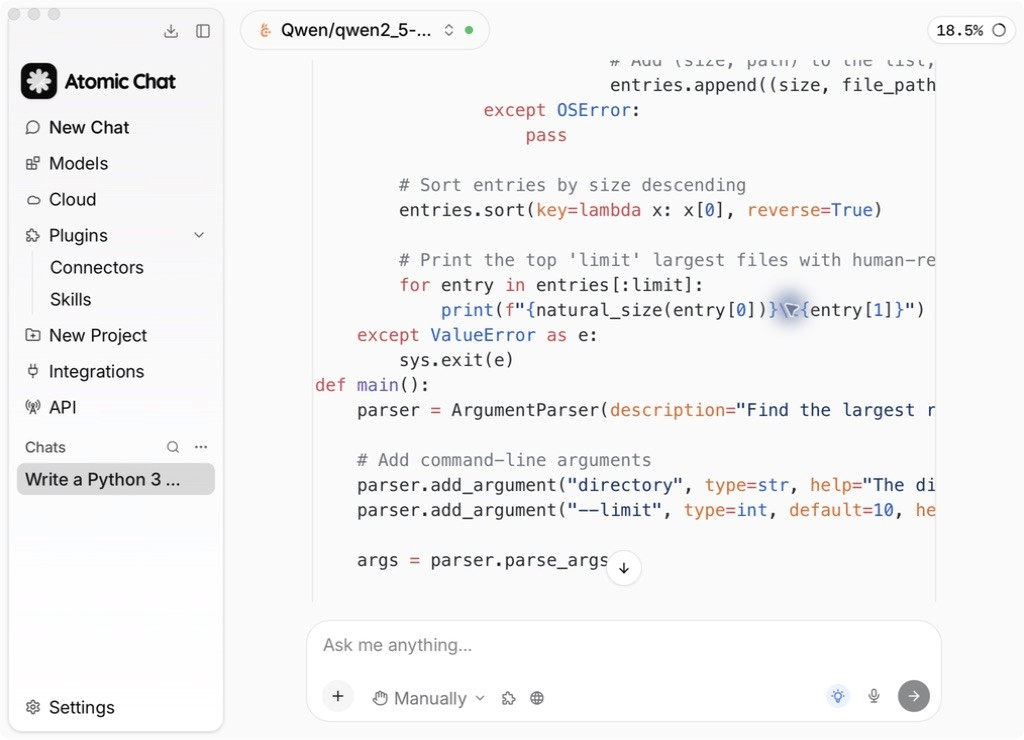
Because inference is local, you can do all of this with your network cable unplugged. Download the app, backend, model and any client dependencies first, and keep web search and remote tools off.
Step 4: Use the Local Server from the Terminal (OpenAI-compatible)
The GUI is only half of it. Atomic Chat runs an OpenAI-compatible server at http://localhost:1337/v1, bound to 127.0.0.1 by default, so any tool that speaks the OpenAI API can use your local model.
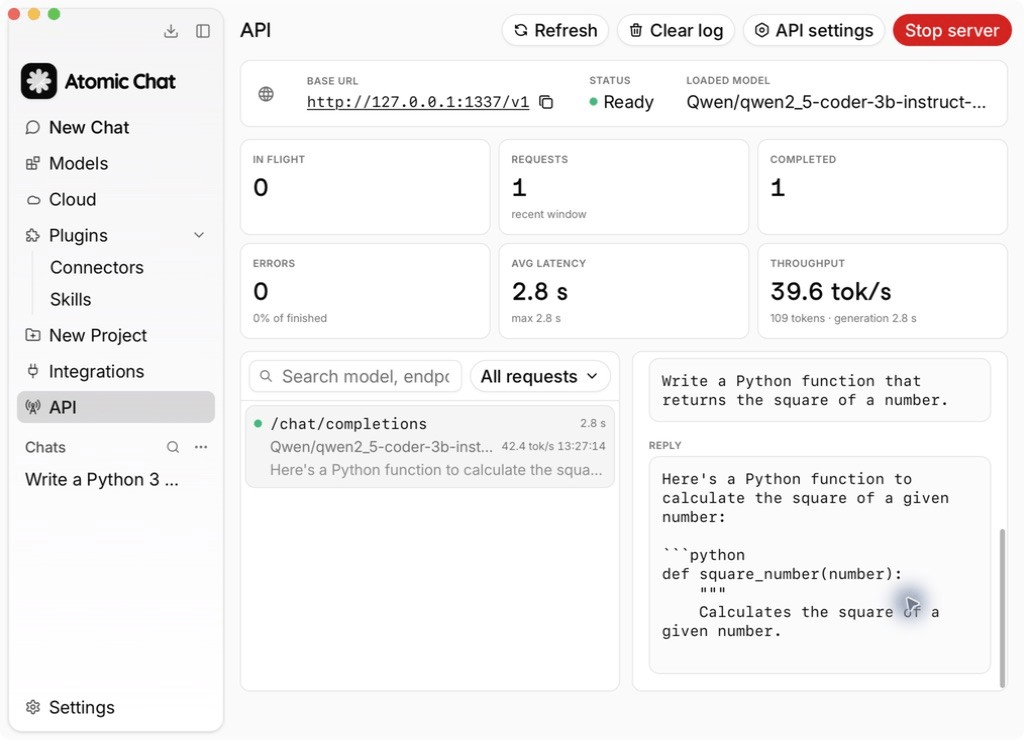
Open the API panel, start the server if it is stopped, and check that it is Ready. A placeholder key works only when API authentication is disabled; otherwise use the configured key.
Test it with curl. First query http://localhost:1337/v1/models and copy the ID of your downloaded local model. The example below uses the ID returned for the Qwen download above:
curl http://localhost:1337/v1/chat/completions \
   -H "Content-Type: application/json" \
   -d '{
      "model": "Qwen/qwen2_5-coder-3b-instruct-q4_k_m",
      "messages": [
        {"role": "user", "content": "Write a bash one-liner to count lines in all .py files under the current dir."}
  ]
}'
Or drop it straight into the official OpenAI Python SDK by changing only the base_url: Install the openai package in a Python virtual environment first.
from openai import OpenAI
client = OpenAI(
    base_url="http://localhost:1337/v1",
    api_key="not-needed", # only when API authentication is off
)

resp = client.chat.completions.create(
    model="Qwen/qwen2_5-coder-3b-instruct-q4_k_m",
    messages=[{"role": "user", "content": "Refactor this into a function: "
               "x=[i*i for i in range(10) if i%2==0]"}],
)
print(resp.choices[0].message.content)
Use the model identifier exactly as it appears in the /v1/models response. If you’ve changed the port, check the current value in the app’s API panel.
Step 5: Point a Coding Agent at it
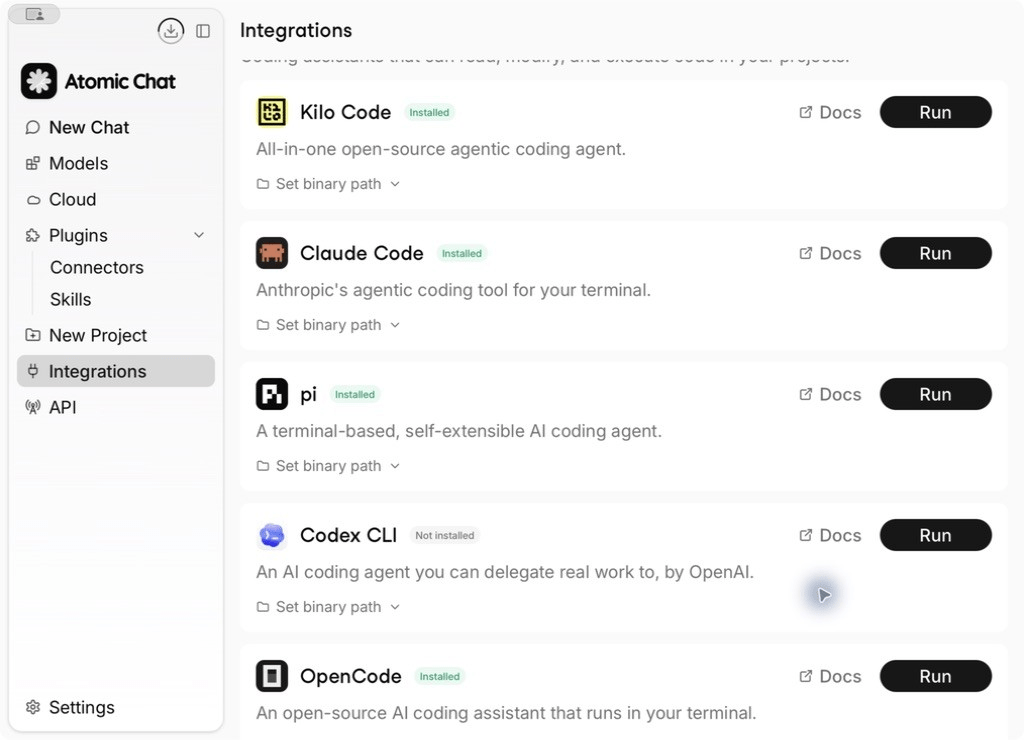
Because the endpoint is OpenAI-compatible, agent CLIs work against it too. Atomic Chat provides one-click launchers for OpenCode and GitHub Copilot CLI from its Integrations tab, and other agents (Goose, OpenClaw, and similar) work when you point them at http://localhost:1337/v1. That lets an agent use a model on your own disk. Check tool-calling support for the model and agent you choose; offline use also requires local tools and no cloud fallback.
How Atomic Chat compares to Ollama and LM Studio
If you’ve used Ollama or LM Studio, the model here is similar, a local runtime with an OpenAI-style API, with two practical differences.
Atomic Chat pairs the desktop app with native iOS and Android apps, and it’s Apache-2.0 with no message caps. If you’re weighing options, Atomic Chat keeps a rundown of Ollama alternatives that lays out where each tool fits.
Troubleshooting
1. AppImage won’t start
Read the terminal error. For a missing FUSE 2 library, use libfuse2t64 on Ubuntu 24.04 or libfuse2 on Ubuntu 22.04 (Step 1).
2. A model won’t load on Linux
Confirm it’s a GGUF build. MLX models are Apple-Silicon only and won’t run on Linux.
The API returns connection refused — make sure Atomic Chat is open, the API server is started, and a model is loaded; the server runs inside the app. Confirm the port in the API panel.
3. Responses are slow
Drop to a smaller quantization or a 3B model; close other memory-heavy apps.
Conclusion
In a few steps you’ve got a private LLM running on Linux, a real coding task done in the GUI, and the same model wired into your own scripts and agents through a local OpenAI-compatible endpoint. Local inference, no cloud API key, no usage caps. It’s a clean way to keep code and prompts on your own machine while still using the tools you already know.
Frequently Asked Questions (FAQ)
A: Yes. It’s released under the Apache-2.0 license at no cost, with no message limits.
A: Yes, when you select a local model and keep web search, cloud providers and remote tools off. The API binds to 127.0.0.1 by default; the local address alone does not prevent requests to a cloud provider.
A: GGUF models. You can browse and download them from the built-in Hugging Face browser; MLX builds are for Apple Silicon only.
A: Yes. Point the SDK’s base_url at http://localhost:1337/v1 and use the model ID from /v1/models. A placeholder API key works when server authentication is off; otherwise use the configured key.
A: About 8 GB for a 3B model; 16 GB is more comfortable for 7B models. These are starting points; context length, quantization and other apps affect the actual requirement.
A: When configured to use a local model and its built-in server, the workflow does not require a cloud API key.
A: Atomic Chat exposes an OpenAI-compatible endpoint at http://localhost:1337/v1.
A: Yes, provided the application, inference backend, and required model have already been downloaded and configured before disconnecting from the internet.
A: The local inference setup runs the model on the user's own machine rather than sending prompts to a remote AI API.
