In our previous guides, we have talked about how to install and configure NethServer 6.8 from ISO. If you don't know already, NethServer is an all-in-one CentOS-based Linux distribution that can be used to setup various types of Linux servers such as web server, mail server, ftp and much more with couple of moue clicks. For more details, check our previous guide in the following link.
Table of Contents
Install NethServer 7.3 using ISO
There are two methods to install NethServer. You can either install NethServer using its ISO image or install it on the top of existing CentOS server. To install NethServer on top of an existing CentOS server, refer the following guide.
Installing NethServer using ISO is suitable for newbies and intermediate users. In this tutorial, we will be discussing how to install NethServer 7.3 from its ISO image.
Download the latest stable version from the link given below. As of writing this guide, the latest stable version was 7.3, and it is based on CentOS 7.3.
![]()
Once downloaded, write the ISO to any CD/DVD or make a bootable USB drive as the way described in the following link.
Then, start the machine using the bootable media.
You will be greeted with the following screen.
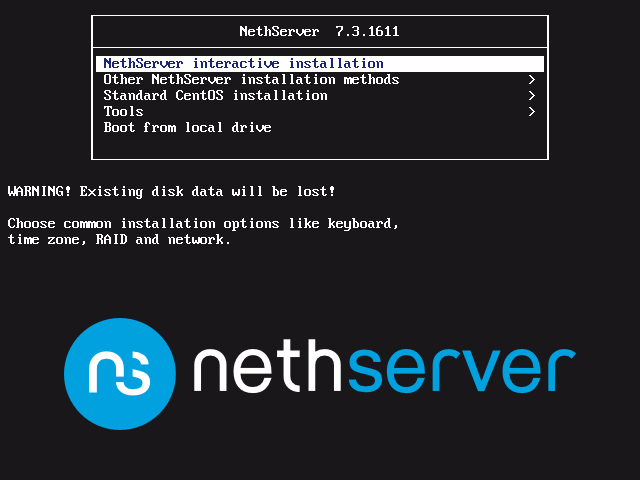
As you see in the above screenshot, there are different types of installation methods.
- NethServer interactive installation - It needs the user interaction. I.E you have to select the language, configure RAID support, network, and encrypted file system etc.
- Other NethServer installation methods - User interaction is not required. The installer will take care of everything, and the default parameters will applied.
- Standard CentOS installations - It allows the user to deploy the NethServer as the you do the normal CentOS installation.
- Tools - It allows users to go to system recovery, execute a memory test etc.
- Boot from local drive - Allows the users to boot the already installed OS.
I go with the first installation option i.e NethServer interactive installation.
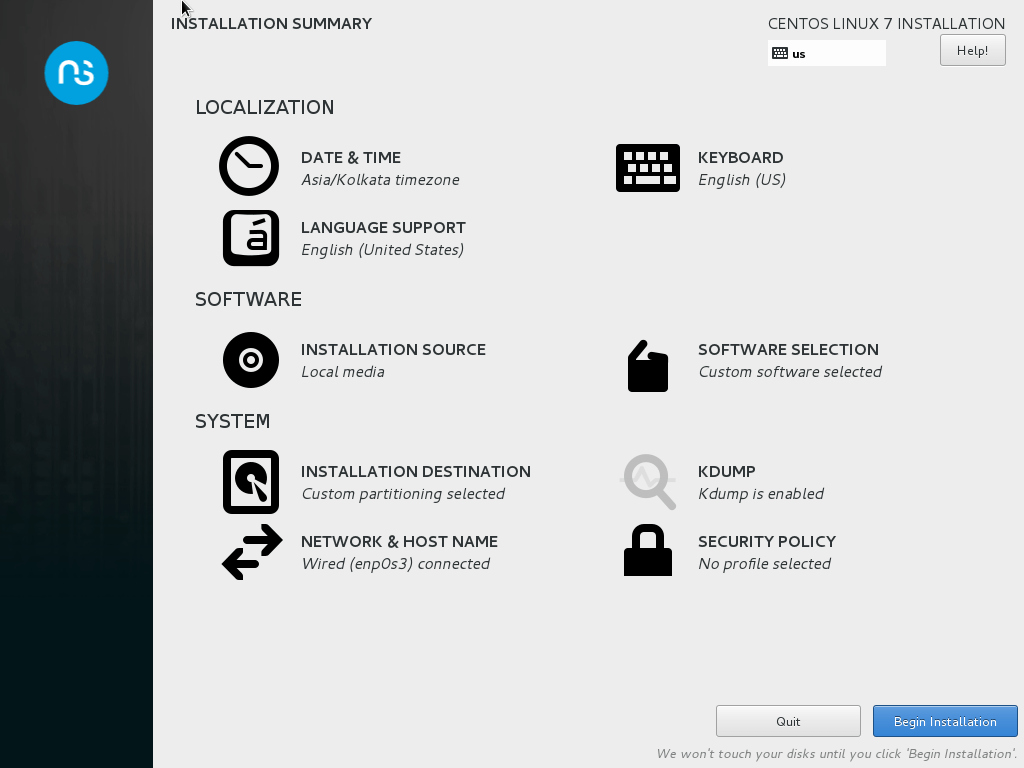
In the next screen, you will see the installation summary such as date & time, keyboard locale, default language, software selection, installation media, partitioning method, network and hostname settings etc. Go through each section and make the changes accordingly. NethServer 7.3 base server installation is pretty much same as CentOS 7.3 If you have already familiar with CentOS 7 installation, you could easily install NethServer.
Once you have setup all options in the summary section, click Begin Installation button on the bottom.
Now, the installation will start. In the mean time, you can set the root user's password and create normal user account.

Once the installation is completed, the system will automatically reboot.
At the boot prompt, you can login either with root user, or the normal account that you have created during the installation.
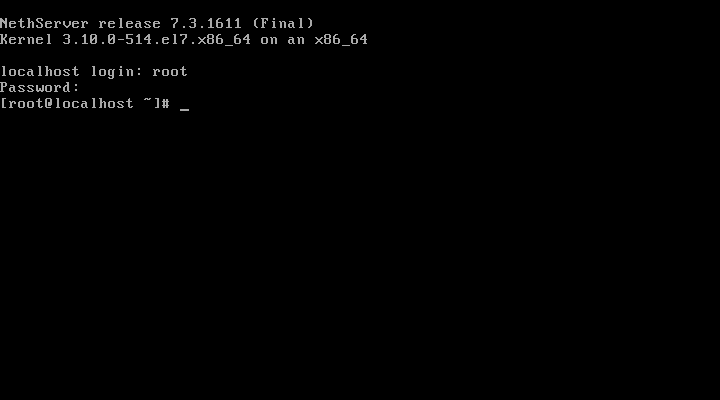
Congratulations! NethServer 7.3 base system has been successfully installed!!
If you chose non-interactive mode(unattended installation), the system will be automatically pre-configured with the following values.
- Default User name: root
- Root password: Nethesis,1234
- Network: DHCP enabled on all interfaces
- Keyboard: en
- Time zone: Greenwich
- Language: English
- Disks: if there are two or more disks, a RAID 1 will be created on first two disks.
Of course, you can change the default values later from NethServer's dashboard.
NethServer initial configuration
First things first
The first thing we must do after installing any operating system is to update it.
To update your NethServer, run:
yum update
Once updated, reboot your system to apply all updates.
Then, change the default password to something else strong and hard to guess. This is required only if you chose the non-interactive installation method.
To do so, run:
passwd root
We can also change the root user password from NethServer's dashboard too. We will see it later in our upcoming articles.
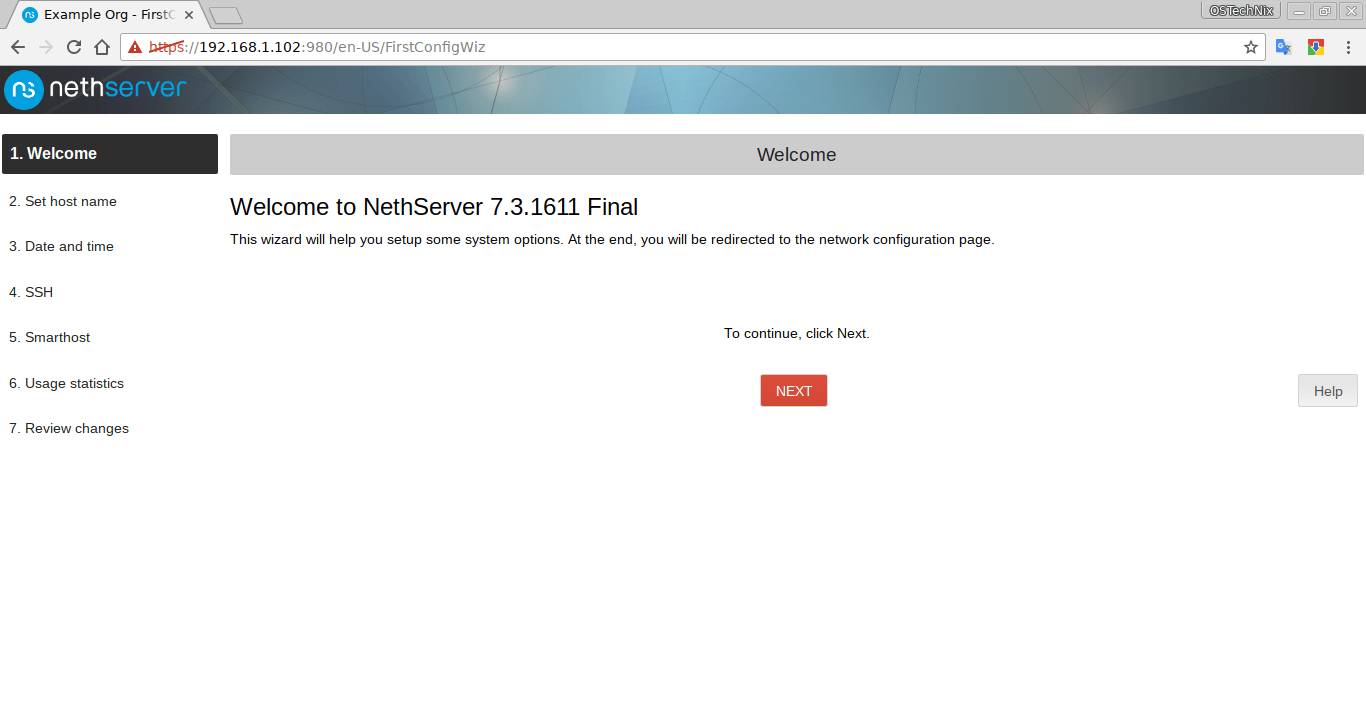
Acesss NethServer's Server-manager
To access the Server-manager, navigate to https://domain-name:980 or https://IP_Address:980 from your web browser.
You should see the following screen. Login as root user. If you have chosen non-interactive installation method, you could login using this credentials - root/Nethesis,1234

Click Next.
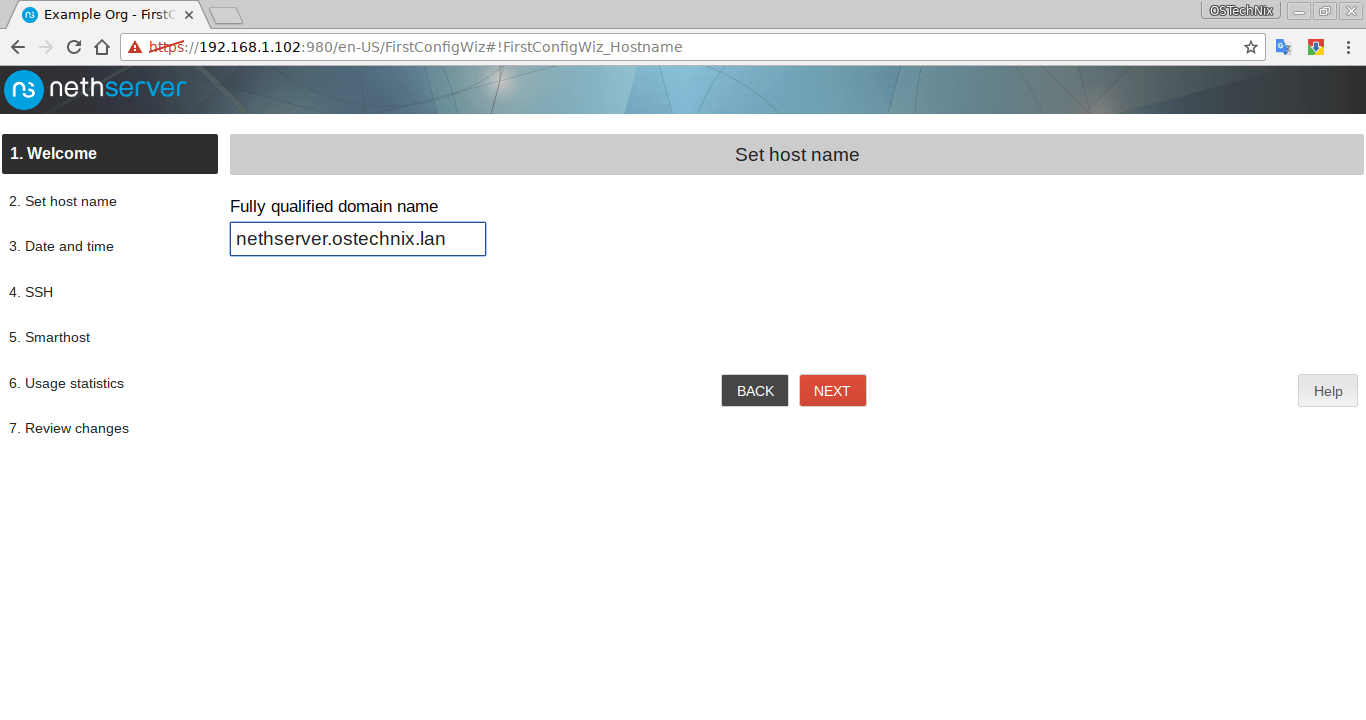
Enter the FQDN and click Next.
Choose your timezone:

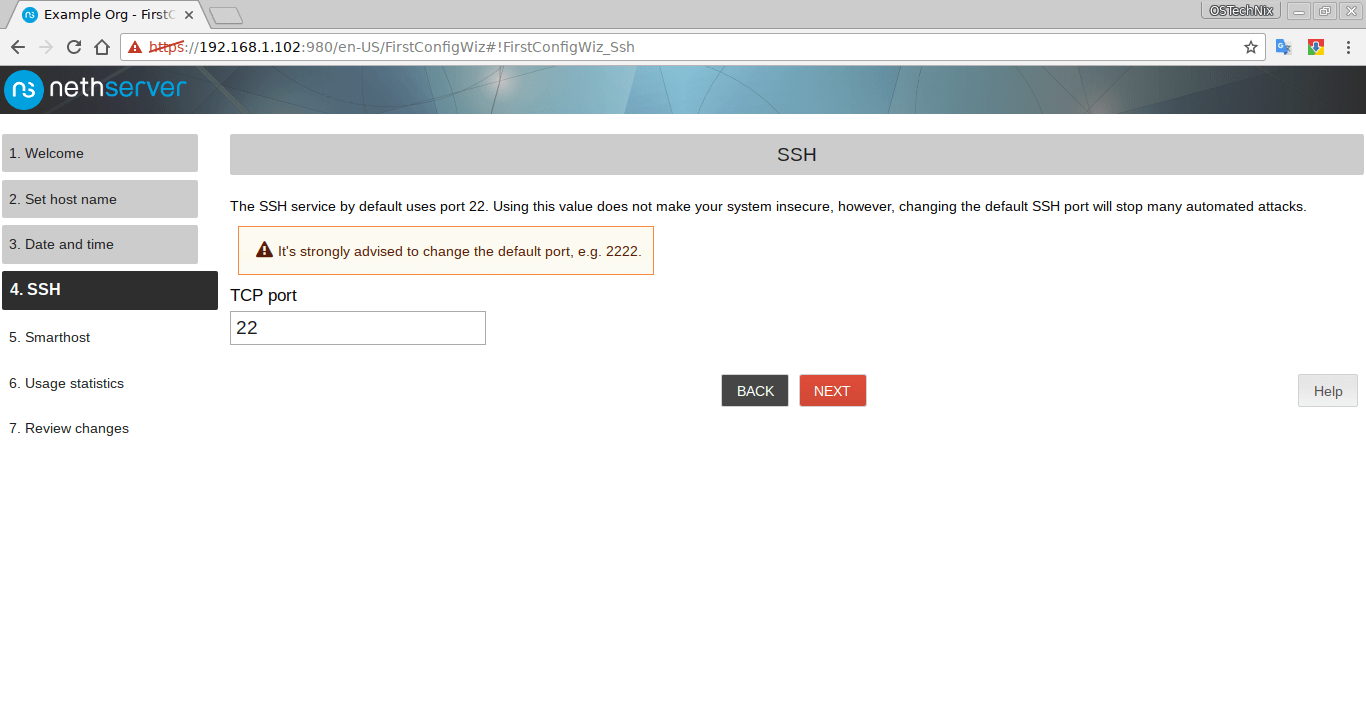
Choose the SSH default port i.e 22. It's strongly advised to change the default port to something else which is hard to guess to secure your NethServer.
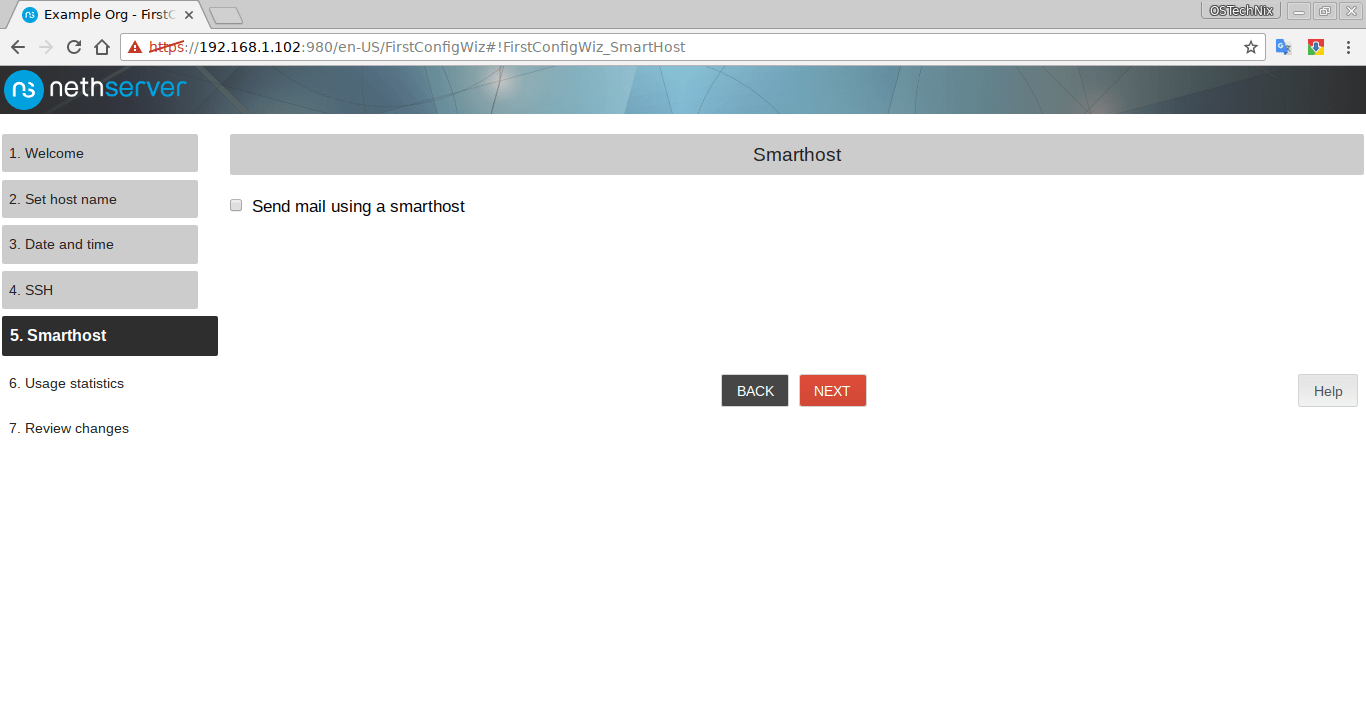
If you want to set up Smarthost for the outgoing mails,just tick the checkbox. You can also configure it later from the dashboard. I don't want to setup a mail server right now, so I just go with the default settings.
Tick the following options if you want to send the usage statistics of NethServer to its developers. if you don't want to send, that's okay. Click 'No, thanks' option and hit ENTER.

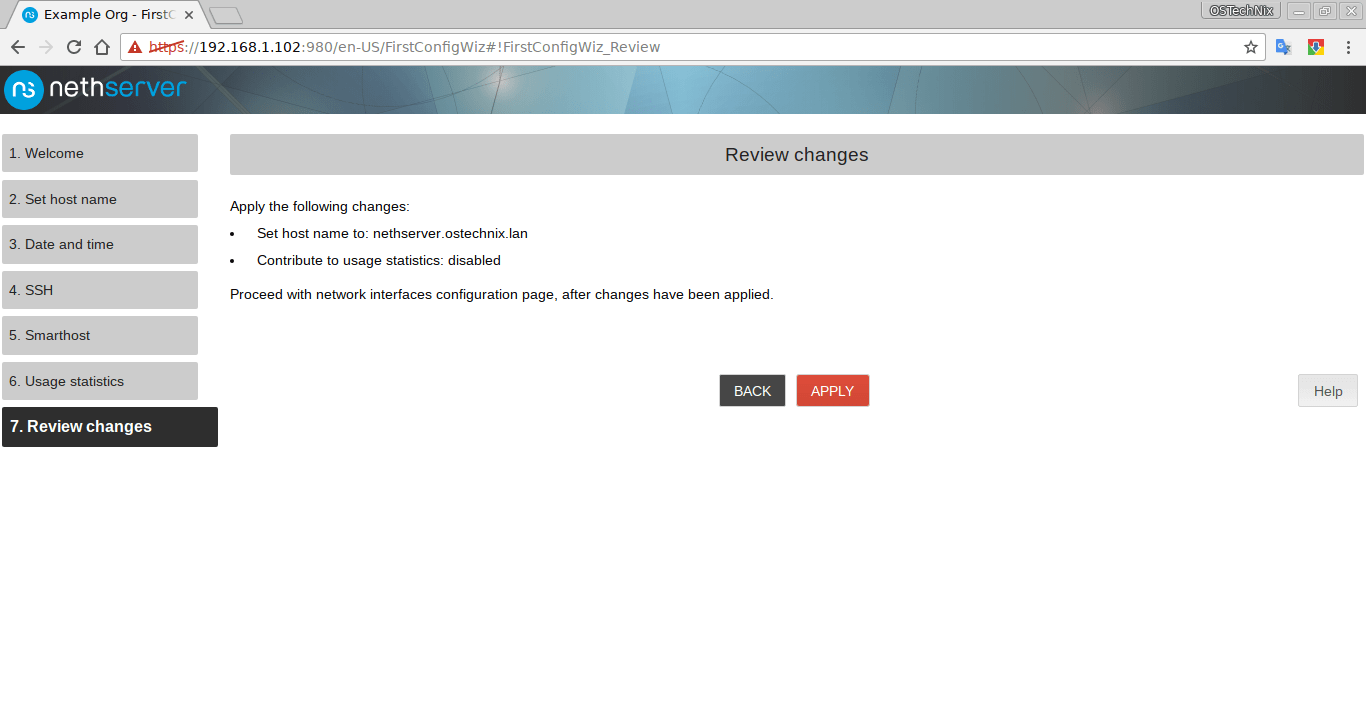
Review the changes and click Apply to configure NethServer.
Here it is how my NethServer's dashboard looks like.

That's it. From here, you can do all administrative tasks, such as installing, removing, configuring modules, configure and manage network services, configure NethServer etc.
That's all for now. In the next tutorial, we will see how to:
Happy weekend!
Cheers!!
Resource:
Thanks for stopping by!
How can I benefit from this blog:
- Subscribe to our Email Newsletter : Sign Up Now
- Download free E-Books and Videos : OSTechNix on TradePub
- Connect with us: Facebook | Twitter | Google Plus | LinkedIn | RSS feeds
Have a Good day!!