In our previous guide, we have seen what is NethServer and how to install NethServer by using its ISO image. It was the easiest and straight forward method. Today, we will see how to install NethServer in an existing, freshly installed CentOS server. If you have a VPS or physical system pre-installed with CentOS operating system, you can install NethServer on top of it, without formatting or deleting the entire setup.
Let us get started.
Install NethServer using YUM On CentOS minimal server
Please note that you should install NethServer in a fresh CentOS minimal server.
Log in as root user, and update the CentOS server using command:
yum update
Then, run the following command to add and enable NethServer's repository in your CentOS:
yum install -y http://mirror.nethserver.org/nethserver/nethserver-release-7.rpmSample output:
Loaded plugins: fastestmirror
nethserver-release-7.rpm | 24 kB 00:00:00
Examining /var/tmp/yum-root-S23Dj2/nethserver-release-7.rpm: nethserver-release-7-8.ns7.noarch
Marking /var/tmp/yum-root-S23Dj2/nethserver-release-7.rpm to be installed
Resolving Dependencies
--> Running transaction check
---> Package nethserver-release.noarch 0:7-8.ns7 will be installed
--> Finished Dependency Resolution

Dependencies Resolved

==================================================================================
Package Arch Version Repository Size
==================================================================================
Installing:
nethserver-release noarch 7-8.ns7 /nethserver-release-7 45 k

Transaction Summary
==================================================================================
Install 1 Package

Total size: 45 k
Installed size: 45 k
Downloading packages:
Running transaction check
Running transaction test
Transaction test succeeded
Running transaction
Installing : nethserver-release-7-8.ns7.noarch 1/1
Verifying : nethserver-release-7-8.ns7.noarch 1/1

Installed:
nethserver-release.noarch 0:7-8.ns7

Complete!
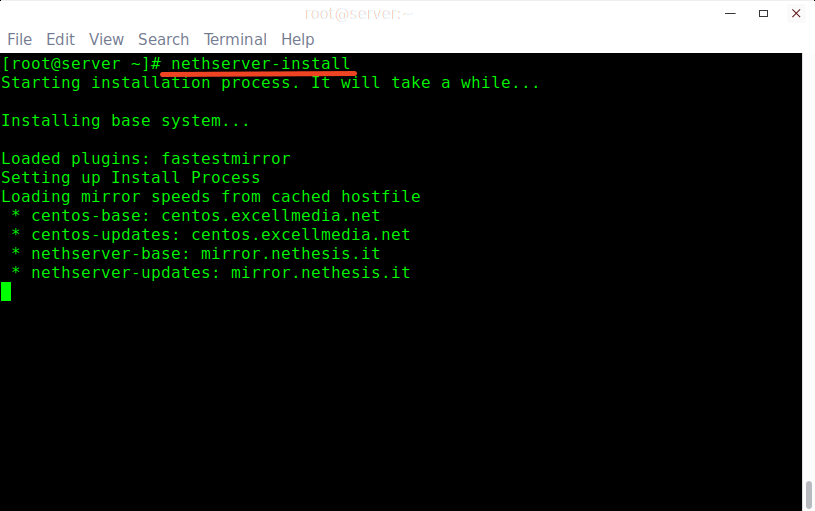
Finally, install NethServer base system using command:
nethserver-install
Sample output:
Alternatively, you can install base system and additional modules (Ex.Mail server) at the same time as shown below:
nethserver-install nethserver-mail nethserver-nutThe above commands will download and install NethServer packages in your CentOS server. This will take a while depending upon the Internet connection speed.
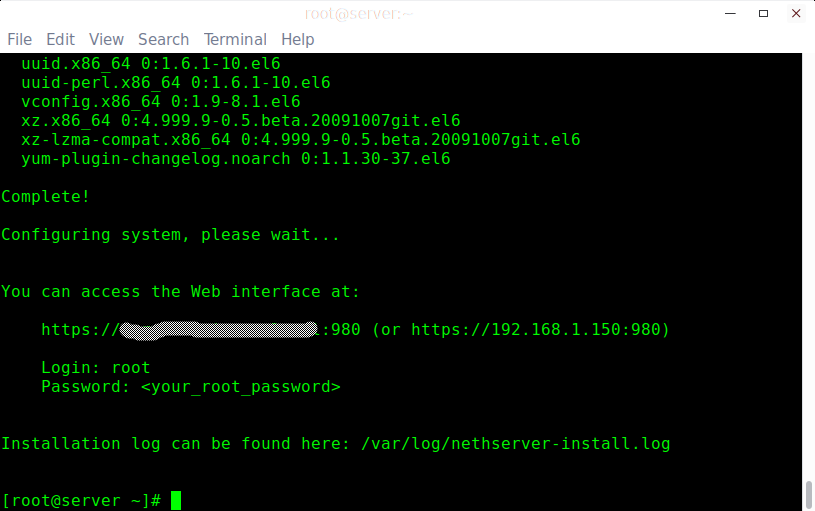
Finally, you will see the following message after NethServer base system has been installed.
Complete!

Configuring system, please wait...

You can access the Web interface at:

 https://domain-name:980 (or https://IP_Address:980)

Login: root
 Password: <your_root_password>

Installation log can be found here: /var/log/nethserver-install.log
Acesss NethServer's Server-manager
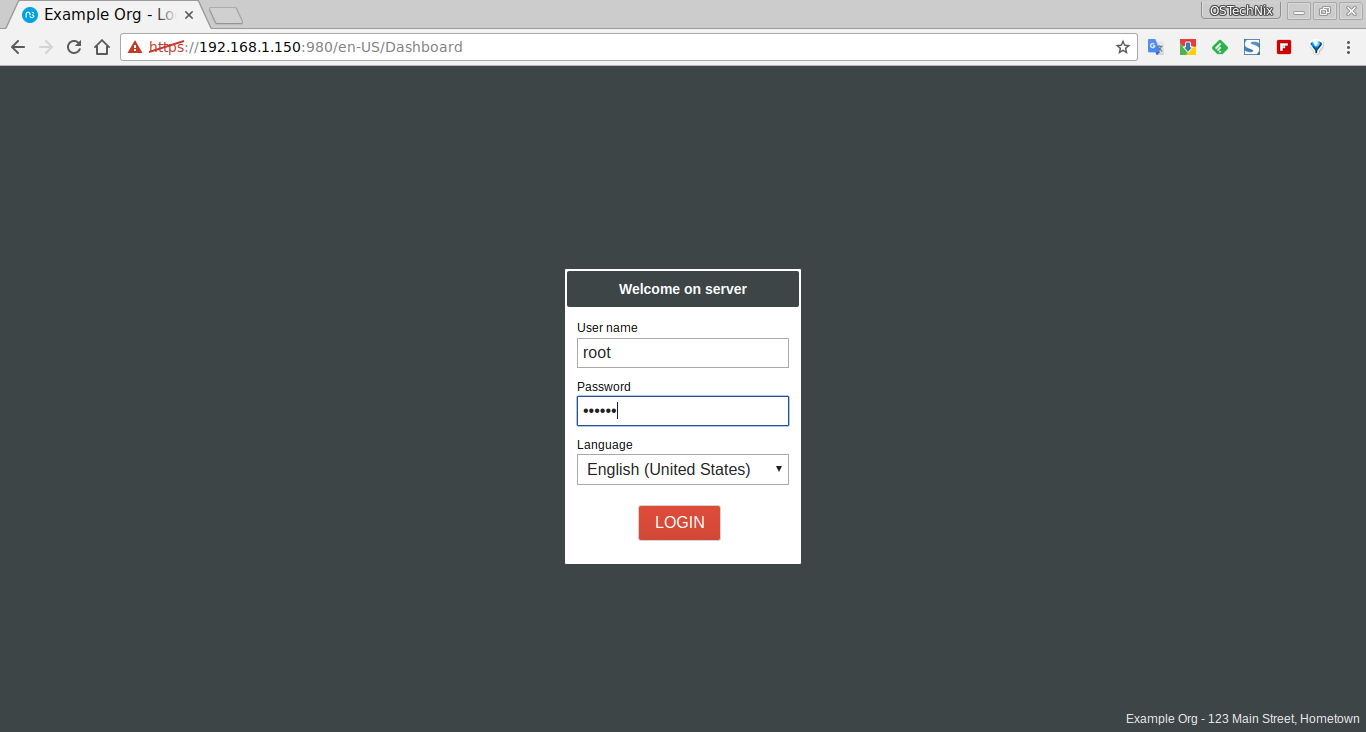
You can access the NethServer web interface by reaching the following URL(s) from your web browser.
- https://domain-name:980 or https://IP_Address:980
Log in as your root user and its password.
Click Next to continue.
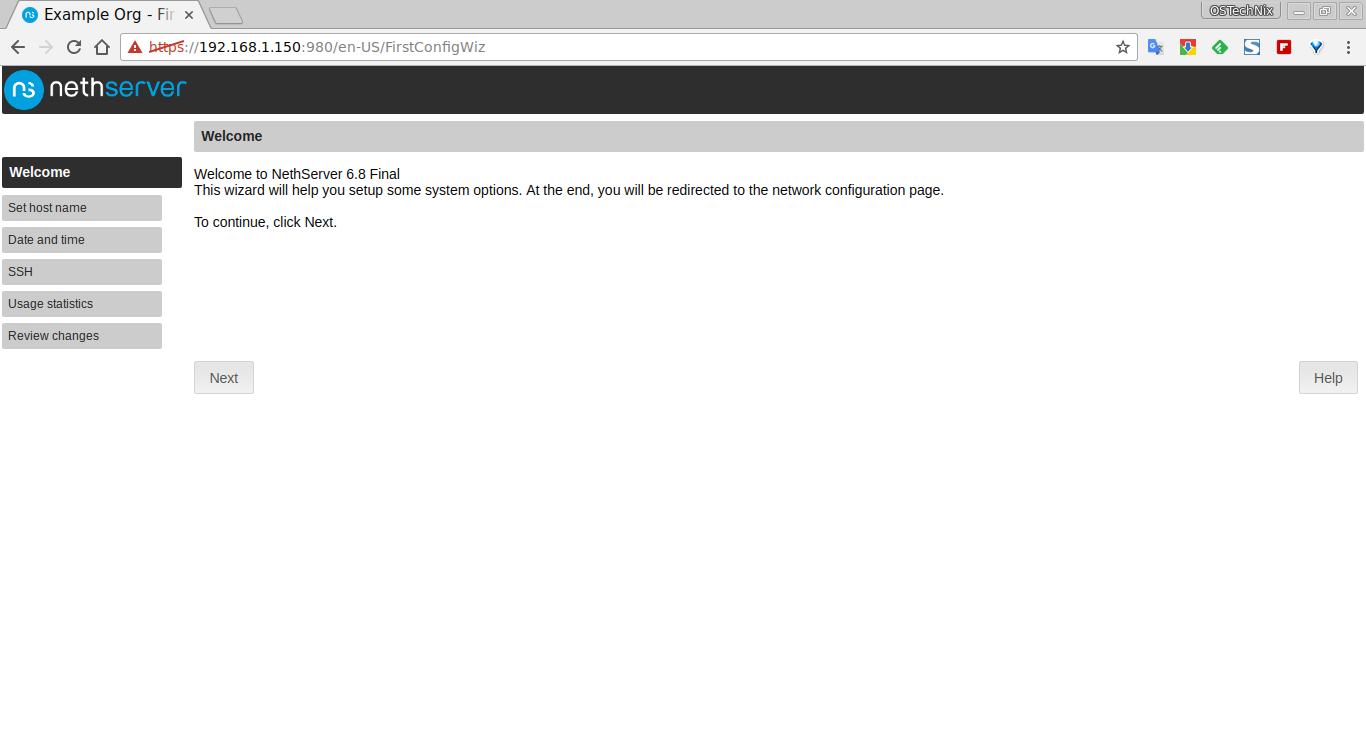
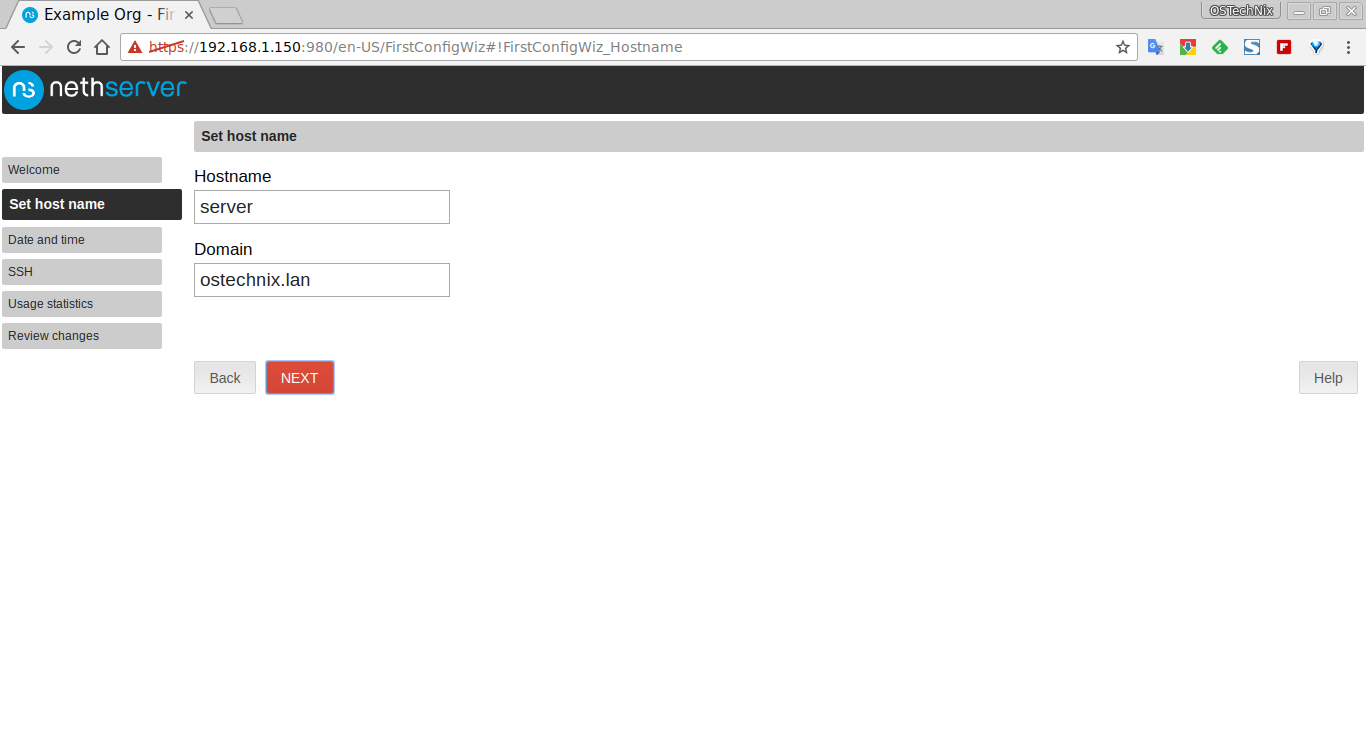
Enter your NethServer's hostname and domain name.
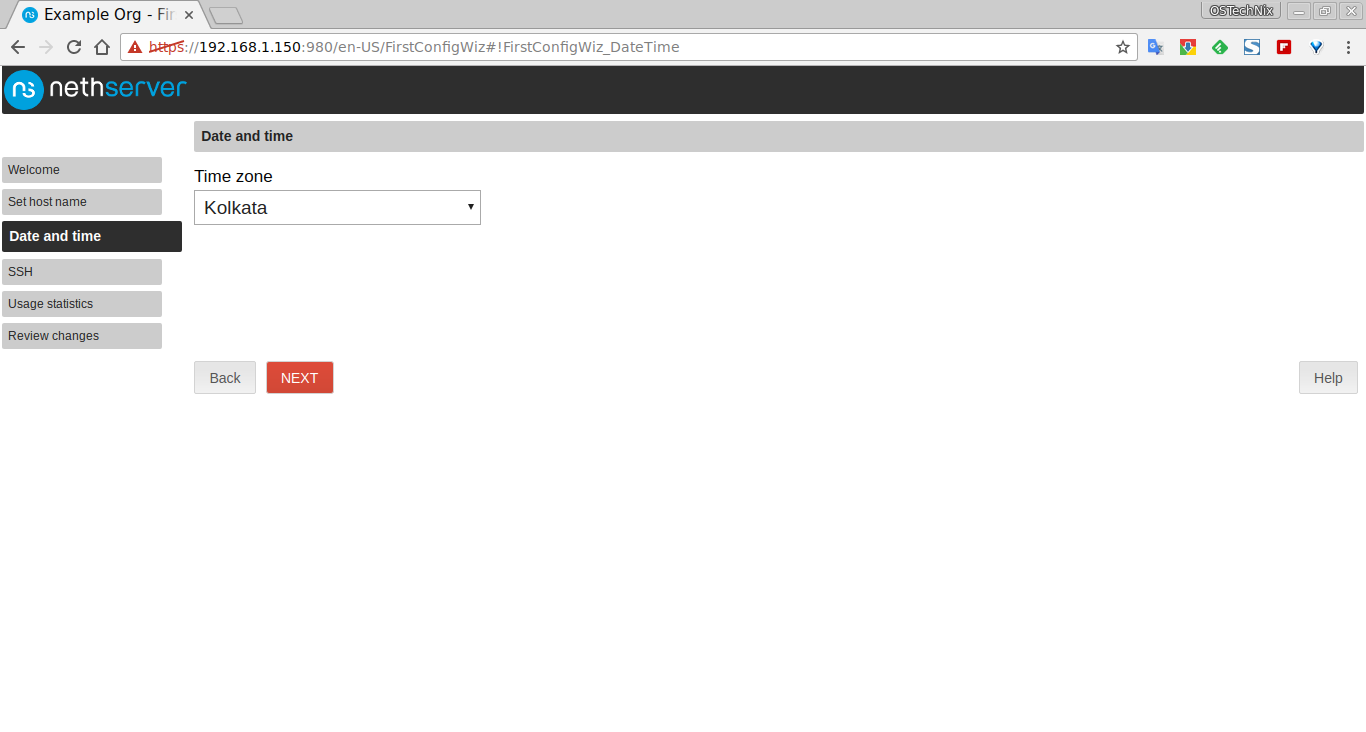
Enter your Time zone:
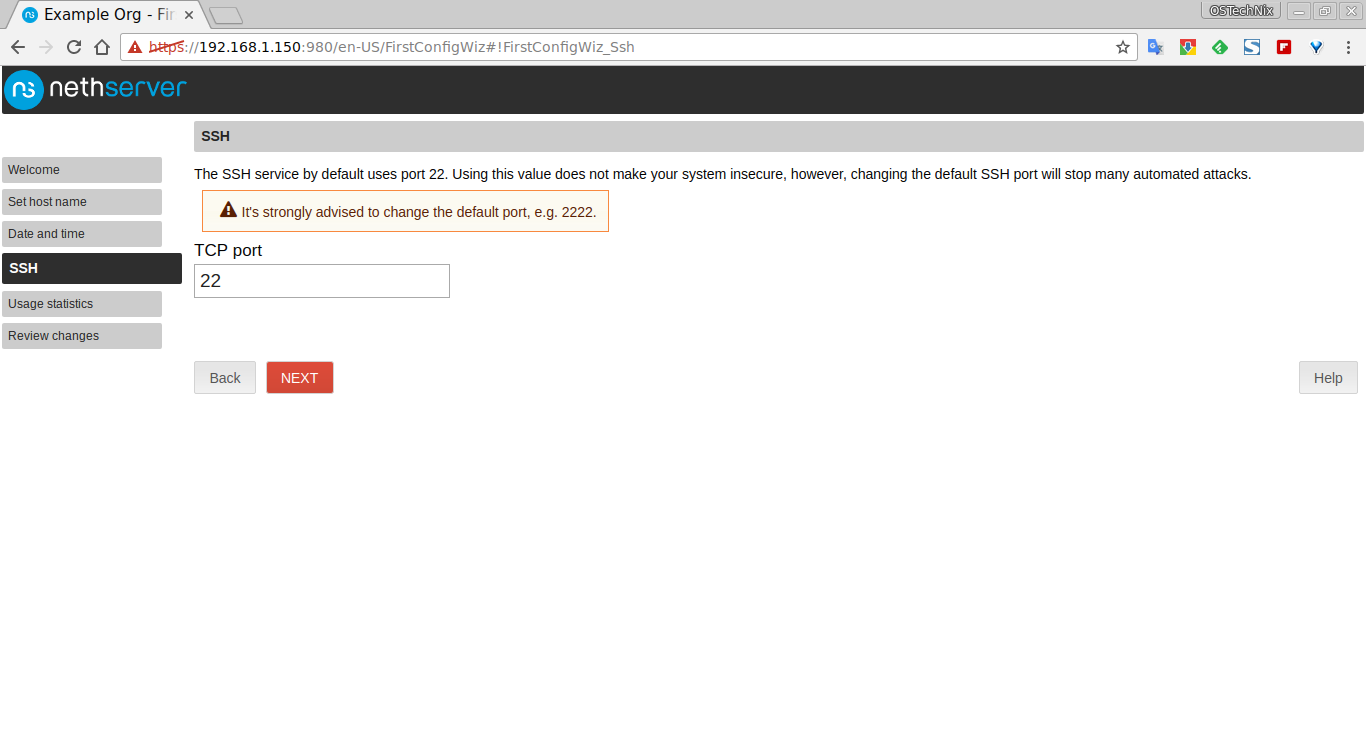
As we all know, the SSH service by default uses port 22. Using this value does not make your system insecure, however, changing the default SSH port will stop many automated attacks. Change to to any random port (don't forget the port no) and click Next.
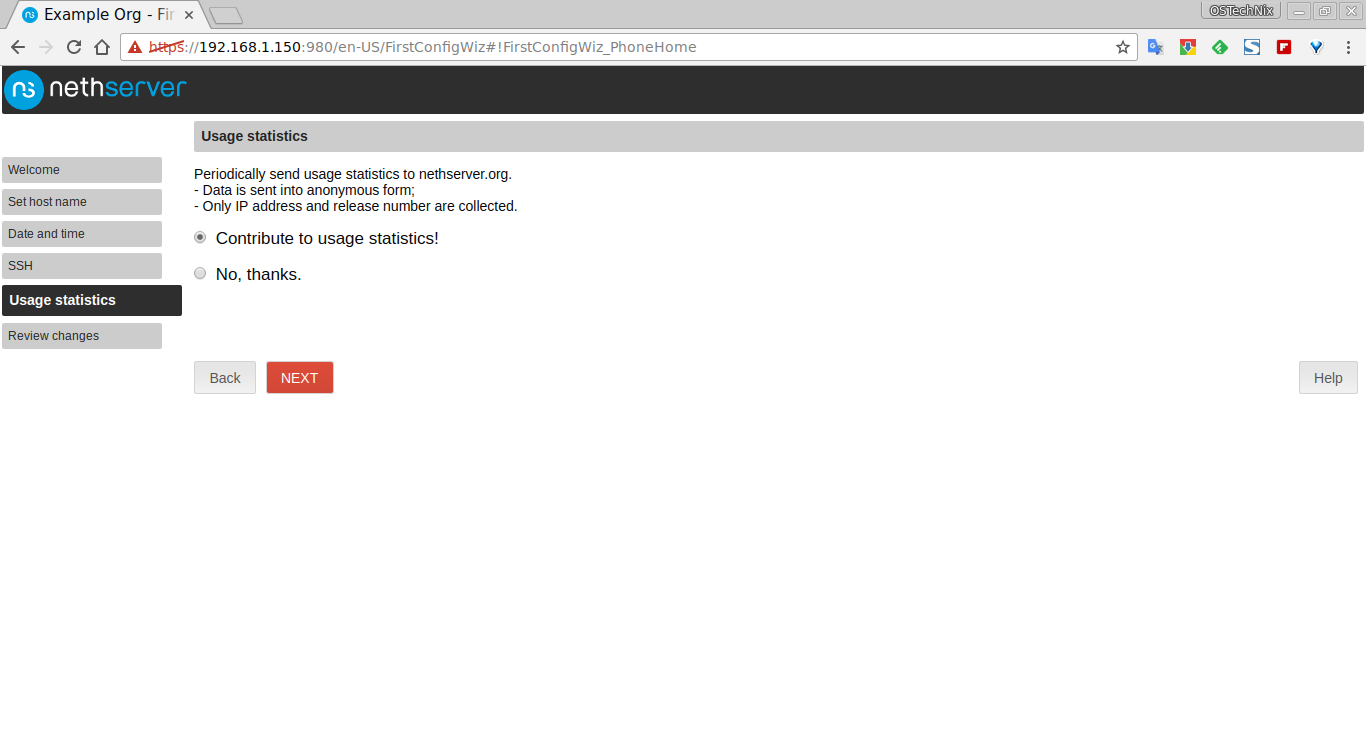
You can send your NethServer's usage statistics to developers if you like. The collected data will send sent as anonymous form. Only the IP address and release number will be collected.
Click Next to continue.
Finally, review the changes and click Next to continue.
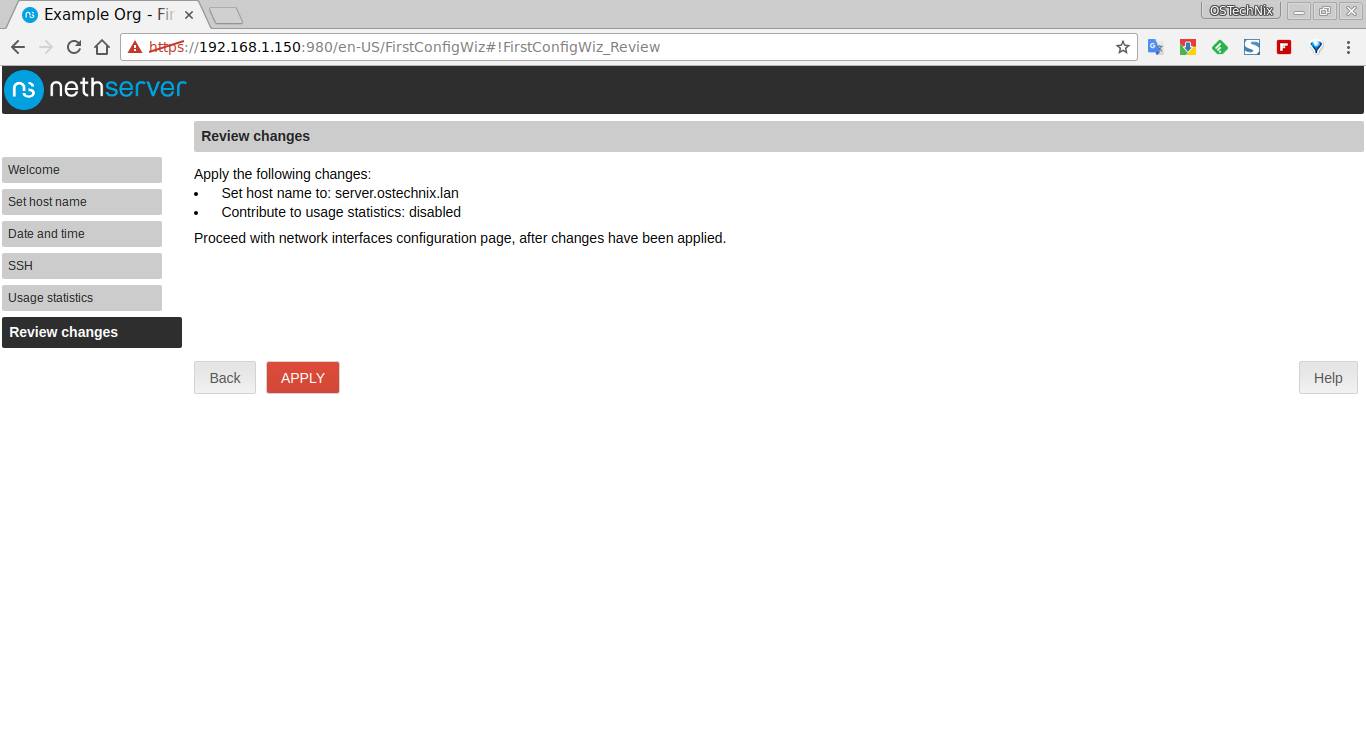
Congratulations! NethServer has been configured!
This is how NethServer's dashboard looks like.
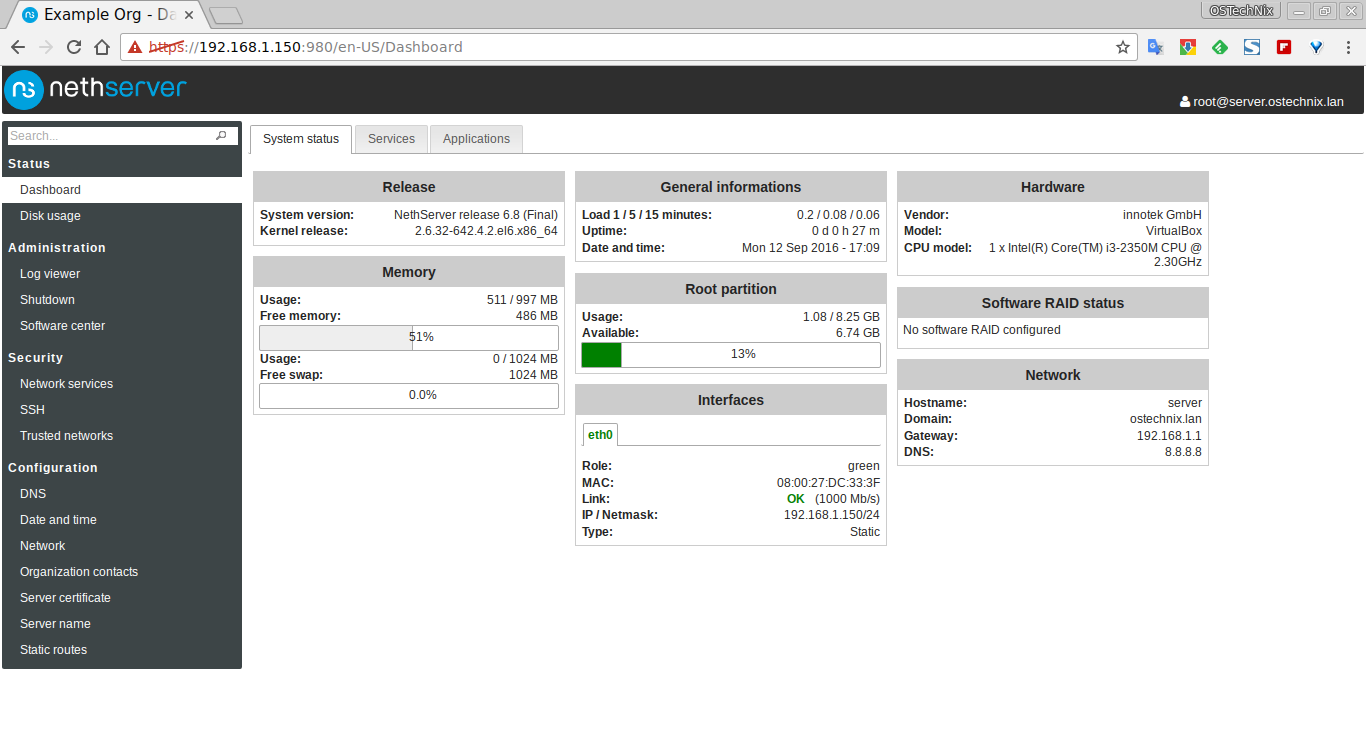
From here, you can do all administrative tasks, such as installing, removing, configuring modules, configure and manage network services, configure NethServer etc.
That's all for now folks. In our next article, we will see how to,
3 comments
Hi, I already have a centos 32bits installation with a lot of services. What kind of troubles can I get if I install nethserver over my centos? P.S. It’s good to find this info that I was looking for
You can’t install NethServer on CentOS 32 bit version. NethServer works on 64 bit platforms only.
thx mate