m23 is a free, open source software deployment and management system for Linux. Using m23, a system administrator can easily install and manage clients via a simple web-browser without much hassle. M23 supports Debian, Ubuntu, Kubuntu, Xubuntu, Linux Mint, Elementary OS, CentOS, Fedora, and openSUSE. The m23 clients can be installed with desktop environments such as KDE, GNOME, Unity, XFCE, LXDE, Pantheon, Cinnamon, and MATE. We can deploy a new client right from the m23 server dashboard, and also we can integrate the exiting clients to m23 server.
m23 has an integrated virtualization option, so that we can install and manage m23 virtual clients as the way we manage the normal clients. It supports mass installation. It means If you want to deploy large number of clients with similar set of software configuration, it is possible too. We can install or remove a software from a single or group of clients at once. It supports manual or automatic partitioning, and also supports software RAID levels 0, 1, 4, 5, 6 and 10.
M23 has built-in LDAP server to manage users. The central LDAP server can be easily managed via web-based LDAP client tool called 'phpLDAPAdmin'. The user's home directories will be stored in a NFS server in m23. So, there won't be any necessity to save user's files in the local hard drives. The users can login into any client systems, and access their files. Of course there are lot of features available in m23. For more details, refer the m23 website, which is given at the end of this guide.
Table of Contents
Install m23 using ISO
m23 is built on top of Debian operating system. So, we can either install m23 server as a standalone server using ISO or install it on an existing Debian OS.
In this tutorial, we will see both methods.Download the ISO from the following link.
After downloading it, create a bootable CD or bootable USB drive using that ISO.
Then, boot up your system using m23 software installation media.
You should see the following screen. Select the installation language and press ENTER to continue.
![m23 server [Running] - Oracle VM VirtualBox_001](https://ostechnix.com/wp-content/uploads/2016/03/m23-server-Running-Oracle-VM-VirtualBox_001.jpg)
Press OK to accept license agreement.
![m23 server [Running] - Oracle VM VirtualBox_002](https://ostechnix.com/wp-content/uploads/2016/03/m23-server-Running-Oracle-VM-VirtualBox_002.jpg)
Enter the password for the root user. The password will not be shown during typing, and the password is case-sensitive.
![m23 server [Running] - Oracle VM VirtualBox_003](https://ostechnix.com/wp-content/uploads/2016/03/m23-server-Running-Oracle-VM-VirtualBox_003.jpg)
Re-enter root user password.
![m23 server [Running] - Oracle VM VirtualBox_004](https://ostechnix.com/wp-content/uploads/2016/03/m23-server-Running-Oracle-VM-VirtualBox_004.jpg)
Enter the hostname for your m23 server.
![m23 server [Running] - Oracle VM VirtualBox_005](https://ostechnix.com/wp-content/uploads/2016/03/m23-server-Running-Oracle-VM-VirtualBox_005.jpg)
Enter IP address, subnet mask, gateway, broadcast address, and DNS server details for the m23 server.
![m23 server [Running] - Oracle VM VirtualBox_006](https://ostechnix.com/wp-content/uploads/2016/03/m23-server-Running-Oracle-VM-VirtualBox_006.jpg)
![m23 server [Running] - Oracle VM VirtualBox_007](https://ostechnix.com/wp-content/uploads/2016/03/m23-server-Running-Oracle-VM-VirtualBox_007.jpg)
![m23 server [Running] - Oracle VM VirtualBox_008](https://ostechnix.com/wp-content/uploads/2016/03/m23-server-Running-Oracle-VM-VirtualBox_008.jpg)
![m23 server [Running] - Oracle VM VirtualBox_009](https://ostechnix.com/wp-content/uploads/2016/03/m23-server-Running-Oracle-VM-VirtualBox_009.jpg)
![m23 server [Running] - Oracle VM VirtualBox_010](https://ostechnix.com/wp-content/uploads/2016/03/m23-server-Running-Oracle-VM-VirtualBox_010.jpg)
![m23 server [Running] - Oracle VM VirtualBox_011](https://ostechnix.com/wp-content/uploads/2016/03/m23-server-Running-Oracle-VM-VirtualBox_011.jpg)
Check the entered network details once, and If everything is ok, select YES and press ENTER to continue.
![m23 server [Running] - Oracle VM VirtualBox_012](https://ostechnix.com/wp-content/uploads/2016/03/m23-server-Running-Oracle-VM-VirtualBox_012.jpg)
Next, select the partition method i.e standard or expert mode. Be mindful that in standard mode, the entire hard drive will be wiped out after partitioning and formatting. Make sure you don't have any important files on your hard drive.
![m23 server [Running] - Oracle VM VirtualBox_013](https://ostechnix.com/wp-content/uploads/2016/03/m23-server-Running-Oracle-VM-VirtualBox_013.jpg)
Select YES and press ENTER to continue.
![m23 server [Running] - Oracle VM VirtualBox_014](https://ostechnix.com/wp-content/uploads/2016/03/m23-server-Running-Oracle-VM-VirtualBox_014.jpg)
Now, the installation wizard will start. This will take few minutes to complete depending upon your Internet connection. During installation, some files will downloaded and installed automatically. Sit back and grab a cup of coffee.
![m23 server [Running] - Oracle VM VirtualBox_015](https://ostechnix.com/wp-content/uploads/2016/03/m23-server-Running-Oracle-VM-VirtualBox_015.jpg)
After few minutes, you'll be asked to update m23 server online. Just select YES, and press ENTER to continue.
![m23 server [Running] - Oracle VM VirtualBox_016](https://ostechnix.com/wp-content/uploads/2016/03/m23-server-Running-Oracle-VM-VirtualBox_016.jpg)
Select OK to install grub bootloader to make m23 server bootable.
![m23 server [Running] - Oracle VM VirtualBox_017](https://ostechnix.com/wp-content/uploads/2016/03/m23-server-Running-Oracle-VM-VirtualBox_017.jpg)
Congratulations! Remove installation media and Press ENTER to complete m23 server installation.
![m23 server [Running] - Oracle VM VirtualBox_018](https://ostechnix.com/wp-content/uploads/2016/03/m23-server-Running-Oracle-VM-VirtualBox_018.jpg)
Log in as root user:
![m23 server [Running] - Oracle VM VirtualBox_019](https://ostechnix.com/wp-content/uploads/2016/03/m23-server-Running-Oracle-VM-VirtualBox_019.jpg)
Install m23 on Debian 8
The installation instructions are known to work in Debian 8 Jessie. I am not sure about other Debian versions, and its derivatives.
Like all Linux distributions, we must update and upgrade the Debian server before installing any software. To do so, run the following command as root user:
# apt-get update && apt-get upgrade
Import and add m23 GPG key using command:
# wget -T1 -t1 -q http://m23.sourceforge.net/m23-Sign-Key.asc -O - | apt-key add -
Edit /etc/apt/sources.list file and add m23 repository:
# nano /etc/apt/sources.list
Add the following line:
deb http://skylink.dl.sourceforge.net/project/m23/m23inst ./
Save and close the file.
Update repositories using command:
# apt-get update
Finally, install m23 server using command:
# apt-get install m23
And follow the onscreen instructions and accept default values. Enter the root user password, set network settings such as IP address, gateway, DNS server details during installation.
That's it. m23 server has been successfully installed.
I personally recommend to use m23 installation ISO for fresh installation.
Access m23 dashboard
As you already know, m23 is text-only server operating system. However, you can access m23 server dashboard via a web browser from any remote clients.
To do so, navigate to: http://m23-IP-address/ from a client system.
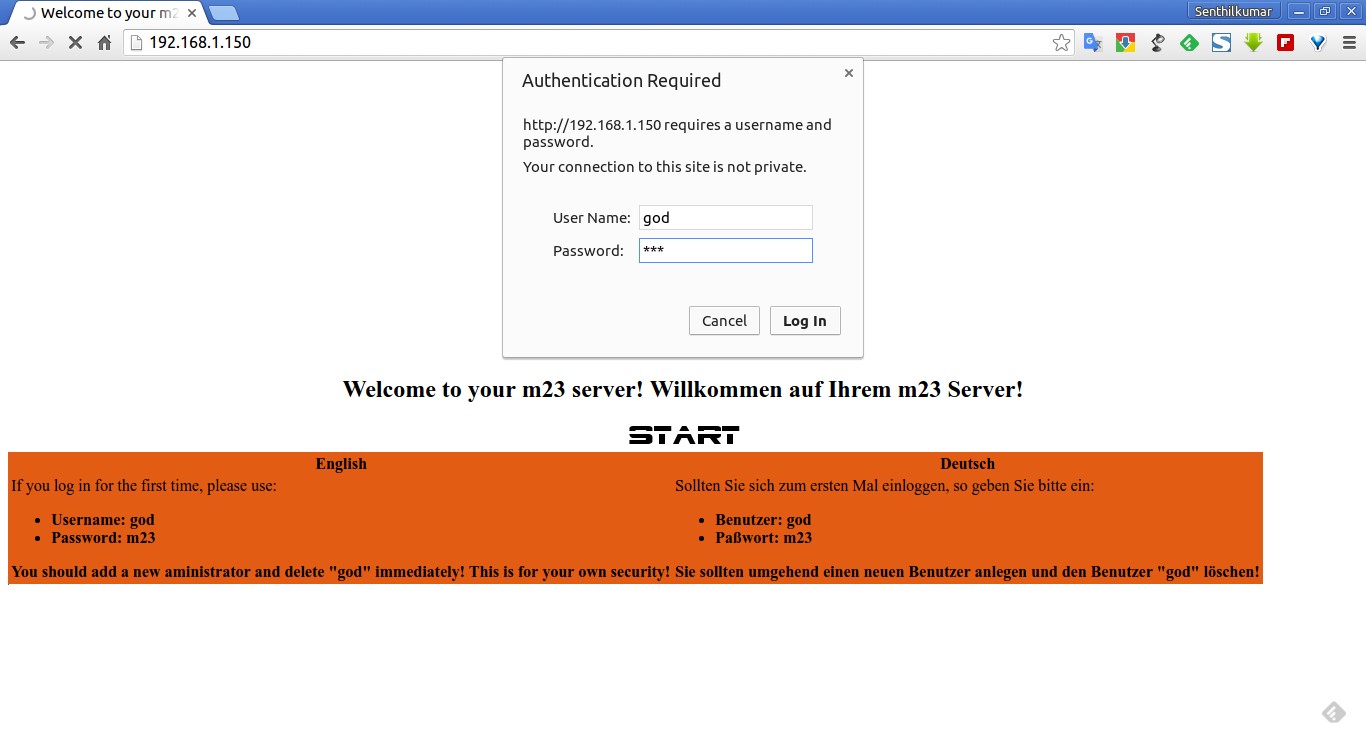
You'll be pleased with the following screen. Enter the default user name as 'god' and its password as shown in the below screen. You should immediately create a new administrator and delete the default admin account 'god' to tighten your security.
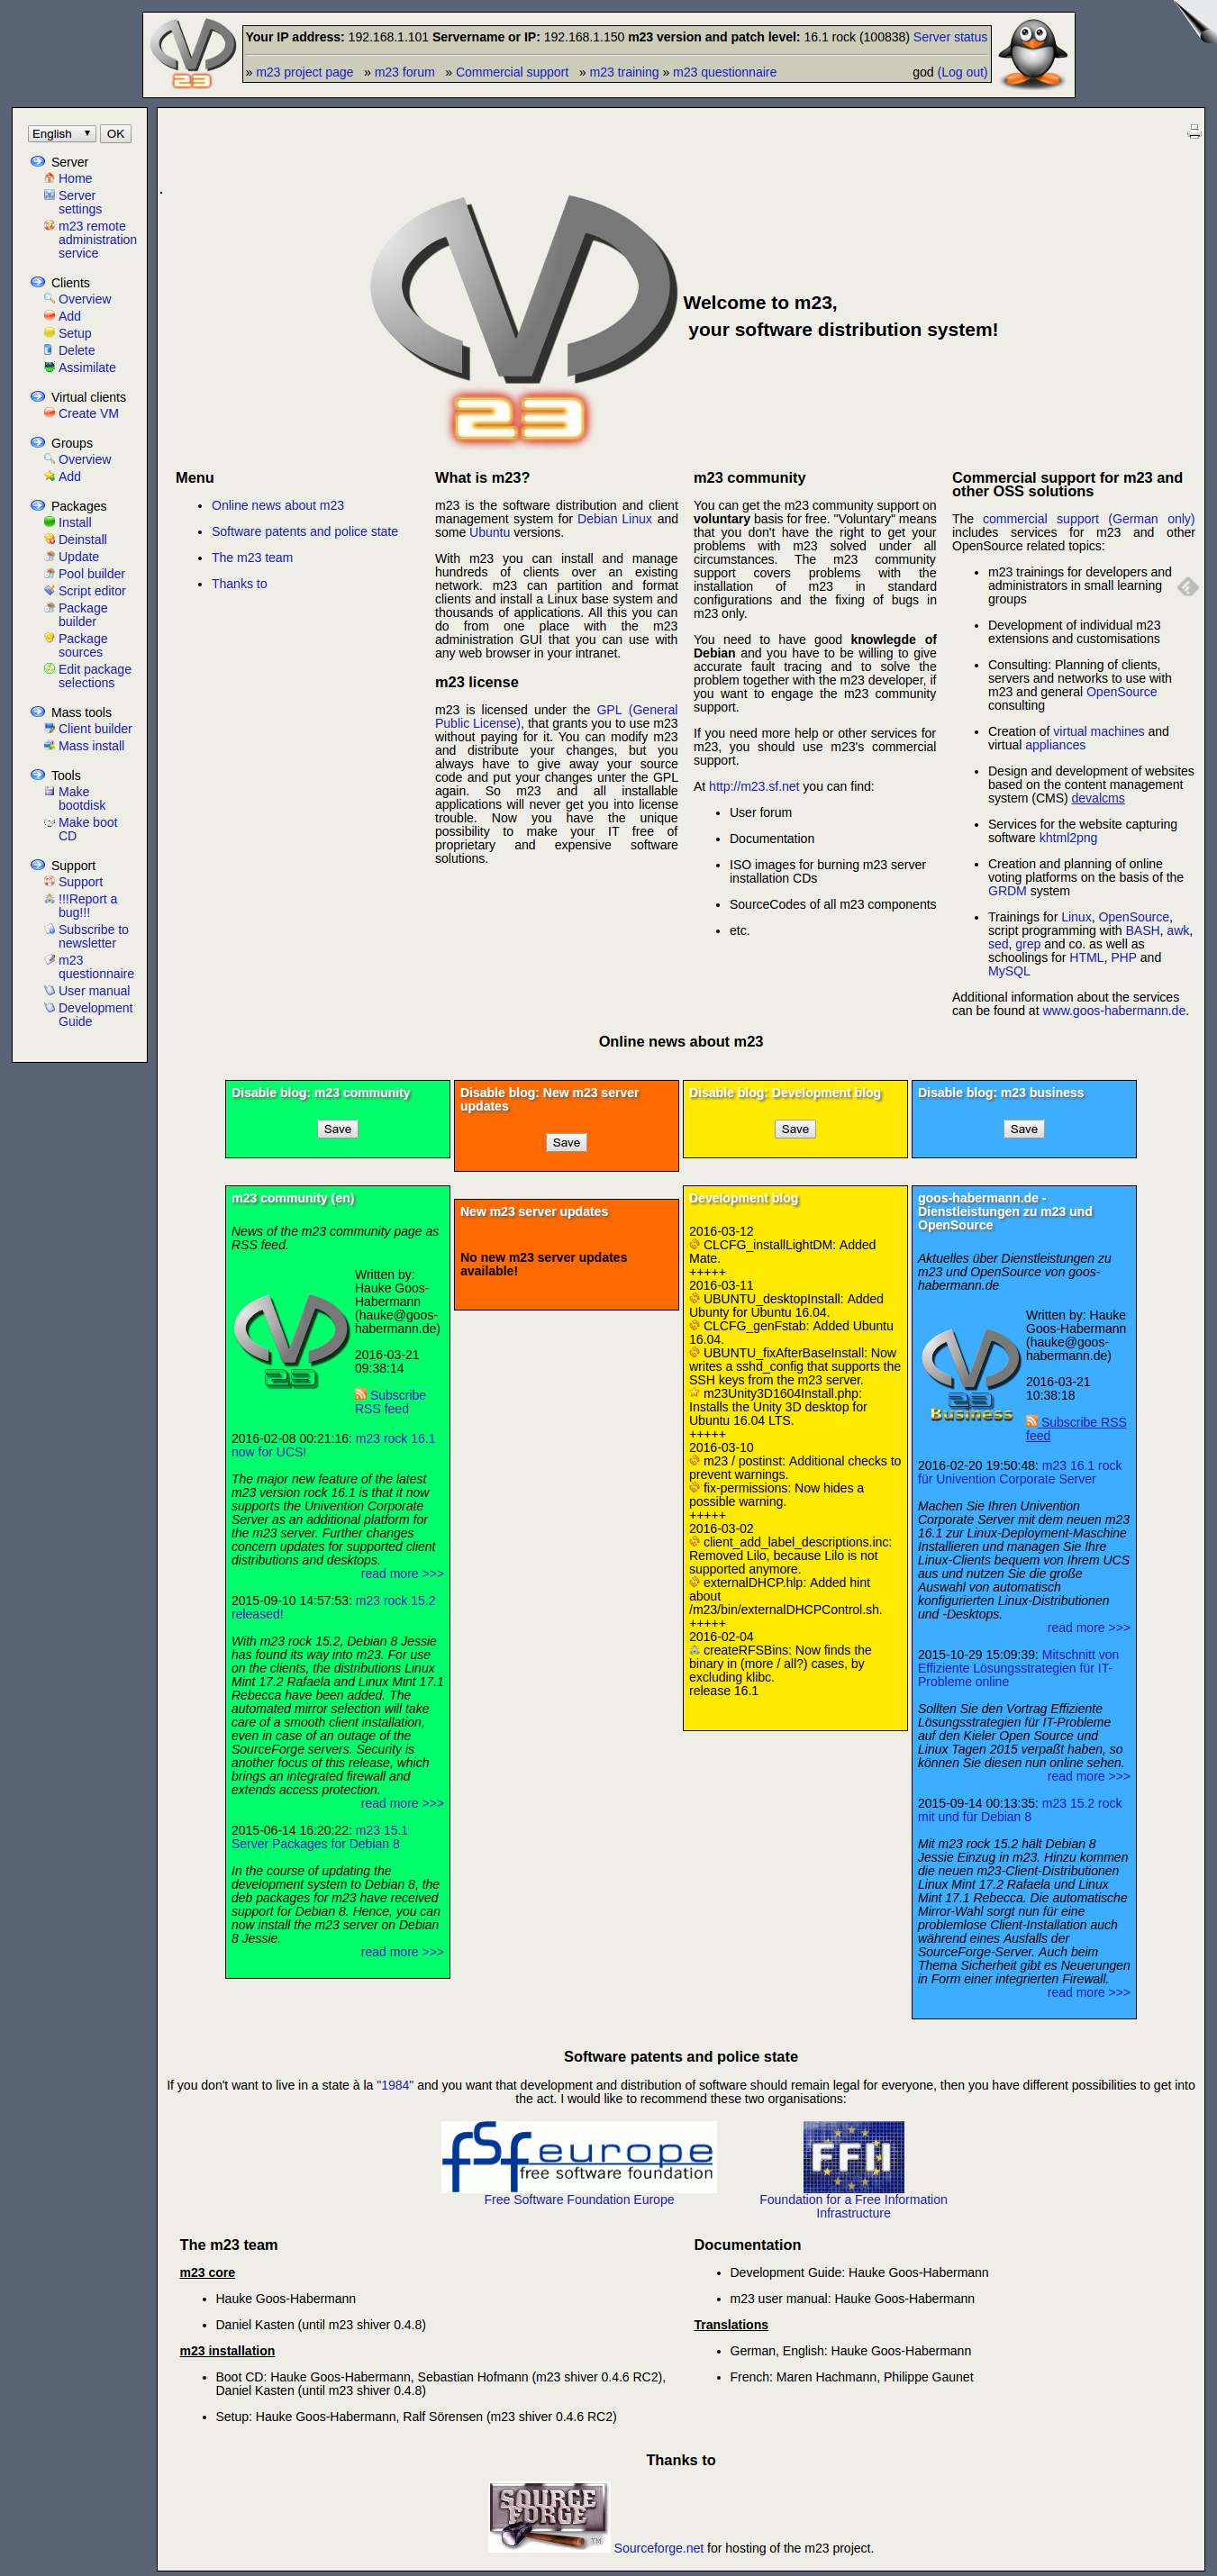
Here it is how my m23 admin dashboard looks like.
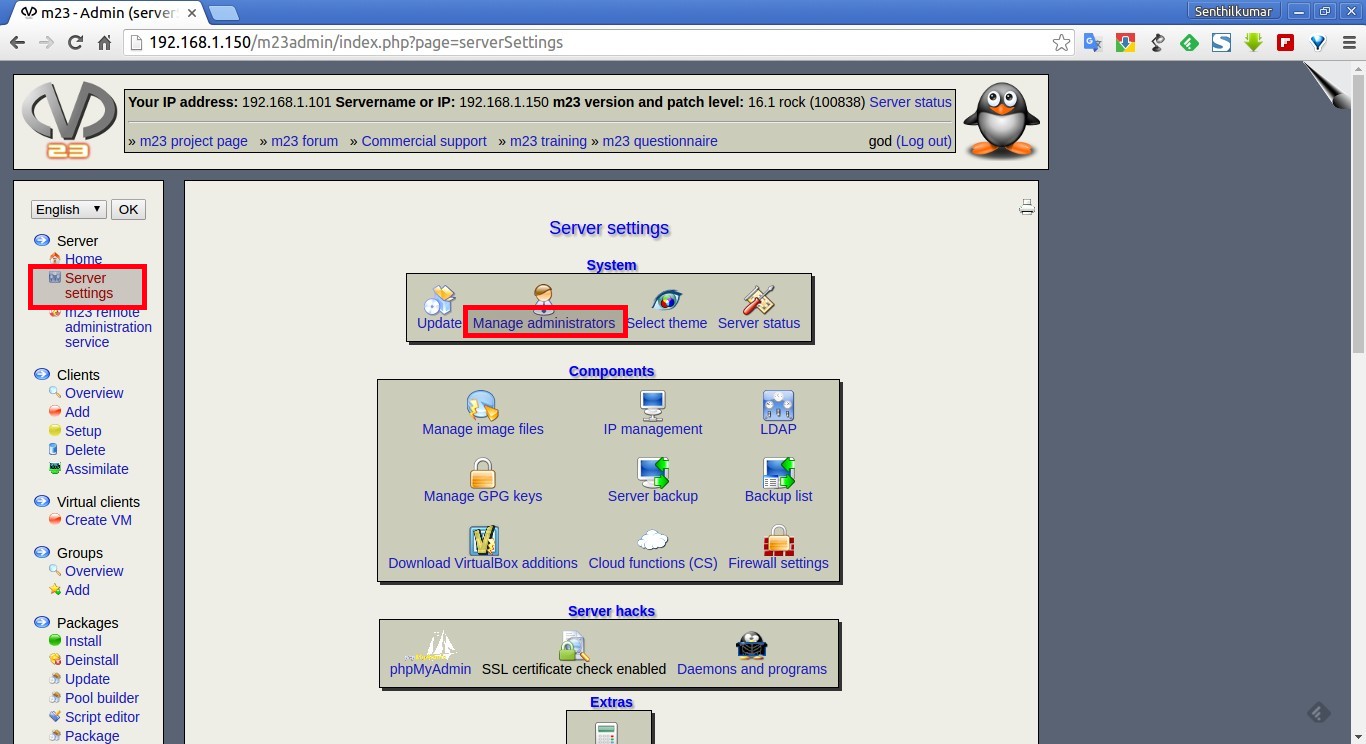
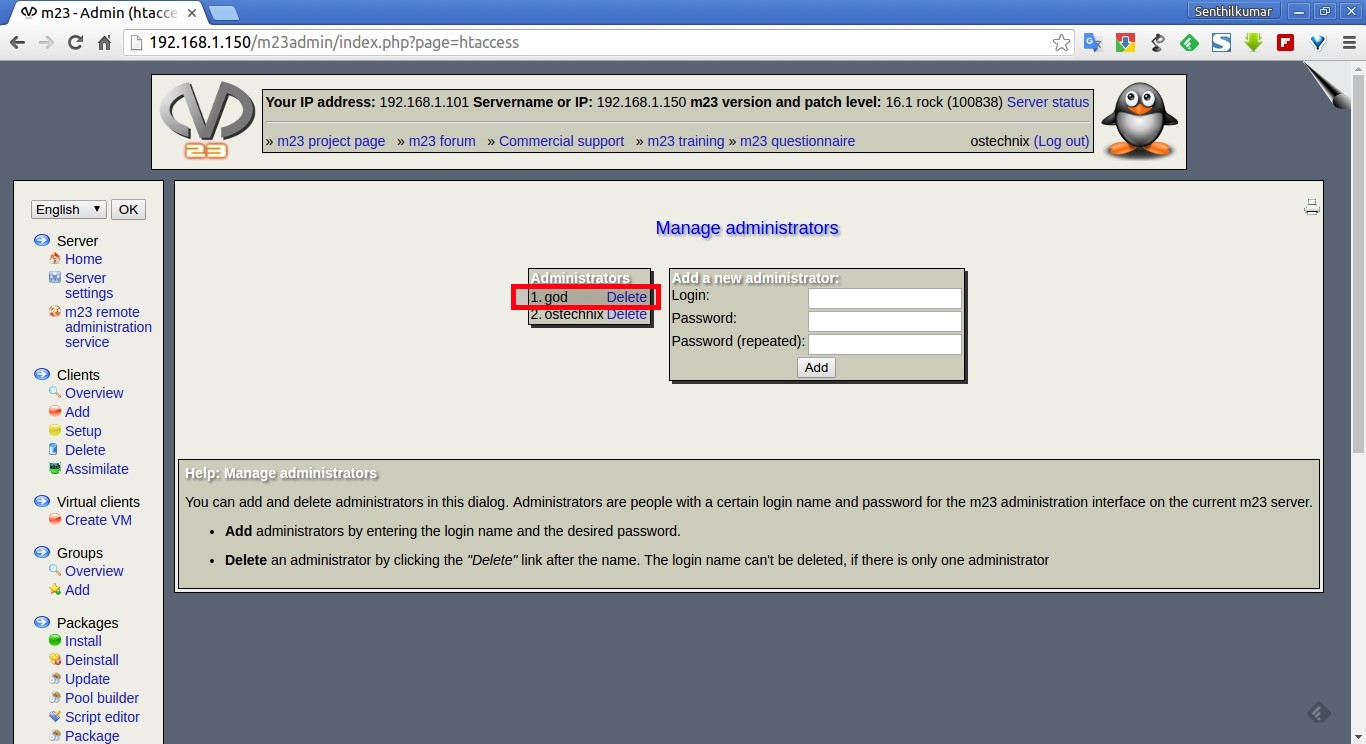
The first action that we should after log in to the admin console is to create a new admin user and delete the default admin account 'god'.
To do that, go to Server settings -> Manage administrators.
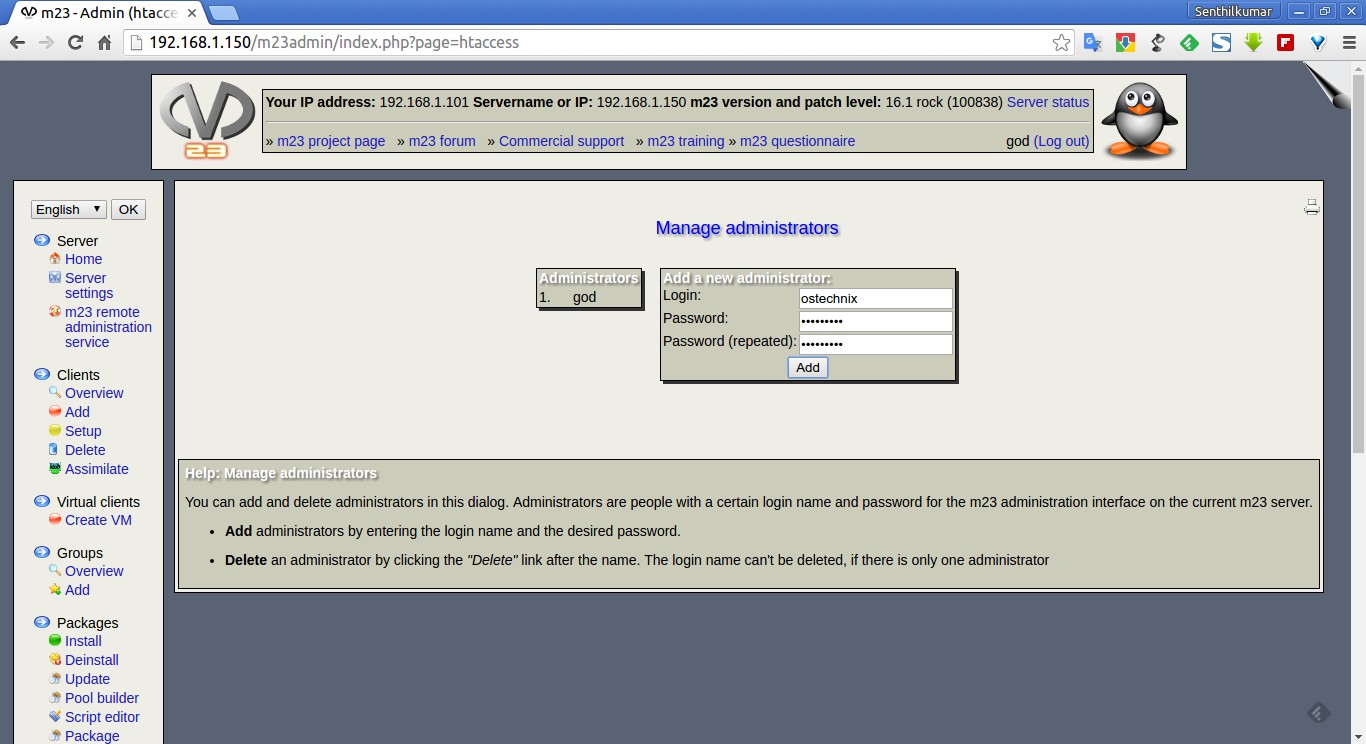
Enter the username and password for new admin account.
Then, log out from the 'god' account, and log in as new admin user which we created in the above step.
Again, Go to Server settings -> Manage administrators and delete the default admin account 'god'.
One of nice thing that the m23 developers have done is they have integrated the help wiki section for each section under the respective tab itself. For example, if you don't know what are the options in Server settings section and what is this section for, just click on it, and scroll down a little bit, you'll there see the detailed help guide.
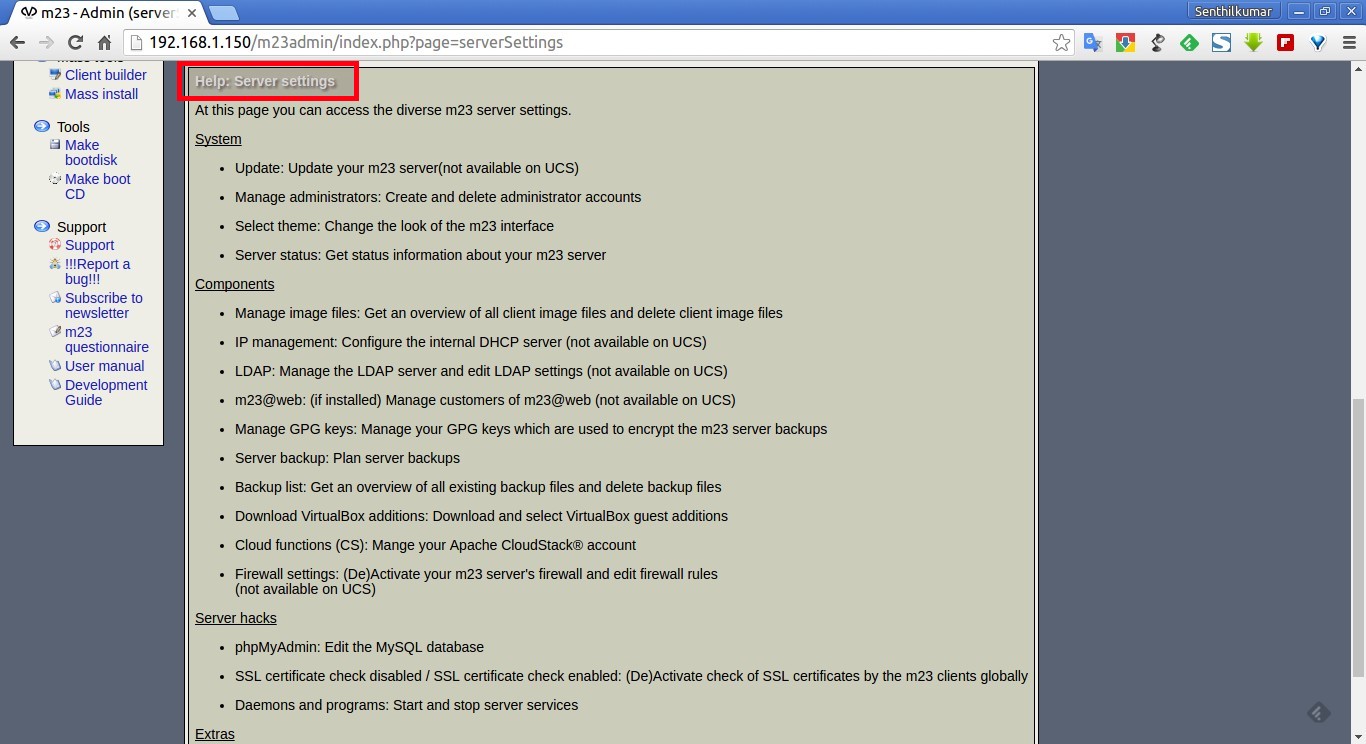
You don't have to go anywhere for any guidance. Everything is available in the dashboard itself under the respective tab.
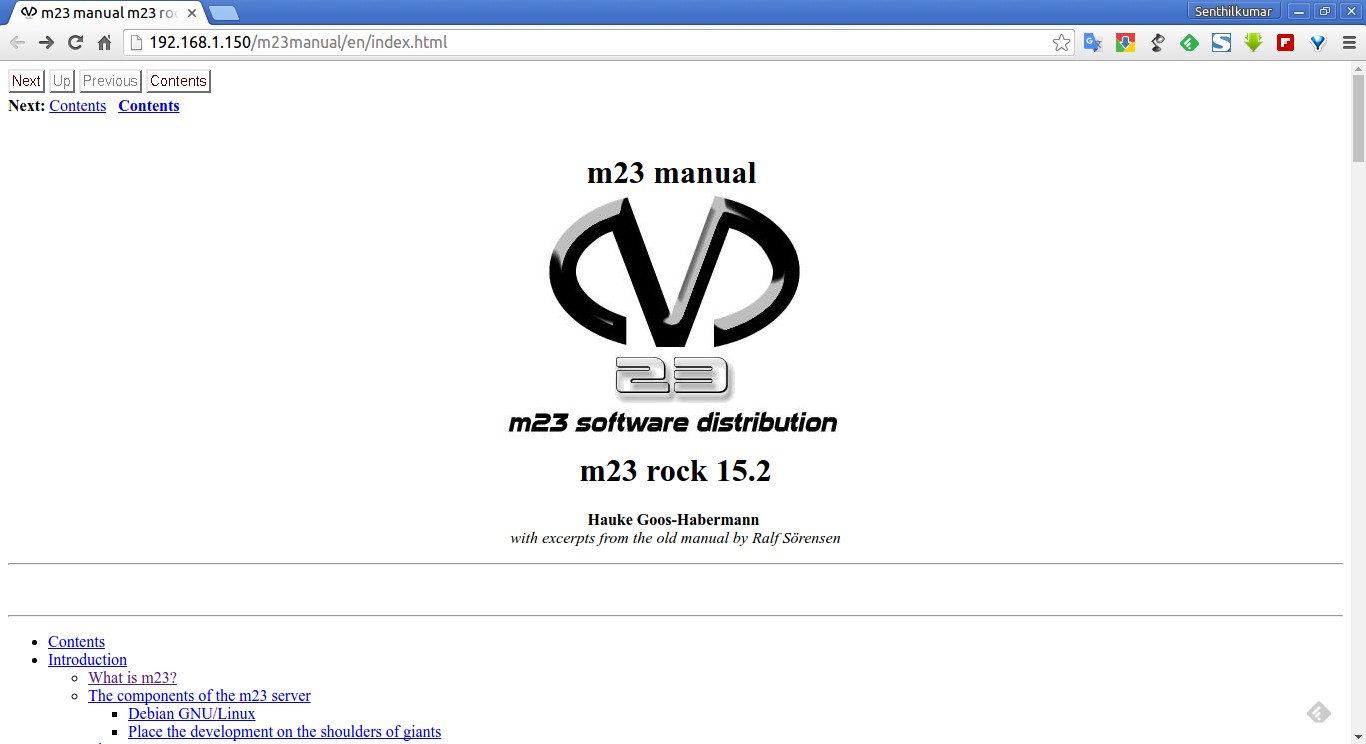
Also, there is a comprehensive user manual under Support section on the left pane. Just click on it, and go through the guide if you have any questions.

And, that's all for now, folks. In our next, we will see how to add and manage clients from m23 server. Until then, stay tuned with OSTechNix, and share this guide in your social, professional networks to help us grow.
Cheers!
Reference link:
Thanks for stopping by!
Help us to help you:
- Subscribe to our Email Newsletter : Sign Up Now
- Support OSTechNix : Donate Via PayPal
- Download free E-Books and Videos : OSTechNix on TradePub
- Connect with us: Facebook | Twitter | Google Plus | LinkedIn | RSS feeds
Have a Good day!!