Secure Shell (SSH) is an essential tool for remote system administration, allowing users to securely connect to and manage Linux servers. If you're using the latest Fedora version, setting up SSH is straightforward. This guide will walk you through the steps to set up and configure SSH on Fedora Linux 43 and older versions.
Table of Contents
Why Use SSH?
SSH enables secure, encrypted communication between systems over an unsecured network. It replaces older, insecure protocols like Telnet and FTP.
With SSH, you can:
- Remotely manage Fedora servers.
- Transfer files securely (using
scporsftp). - Automate administrative tasks.
Steps to Configure SSH on Fedora Linux 43
Setting up SSH on a Fedora system involves the following steps:
1. Install the OpenSSH Server
Fedora usually comes with OpenSSH pre-installed. However, if it’s missing, install it using:
sudo dnf install -y openssh-server
2. Enable and Start the SSH Service
After installation, start the SSH service and enable it to run at boot:
sudo systemctl enable --now sshd
To verify that SSH is running:
systemctl status sshd
You should see active (running) in green in the output.
● sshd.service - OpenSSH server daemon
     Loaded: loaded (/usr/lib/systemd/system/sshd.service; enabled; preset: disabled)
    Drop-In: /usr/lib/systemd/system/service.d
             └─10-timeout-abort.conf
     Active: active (running) since Wed 2025-11-26 16:10:28 IST; 35min ago
 Invocation: 918b3b0dc7d749b0b504b0410617b73b
       Docs: man:sshd(8)
             man:sshd_config(5)
   Main PID: 867 (sshd)
      Tasks: 1 (limit: 9459)
     Memory: 1.7M (peak: 2M)
        CPU: 11ms
     CGroup: /system.slice/sshd.service
             └─867 "sshd: /usr/sbin/sshd -D [listener] 0 of 10-100 startups"

Nov 26 16:10:28 fedora systemd[1]: Starting sshd.service - OpenSSH server daemon...
Nov 26 16:10:28 fedora sshd[867]: Server listening on 0.0.0.0 port 22.
Nov 26 16:10:28 fedora systemd[1]: Started sshd.service - OpenSSH server daemon.
Nov 26 16:10:28 fedora sshd[867]: Server listening on :: port 22.

3. Configure the Firewall
Fedora uses firewalld to manage firewall rules. Open the SSH port with:
sudo firewall-cmd --permanent --add-service=ssh
sudo firewall-cmd --reload
Confirm the rule is applied:
sudo firewall-cmd --list-services
You should see ssh in the list.
dhcpv6-client samba-client ssh
4. Set Up SSH Key Authentication (Recommended)
For added security, use SSH keys instead of passwords.
Warning: Do not disable password authentication until you confirm SSH key login works! Otherwise, you may lock yourself out of the server if keys aren’t set up correctly.
4.1. Generate SSH Key Pair
Generate a key pair on your local machine (not the Fedora server):
ssh-keygen -t ed25519 -C "your-email@example.com"
Press Enter to accept defaults. Optionally, set a passphrase for extra security.
Generating public/private ed25519 key pair.
Enter file in which to save the key (/home/ostechnix/.ssh/id_ed25519):
Enter passphrase (empty for no passphrase):
Enter same passphrase again:
Your identification has been saved in /home/ostechnix/.ssh/id_ed25519
Your public key has been saved in /home/ostechnix/.ssh/id_ed25519.pub
The key fingerprint is:
SHA256:smI0vudP4BHRayrjGXZZghHhE6h8qin9jgifPs+6JDQ sk@ostechnix.local
The key's randomart image is:
+--[ED25519 256]--+
|   .+o..         |
|  .... ..        |
|..  oo.  .       |
|.. .....+        |
| Eo o +*S        |
|...o=o+=         |
|+o.o+*o .        |
|==o=oo..         |
|o.BB*o...        |
+----[SHA256]-----+
4.2. Copy SSH Public Key to Fedora
There are two ways. You can use the ssh-copy-id command. It is the easiest way. Alternatively, you can copy the public key manually.
Copy SSH Public Key using ssh-copy-id Command:
Copy the public key to the Fedora system:
ssh-copy-id yourusername@your-fedora-ip
Example:
ssh-copy-id ostechnix@192.168.1.43
Here, ostechnix is the username and 192.168.1.43 is the IP address of my Fedora Linux system.
You’ll need to enter your Fedora system's password once for this step.
/usr/bin/ssh-copy-id: INFO: attempting to log in with the new key(s), to filter out any that are already installed
/usr/bin/ssh-copy-id: INFO: 2 key(s) remain to be installed -- if you are prompted now it is to install the new keys
ostechnix@192.168.1.43's password:

Number of key(s) added: 2

Now try logging into the machine, with:   "ssh 'ostechnix@192.168.1.43'"
and check to make sure that only the key(s) you wanted were added.
Copy SSH Public key Manually:
You can also manually add the public key using this command:
cat ~/.ssh/id_ed25519.pub | ssh yourusername@your-fedora-ip "mkdir -p ~/.ssh && cat >> ~/.ssh/authorized_keys"
Ensure proper file permissions:
ssh yourusername@your-fedora-ip "chmod 600 ~/.ssh/authorized_keys && chmod 700 ~/.ssh"
Login to Fedora:
Now, test SSH key login (Before Disabling Passwords!):
ssh yourusername@your-fedora-ip
If successful, you'll log in without a password. If it fails, check ~/.ssh/authorized_keys on the server and retry ssh-copy-id.
Now you can safely disable password authentication (if using SSH keys).
Note: Do this only after confirming key login works.
First, backup the original configuration file in your fedora system.
sudo cp /etc/ssh/sshd_config /etc/ssh/sshd_config.bak
Next, edit /etc/ssh/sshd_config and set:
PasswordAuthentication no
Save and exit, then restart SSH:
sudo systemctl restart sshd
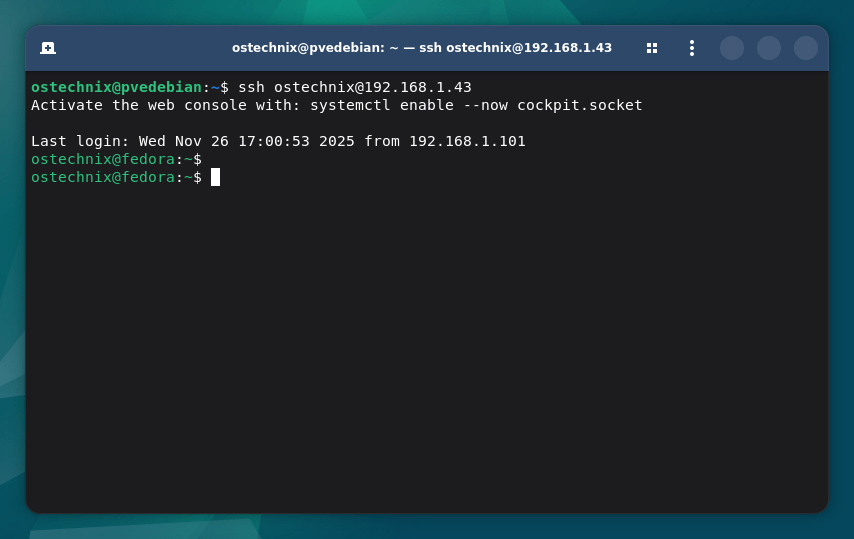
5. Connect to Your Fedora System via SSH
Once SSH is configured, connect using:
ssh yourusername@your-fedora-ip
Example:
ssh ostechnix@192.168.1.43
6. Secure Your SSH Configuration
To enhance SSH security, you may need to do the following recommended security enhancements.
Edit the SSH configuration file in your Fedora system:
sudo nano /etc/ssh/sshd_config
1. Disable root login
Find the following line:
#PermitRootLogin yes
And set its value as no.
PermitRootLogin no
2. Allow specific users
AllowUsers yourusername
7. (Optional) Change the Default SSH Port on Fedora
For additional security, change the default SSH port (default is 22):
sudo nano /etc/ssh/sshd_config
Find the following line:
#Port 22
Uncomment it and set a different port of your choice:
Port 2222
Make sure the port is free and is not being currently used by other services.

Save the file and close it.
Update the firewall:
sudo firewall-cmd --permanent --add-port=2222/tcp
sudo firewall-cmd --reload
Restart SSH service:
sudo systemctl restart sshd
If SSH is running on a non-default port, SELinux will block it unless explicitly allowed.
Check the current SELinux policy for SSH:
sudo semanage port -l | grep ssh
If your custom port (e.g., 2222) is missing, add it:
sudo semanage port -a -t ssh_port_t -p tcp 2222
Restart SSH and reload SELinux policies:
sudo systemctl restart sshd
sudo restorecon -v /etc/ssh/sshd_config
Verify that SSH is listening on the new port:
sudo ss -tlnp | grep sshd
It will list the allowed ssh ports:
LISTEN 0      128          0.0.0.0:2222       0.0.0.0:*    users:(("sshd",pid=4999,fd=6))
LISTEN 0      128             [::]:2222          [::]:*    users:(("sshd",pid=4999,fd=7))
Connect using the new port:
ssh -p 2222 yourusername@your-fedora-ip

Locked Out? Re-enable SSH Password Authentication
Let us say, you disabled the password authentication before properly setting up key-based authentication. You're now locked out of your Fedora system. How to re-enable the Password authentication? It is easy!
Access the Server via Console or Recovery Mode
If your server is a physical machine, use a keyboard and monitor to access it directly. If it is a VPS or cloud instance, check if your hosting provider offers a web-based console (e.g., through a control panel).
Once you have console access, proceed with the following steps:
Boot into Rescue Mode
Restart the system and, at the GRUB menu, press e to edit the boot entry.
Find the line that starts with linux or linux16, and add the following at the end of the line:
systemd.unit=rescue.target
Press Ctrl + X to boot with these options.
Once you are in rescue mode, you will have root shell access.
Re-enable SSH Authentication
Now, modify the SSH configuration file:
nano /etc/ssh/sshd_config
Find and change the following lines:
PasswordAuthentication yes
PubkeyAuthentication yes
Save and exit (Ctrl + X, then Y, then Enter).
Restart SSH:
systemctl restart sshd
Add a New SSH Key (Optional)
If you intend to use key-based authentication, ensure your public key is in the ~/.ssh/authorized_keys file:
mkdir -p ~/.ssh
echo "your-public-key-here" >> ~/.ssh/authorized_keys
chmod 600 ~/.ssh/authorized_keys
chmod 700 ~/.ssh
Reboot and Test SSH Access
Exit the rescue mode and reboot:
reboot
Try logging in via SSH:
ssh user@your-fedora-ip
Conclusion
Setting up SSH on Fedora is an important step for remote access and server management. By securing your SSH configuration, you can prevent unauthorized access and improve system security.
Read Next:
4 comments
all good info especially for a beginner. but the one area you didn’t dive into was configuring things so that your login password decrypts your private keys at the start of a login session and makes them available to all processes in that session via ssh-agent. the details depend on your desktop choice. covering KDE (my fav) and GNOME would suffice. round 2?
Noted. I will cover some ssh-agent related guides in future. Thanks for your appreciation and comment.
ed25519 doesn’t work in FIPS environments.
Thanks for the heads up.