In this detailed tutorial, we explain how to build a fully disposable WordPress multisite lab on Linux to safely practice every WP-CLI command. This hands-on guide includes full wordpress multisite setup, multisite conversion from single site, standalone sites, and complete cleanup steps.
Reading time: ~15 minutes
Level: Beginner to Intermediate
Works on: Debian, Ubuntu, Linux Mint, Fedora, RHEL, AlmaLinux, Rocky Linux
Last verified and updated: May 30, 2026
Part 4 of 4 in the WP-CLI series
Table of Contents
Why You Need a Disposable WordPress Multisite Lab
The fastest way to learn WP-CLI is to use it, not just read about it. However, running unfamiliar commands on a live site is risky. One wrong wp db reset or a mistyped search-replace can wipe data instantly with no undo.
A disposable wordpress lab solves this completely. You get a real, fully functional WordPress environment running entirely on your local machine. You can break things intentionally, rebuild in seconds, and repeat the same command ten times until it feels natural. Nothing you do here affects any real site.
Moreover, because the entire setup runs on your local filesystem, you do not need a domain name, a hosting account, or an internet connection to practice (except for installing necessary software). Everything stays on your machine until you decide to remove it.
What You Will Have by the End
By the time you finish this guide, you will have:
- A fully working WordPress multisite network running locally at
http://localhost:8000 - Two practice subsites at
http://localhost:8000/client1andhttp://localhost:8000/client2 - A separate standalone WordPress site running at
http://localhost:8001 - WP-CLI installed and working across all environments
- A clean removal process that wipes everything when you are done
What You Need Before You Start
This guide focuses entirely on the lab setup. It does not repeat the full prerequisites explanation here. Before you start, make sure you have:
- A Linux desktop or server (Debian, Ubuntu, Fedora, RHEL, AlmaLinux, or Rocky Linux)
- A terminal with sudo access
- Basic comfort with the command line
If you are brand new to WP-CLI and have not yet read the full requirements and installation background, start with the WP-CLI Complete Guide first. That guide covers PHP version requirements, required extensions, SSH access, and database setup in detail. Come back here once you are familiar with the basics.
Note: This guide uses the built-in PHP development server (php -S) for local testing. This server is for practice only. Never use it on a production environment.
Step 1: Install Required Packages
First, install PHP, MariaDB, and the supporting tools your lab needs. Pick the commands for your Linux distribution.
Fedora / RHEL / AlmaLinux / Rocky Linux:
sudo dnf install php php-mysqlnd mariadb-server wget unzip less
Debian / Ubuntu / Linux Mint:
sudo apt update
sudo apt install php php-mysql mariadb-server wget unzip less
Next, start MariaDB and enable it so it starts automatically on every boot:
sudo systemctl enable --now mariadb
Note: In Ubuntu, MariaDB service is started automatically. No need to manually start it.
Confirm MariaDB is running before moving on:
sudo systemctl status mariadb
Sample Output:
● mariadb.service - MariaDB 11.8.6 database server
     Loaded: loaded (/usr/lib/systemd/system/mariadb.service; enabled; preset: enabled)
     Active: active (running) since Sat 2026-05-30 16:33:26 IST; 1min 5s ago
 Invocation: af1424889bbb491997884ffd57e779f6
       Docs: man:mariadbd(8)
             https://mariadb.com/kb/en/library/systemd/
    Process: 31374 ExecStartPre=/bin/sh -c [ ! -e /usr/bin/galera_recovery ] && VAR= ||   VAR=`/usr/bin/galera_recovery`; [ $? -eq 0 ] >
    Process: 31441 ExecStartPost=/bin/rm -f /run/mysqld/wsrep-start-position /run/mysqld/wsrep-new-cluster (code=exited, status=0/SUCCE>
    Process: 31443 ExecStartPost=/etc/mysql/debian-start (code=exited, status=0/SUCCESS)
   Main PID: 31426 (mariadbd)
     Status: "Taking your SQL requests now..."
      Tasks: 10 (limit: 90283)
     Memory: 91.7M (peak: 96.6M)
        CPU: 723ms
     CGroup: /system.slice/mariadb.service
             └─31426 /usr/sbin/mariadbd

May 30 16:33:26 Ubuntu2604 mariadbd[31426]: 2026-05-30 16:33:26 0 [Note] /usr/sbin/mariadbd: ready for connections.
May 30 16:33:26 Ubuntu2604 mariadbd[31426]: Version: '11.8.6-MariaDB-5 from Ubuntu'  socket: '/run/mysqld/mysqld.sock'  port: 3306  -- >
May 30 16:33:26 Ubuntu2604 systemd[1]: Started mariadb.service - MariaDB 11.8.6 database server.
You should see active (running) in the output. If you do not, run sudo systemctl start mariadb and check the status again.
Step 2: Create the Database
WP-CLI needs a database ready before it can install WordPress. Open the MariaDB shell:
sudo mysql
Then run these commands inside the MariaDB prompt:
CREATE DATABASE wpcli_lab CHARACTER SET utf8mb4 COLLATE utf8mb4_unicode_ci;
CREATE USER 'wpuser'@'localhost' IDENTIFIED BY 'password';
GRANT ALL PRIVILEGES ON wpcli_lab.* TO 'wpuser'@'localhost';
FLUSH PRIVILEGES;
EXIT;
A few things to note here. The CHARACTER SET utf8mb4 setting is important. It ensures WordPress handles international characters, emoji, and special symbols correctly from the start. The FLUSH PRIVILEGES line tells MariaDB to reload its permission tables immediately so the new user works straight away.
For production: Always use a strong, unique password instead of
password. For this practice lab, a simple password is fine since the database is only accessible locally.
Verify the database was created:
sudo mysql -e "SHOW DATABASES;"
You should see wpcli_lab in the list.
+--------------------+
| Database           |
+--------------------+
| information_schema |
| mysql              |
| performance_schema |
| sys                |
| wpcli_lab          |
+--------------------+
Step 3: Install WP-CLI
Download the latest stable WP-CLI release:
curl -O https://raw.githubusercontent.com/wp-cli/builds/gh-pages/phar/wp-cli.phar
Make the file executable:
chmod +x wp-cli.phar
Move it to a global location so you can run wp from anywhere:
sudo mv wp-cli.phar /usr/local/bin/wp
Verify the installation:
wp --info
You should see WP-CLI version information, your PHP binary path, PHP version, and system details. If you see all of that, WP-CLI is installed correctly and ready to use.
Sample output:
OS:	Linux 7.0.0-15-generic #15-Ubuntu SMP PREEMPT_DYNAMIC Wed Apr 22 16:06:43 UTC 2026 x86_64
Shell:	/bin/bash
PHP binary:	/usr/bin/php8.5
PHP version:	8.5.4
php.ini used:	/etc/php/8.5/cli/php.ini
MySQL binary:	/usr/bin/mariadb
MySQL version:	mariadb from 11.8.6-MariaDB, client 15.2 for debian-linux-gnu (x86_64) using  EditLine wrapper
SQL modes:
WP-CLI root dir:	phar://wp-cli.phar/vendor/wp-cli/wp-cli
WP-CLI vendor dir:	phar://wp-cli.phar/vendor
WP_CLI phar path:	phar:///usr/local/bin/wp
WP-CLI packages dir:
WP-CLI cache dir:	/home/ostechnix/.wp-cli/cache
WP-CLI global config:
WP-CLI project config:
WP-CLI version:	2.12.0

Step 4: Create the Practice Directory
Create a dedicated folder for your multisite lab and move into it:
mkdir ~/wpcli-lab
cd ~/wpcli-lab
All WordPress files for your main practice site will live here. Keeping it in your home directory makes it easy to find and easy to delete when you are done.
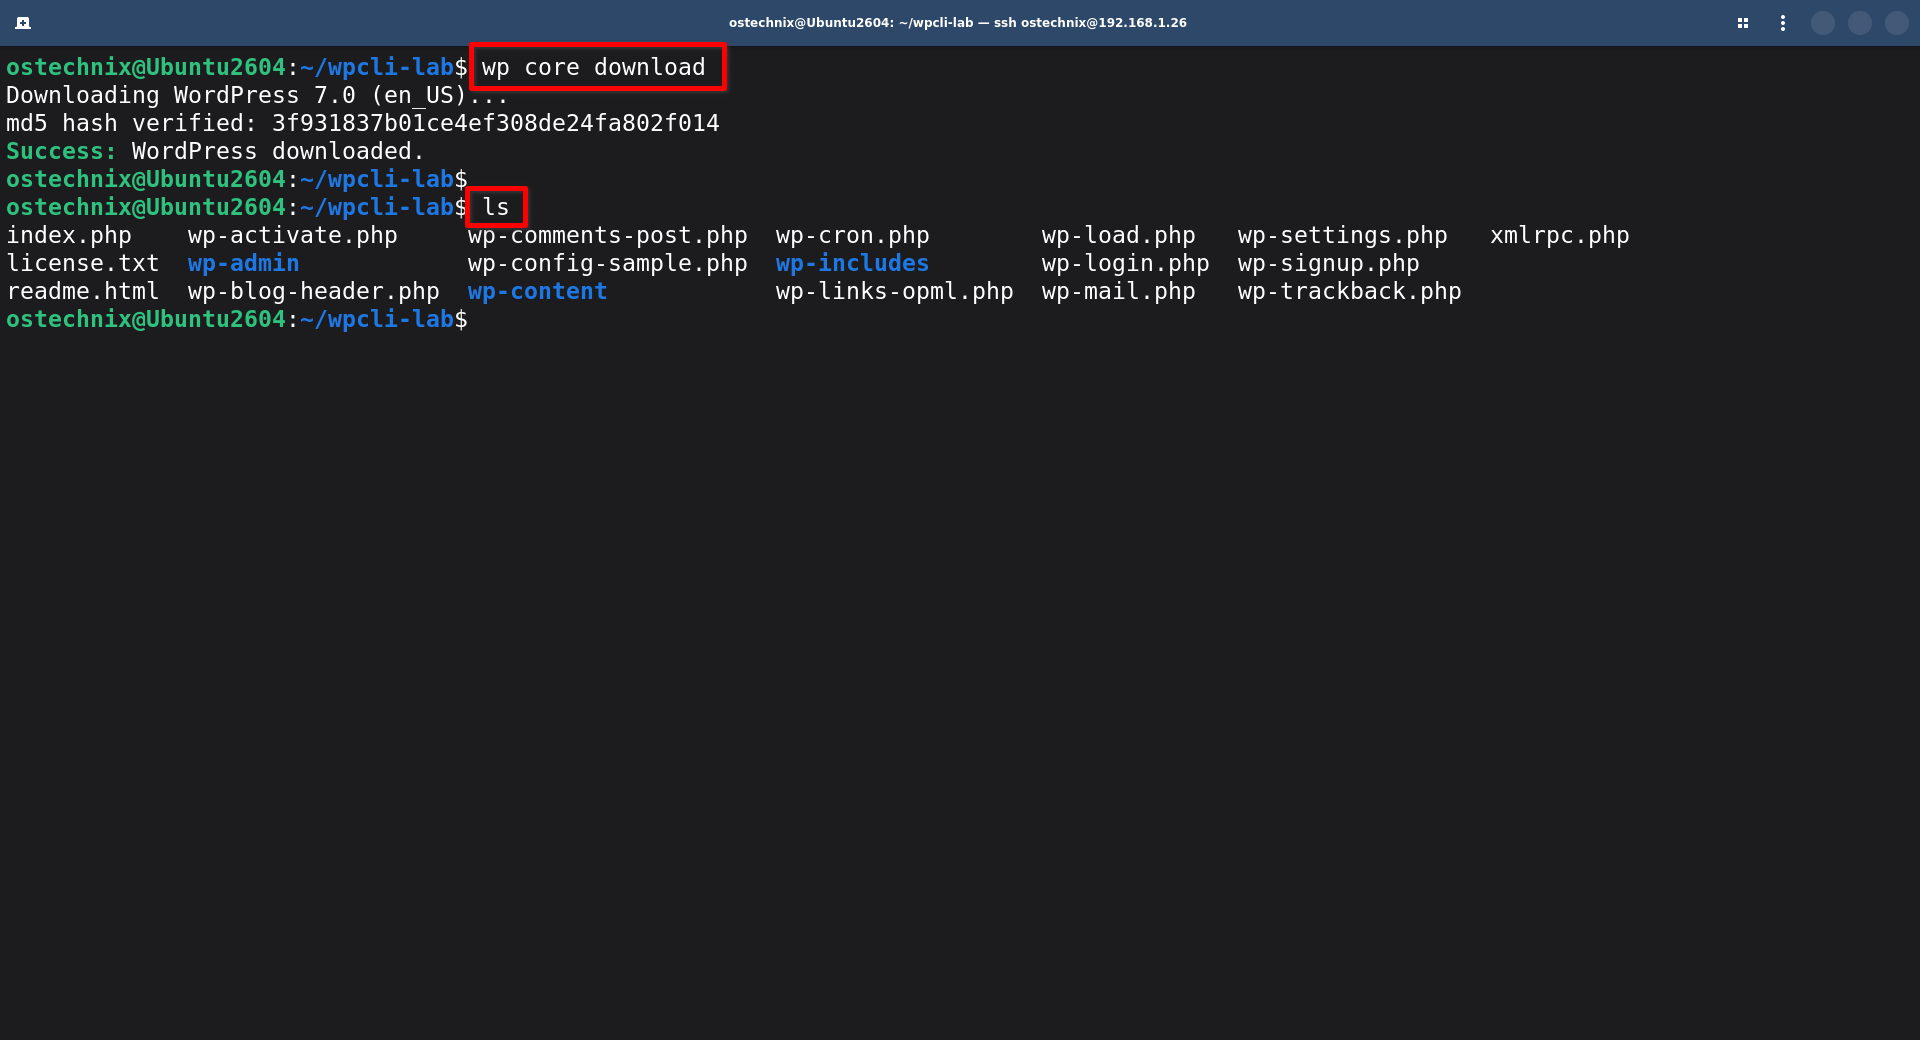
Step 5: Download WordPress
Download the latest version of WordPress core directly into your practice directory:
wp core download
WP-CLI downloads WordPress from the official WordPress.org repository and extracts it into the current directory.
After this command finishes, run ls to confirm the WordPress files are there:
ls
You should see folders like wp-admin, wp-content, and wp-includes, along with files like wp-config-sample.php and index.php.
Step 6: Create wp-config.php
Generate the wp-config.php file using the database credentials you created in Step 2:
wp config create \
  --dbname=wpcli_lab \
  --dbuser=wpuser \
  --dbpass=password
Replace the database name, user and password with your own.
WP-CLI reads your current directory, finds wp-config-sample.php, fills in your database details, and saves the result as wp-config.php. Furthermore, it automatically sets the database host to localhost, which is correct for a local MariaDB installation.
If you see error 2002 "No such file or directory": Replace
--dbhost=localhostwith--dbhost=127.0.0.1in the command above. This forces PHP to use a TCP connection instead of a Unix socket, which fixes the issue on some systems.
Confirm the config file was created:
ls wp-config.php

Step 7: Install WordPress
Now run the WordPress installer. This creates all the database tables and sets up the admin account:
wp core install \
  --url=http://localhost:8000 \
  --title="WP-CLI Lab" \
  --admin_user=admin \
  --admin_password=password \
  --admin_email=admin@example.com \
  --skip-email
The --skip-email flag stops WordPress from trying to send a welcome email during installation. Since this is a local lab with no mail server configured, skipping it prevents a confusing warning from appearing.
Verify the installation completed successfully:
wp core is-installed && echo "WordPress installed successfully"

If you see "WordPress installed successfully", move to the next step.
Step 8: Start the Local PHP Server
PHP includes a built-in development server that you can start with a single command. Open a terminal window and run:
cd ~/wpcli-lab
php -S localhost:8000
Leave this terminal window running. The PHP server runs in the foreground, so closing this window stops the server.

Now open your web browser and visit:
http://localhost:8000
You should see your WordPress site.

To access the admin dashboard, go to:
http://localhost:8000/wp-admin
Log in with admin and password. Again, replace these with your values if you have used different username and password when installing wordpress in the earlier step.
At this point, WordPress is fully running locally as a single site. The next step converts it to multisite.
Step 9: Convert to Multisite
Open a second terminal window - keep the first one running the PHP server. In the new terminal, navigate to your lab directory:
cd ~/wpcli-lab
Convert the single WordPress install to a multisite network:
wp core multisite-convert
Sample output:
Set up multisite database tables.
Added multisite constants to 'wp-config.php'.
Success: Network installed. Don't forget to set up rewrite rules (and a .htaccess file, if using Apache).

This single command does four things automatically:
- Enables multisite mode in
wp-config.php - Updates WordPress options in the database to activate the network
- Creates the additional database tables that multisite requires
- Enables the Network Admin dashboard
Apache users: If you run this on an Apache server rather than the PHP built-in server, you also need to update your
.htaccessfile with the multisite rewrite rules. WP-CLI handleswp-config.phpautomatically but does not update.htaccess. Check the WordPress multisite documentation for the correct rules to add.
Step 10: Verify Multisite
Confirm that multisite is working correctly:
wp site list
You should see output like this:
+---------+------------------------+---------------------+---------------------+
| blog_id | url                    | last_updated        | registered          |
+---------+------------------------+---------------------+---------------------+
| 1       | http://localhost:8000/ | 0000-00-00 00:00:00 | 2026-05-30 11:23:39 |
+---------+------------------------+---------------------+---------------------+

One site means the network is up and running. You can also access the WordPress Network Admin dashboard in your browser at:
http://localhost:8000/wp-admin/network
Log in with the same admin credentials. The Network Admin panel is where you manage all sites, network-wide plugins, and network settings across the entire multisite installation.

You can find your individual sites under the "My Sites" tab.

As you can see in the above output, currently we have one wordpress site named "WP-CLI LAB".
Step 11: Create Additional Subsites
Now add two practice subsites to your network. Each one gives you a separate WordPress environment to experiment with independently:
wp site create --slug=client1 --title="Client 1"
wp site create --slug=client2 --title="Client 2"
Verify all three sites now appear in the network:
wp site list
You should see all three entries, the root site plus both subsites:
+---------+--------------------------------+---------------------+---------------------+
| blog_id | url                            | last_updated        | registered          |
+---------+--------------------------------+---------------------+---------------------+
| 1       | http://localhost:8000/         | 0000-00-00 00:00:00 | 2026-05-30 11:23:39 |
| 2       | http://localhost:8000/client1/ | 2026-05-30 11:35:43 | 2026-05-30 11:35:43 |
| 3       | http://localhost:8000/client2/ | 2026-05-30 11:35:54 | 2026-05-30 11:35:54 |
+---------+--------------------------------+---------------------+---------------------+
Open each subsite in your browser to confirm they load:
http://localhost:8000/client1
http://localhost:8000/client2
You can also view them under the "My Sites" tab in your WordPress Network Admin dashboard:

Both subsites are now fully independent WordPress sites running inside the same network. As a result, you can practice network-wide commands like wp plugin activate --network as well as site-specific commands using the --url flag.
Step 12: Create a Standalone WordPress Site
In addition to the multisite network, you can also spin up a completely separate standalone WordPress installation. This is useful for practicing commands that only apply to single-site setups, or for comparing single-site and multisite behaviour side by side.
Create a new directory:
mkdir ~/newsite
cd ~/newsite
Create a new database for this site. Open MariaDB:
sudo mysql
Inside the MariaDB prompt:
CREATE DATABASE newsite_db CHARACTER SET utf8mb4 COLLATE utf8mb4_unicode_ci;
CREATE USER 'newuser'@'localhost' IDENTIFIED BY 'password';
GRANT ALL PRIVILEGES ON newsite_db.* TO 'newuser'@'localhost';
FLUSH PRIVILEGES;
EXIT;
Download WordPress:
wp core download
Create wp-config.php:
wp config create \
  --dbname=newsite_db \
  --dbuser=newuser \
  --dbpass=password
Install WordPress:
wp core install \
  --url=http://localhost:8001 \
  --title="New Site" \
  --admin_user=admin \
  --admin_password=password \
  --admin_email=admin@example.com \
  --skip-email
Start the PHP server on a different port (open a third terminal window for this):
cd ~/newsite
php -S localhost:8001
Open the site in your browser:
http://localhost:8001
You now have a completely separate standalone WordPress installation running alongside your multisite network. Each environment is independent and the changes in one do not affect the other.
Step 13: Practice WP-CLI Commands
Your lab is ready. Here is what you can safely practice across your three environments:
Plugin management:
# Install and activate a plugin on the multisite network
cd ~/wpcli-lab
wp plugin install hello-dolly --activate --url=http://localhost:8000/client1

# Activate a plugin network-wide
wp plugin activate hello-dolly --network

# List plugins across the network
wp plugin list --url=http://localhost:8000/client2
Multisite administration:
# List all sites
wp site list

# Create a new subsite
wp site create --slug=testsite --title="Test Site"

# Delete a subsite
wp site delete 4 --yes
User management:
# Create a user on a specific subsite
wp user create senthil senthil@example.com --role=editor \
  --url=http://localhost:8000/client1

# List all users network-wide
wp user list --network

# Generate test users
wp user generate --count=5 --role=subscriber
Database operations:
# Export the database
wp db export backup.sql

# Check database size
wp db size --human-readable

# Run a search-replace dry run
wp search-replace 'localhost:8000' 'example.com' --dry-run
Cron jobs:
# List scheduled cron events
wp cron event list

# Run all cron events immediately
wp cron event run --all
Backups and restores:
# Export
wp db export ~/backup-$(date +%Y%m%d).sql

# Import
wp db import ~/backup-20250101.sql
Troubleshooting:
# Verify core files
wp core verify-checksums

# Flush all caches
wp cache flush

# Check for available updates
wp core check-update
wp plugin list --update=available
Since the lab is completely disposable, you can freely experiment without worrying about breaking anything important. If you corrupt the database or delete something you should not have, just tear down the lab and rebuild it from Step 4. The whole process takes less than five minutes once you have done it once.
Step 14: Clean Up Everything
When you finish practising, remove everything completely. This section walks through every component in the correct removal order.
Stop the PHP Local Servers
In each terminal window running a PHP server, press Ctrl + C to stop it. Do this for both localhost:8000 and localhost:8001 if both are running.
Remove the WordPress Directories
rm -rf ~/wpcli-lab
rm -rf ~/newsite
Remove All Databases and Users
Open MariaDB:
sudo mysql
Inside the MariaDB prompt:
DROP DATABASE wpcli_lab;
DROP DATABASE newsite_db;
DROP USER 'wpuser'@'localhost';
DROP USER 'newuser'@'localhost';
FLUSH PRIVILEGES;
EXIT;
Remove WP-CLI
sudo rm /usr/local/bin/wp
Remove PHP and MariaDB (Optional)
Only do this if you installed them specifically for this lab and do not need them for anything else on your system.
Fedora / RHEL / AlmaLinux / Rocky Linux:
sudo dnf remove php php-mysqlnd mariadb-server
Ubuntu / Debian / Linux Mint:
sudo apt remove php php-mysql mariadb-server
sudo apt autoremove
Verify the Cleanup
Run each of these checks to confirm everything is gone:
# Check WordPress directories are removed
ls ~/wpcli-lab    # Should return: No such file or directory
ls ~/newsite      # Should return: No such file or directory

# Check databases are removed
sudo mysql -e "SHOW DATABASES;"
# wpcli_lab and newsite_db should no longer appear
# If mysql is already uninstalled, you would see command not found.

# Check WP-CLI is removed
wp --info         # Should return: command not found or no such file
At this point, your system is back to its clean state. All WordPress files, databases, users, and WP-CLI itself are completely removed.
Final Thoughts
A disposable lab is genuinely one of the fastest ways to learn WP-CLI. Instead of memorising command syntax from a cheat sheet, you run the commands in a real environment and see exactly what they do. You learn through repetition - creating sites, breaking things intentionally, and rebuilding the environment from scratch as many times as you need.
For Linux users especially, WP-CLI feels natural because it fits seamlessly into the standard command-line workflow you already use every day. The same terminal you use for everything else becomes your WordPress management tool.
The key habit to build is this: every time you want to learn a new WP-CLI command, come back to this lab, spin it up, and run it here first. Do not run an unfamiliar command on a live site until you have seen exactly what it does in a safe environment.
What to Practice Next
Your lab is running. Here are five commands from the WP-CLI Commands guide to start with. Each one teaches you something fundamentally different:
wp plugin update --all- update every plugin in one shot and see how fast WP-CLI is compared to the dashboardwp search-replace 'localhost:8000' 'mysite.com' --dry-run- practice safe domain migration with a preview before committingwp user generate --count=10 --role=subscriber- create ten test users instantly to practice user managementwp db export backup.sql- take your first database backup and confirm it creates the filewp core verify-checksums- check the integrity of your WordPress installation files
See the full command reference in Part 3: WP-CLI Commands - The Complete Reference Guide.
Found this guide useful? Share it with someone learning WordPress development. The more you practice in a safe environment, the more confident you will feel working on real sites.
Also in this series: