This step by step tutorial explains how to install Oracle VirtualBox on Ubuntu 18.04.2 LTS headless server and how to manage the VirtualBox headless instances using phpVirtualBox, a web-based front-end tool for VirtualBox. The steps described below might also work on Debian and other Ubuntu derivatives such as Linux Mint. Let us get started.
Table of Contents
Prerequisites
Before installing Oracle VirtualBox, we need to do the following prerequisites in our Ubuntu 18.04.2 LTS server.
First of all, make sure you have enabled universe and multiverse repositories if they are not enabled already. These repositories are required to install some dependencies while installing Virtualbox.
$ sudo add-apt-repository universe
$ sudo add-apt-repository multiverse
And then, update the Ubuntu server by running the following commands one by one.
$ sudo apt update
$ sudo apt upgrade
$ sudo apt dist-upgrade
Next, install the following necessary packages:
$ sudo apt install build-essential dkms unzip wget
After installing all updates and necessary prerequisites, restart the Ubuntu server.
$ sudo reboot
Install Oracle VirtualBox on Ubuntu 18.04 LTS server
Add Oracle VirtualBox official repository. To do so, edit /etc/apt/sources.list file:
$ sudo nano /etc/apt/sources.list
Add the following lines.
Here, I will be using Ubuntu 18.04.2 LTS, so I have added the following repository.
deb http://download.virtualbox.org/virtualbox/debian bionic contrib
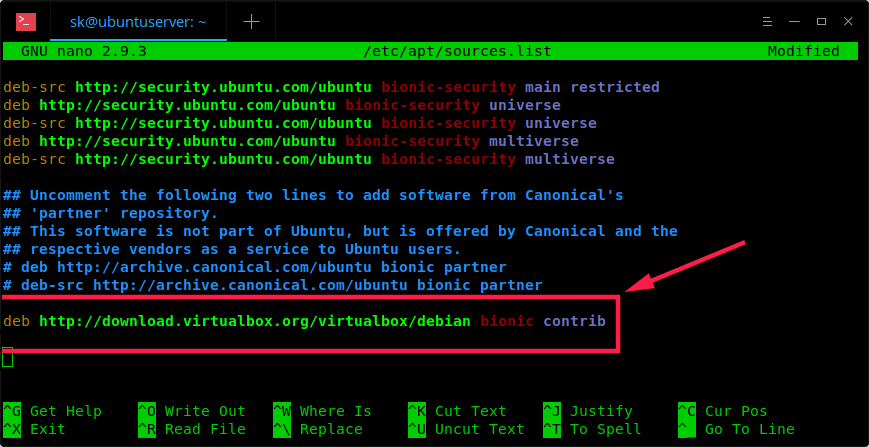
Add Oracle VirtualBox official repository
Replace the word 'bionic' with your Ubuntu distribution's code name, such as 'xenial', 'vivid', 'utopic', 'trusty', 'raring', 'quantal', 'precise', 'lucid', 'jessie', 'wheezy', or 'squeeze'.
Then, run the following command to add the Oracle public key:
$ wget -q https://www.virtualbox.org/download/oracle_vbox_2016.asc -O- | sudo apt-key add -
For VirtualBox older versions, add the following key:
$ wget -q https://www.virtualbox.org/download/oracle_vbox.asc -O- | sudo apt-key add -
Next, update the software sources using command:
$ sudo apt update
Finally, install latest Oracle VirtualBox latest version using command:
$ sudo apt install virtualbox-5.2
Adding users to VirtualBox group
We need to create and add our system user to the vboxusers group. You can either create a separate user and assign it to vboxusers group or use the existing user. I don't want to create a new user, so I added my existing user to this group. Please note that if you use a separate user for virtualbox, you must log out and log in to that particular user and do the rest of the steps.
I am going to use my username named sk, so, I ran the following command to add it to the vboxusers group.
$ sudo usermod -aG vboxusers sk
Now, run the following command to check if virtualbox kernel modules are loaded or not.
$ sudo systemctl status vboxdrv
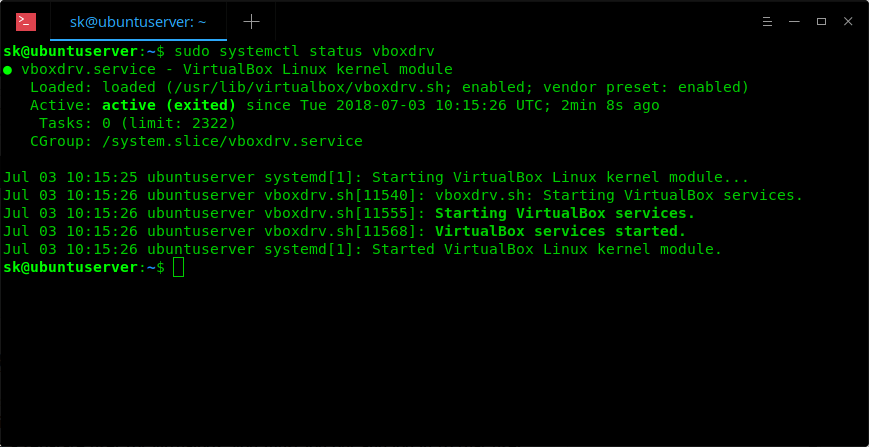
As you can see in the above screenshot, the vboxdrv module is loaded and running!
For older Ubuntu versions, run:
$ sudo /etc/init.d/vboxdrv status
If the virtualbox module doesn't start, run the following command to start it.
$ sudo /etc/init.d/vboxdrv setup
Great! We have successfully installed VirtualBox and started virtualbox module. Now, let us go ahead and install Oracle VirtualBox extension pack.
Install VirtualBox Extension pack
The VirtualBox Extension pack provides the following functionalities to the VirtualBox guests.
- The virtual USB 2.0 (EHCI) device
- VirtualBox Remote Desktop Protocol (VRDP) support
- Host webcam passthrough
- Intel PXE boot ROM
- Experimental support for PCI passthrough on Linux hosts
Download the latest Extension pack for VirtualBox 5.2.x from here.
$ wget https://download.virtualbox.org/virtualbox/5.2.30/Oracle_VM_VirtualBox_Extension_Pack-5.2.30.vbox-extpack
Install Extension pack using command:
$ sudo VBoxManage extpack install Oracle_VM_VirtualBox_Extension_Pack-5.2.30.vbox-extpack
Congratulations! We have successfully installed Oracle VirtualBox with extension pack in Ubuntu 18.04 LTS server. It is time to deploy virtual machines. Refer the virtualbox official guide to start creating and managing virtual machines in command line.
Not everyone is command line expert. Some of you might want to create and use virtual machines graphically. No worries! Here is where phpVirtualBox comes in handy!!
About phpVirtualBox
PhpVirtualBox is a free, web-based front-end to Oracle VirtualBox. It is written using PHP language. Using phpVirtualBox, we can easily create, delete, manage and administer virtual machines via a web browser from any remote system on the network.
Install phpVirtualBox in Ubuntu 18.04 LTS
Since it is a web-based tool, we need to install Apache web server, PHP and some php modules.
To do so, run:
$ sudo apt install apache2 php php-mysql libapache2-mod-php php-soap php-xml
Then, Download the phpVirtualBox 5.2.x version from the releases page. Please note that we have installed VirtualBox 5.2, so we must install phpVirtualBox version 5.2 as well.
To download it, run:
$ wget https://github.com/phpvirtualbox/phpvirtualbox/archive/5.2-1.zip
Extract the downloaded archive with command:
$ unzip 5.2-1.zip
This command will extract the contents of 5.2.1.zip file into a folder named "phpvirtualbox-5.2-1". Now, copy or move the contents of this folder to your apache web server root folder.
$ sudo mv phpvirtualbox-5.2-1/ /var/www/html/phpvirtualbox
Assign the proper permissions to the phpvirtualbox folder.
$ sudo chmod 777 /var/www/html/phpvirtualbox/
Next, let us configure phpVirtualBox.
Copy the sample config file as shown below.
$ sudo cp /var/www/html/phpvirtualbox/config.php-example /var/www/html/phpvirtualbox/config.php
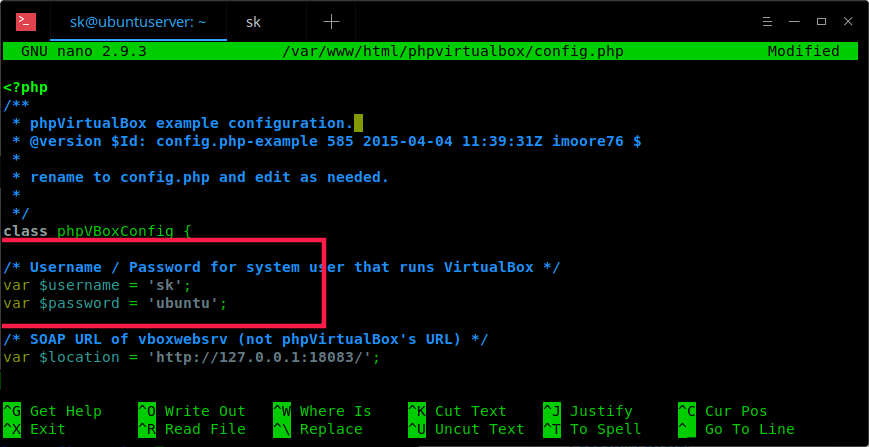
Edit phpVirtualBox config.php file:
$ sudo nano /var/www/html/phpvirtualbox/config.php
Find the following lines and replace the username and password with your system user (The same username that we used in "Adding users to VirtualBox group" section).
In my case, my Ubuntu system username is sk, and its password is ubuntu.
var $username = 'sk';
var $password = 'ubuntu';
Save and close the file.
Next, create a new file called /etc/default/virtualbox:
$ sudo nano /etc/default/virtualbox
Add the following line. Replace 'sk' with your own username.
VBOXWEB_USER=sk
Finally, Reboot your system or simply restart the following services to complete the configuration.
$ sudo systemctl restart vboxweb-service
$ sudo systemctl restart vboxdrv
$ sudo systemctl restart apache2
Adjust firewall to allow Apache web server
By default, the apache web browser can't be accessed from remote systems if you have enabled the UFW firewall in Ubuntu 18.04 LTS. You must allow the http and https traffic via UFW by following the below steps.
First, let us view which applications have installed a profile using command:
$ sudo ufw app list
Available applications:
Apache
Apache Full
Apache Secure
OpenSSH
As you can see, Apache and OpenSSH applications have installed UFW profiles.
If you look into the "Apache Full" profile, you will see that it enables traffic to the ports 80 and 443:
$ sudo ufw app info "Apache Full"
Profile: Apache Full
Title: Web Server (HTTP,HTTPS)
Description: Apache v2 is the next generation of the omnipresent Apache web
server.

Ports:
80,443/tcp
Now, run the following command to allow incoming HTTP and HTTPS traffic for this profile:
$ sudo ufw allow in "Apache Full"
Rules updated
Rules updated (v6)
If you don't want to allow https traffic, but only http (80) traffic, run:
$ sudo ufw app info "Apache"
Access phpVirtualBox Web console
Now, go to any remote system that has graphical web browser.
In the address bar, type: http://IP-address-of-virtualbox-headless-server/phpvirtualbox.
In my case, I navigated to this link - http://192.168.225.22/phpvirtualbox
You should see the following screen. Enter the phpVirtualBox administrative user credentials.
The default username and phpVirtualBox is admin/admin.
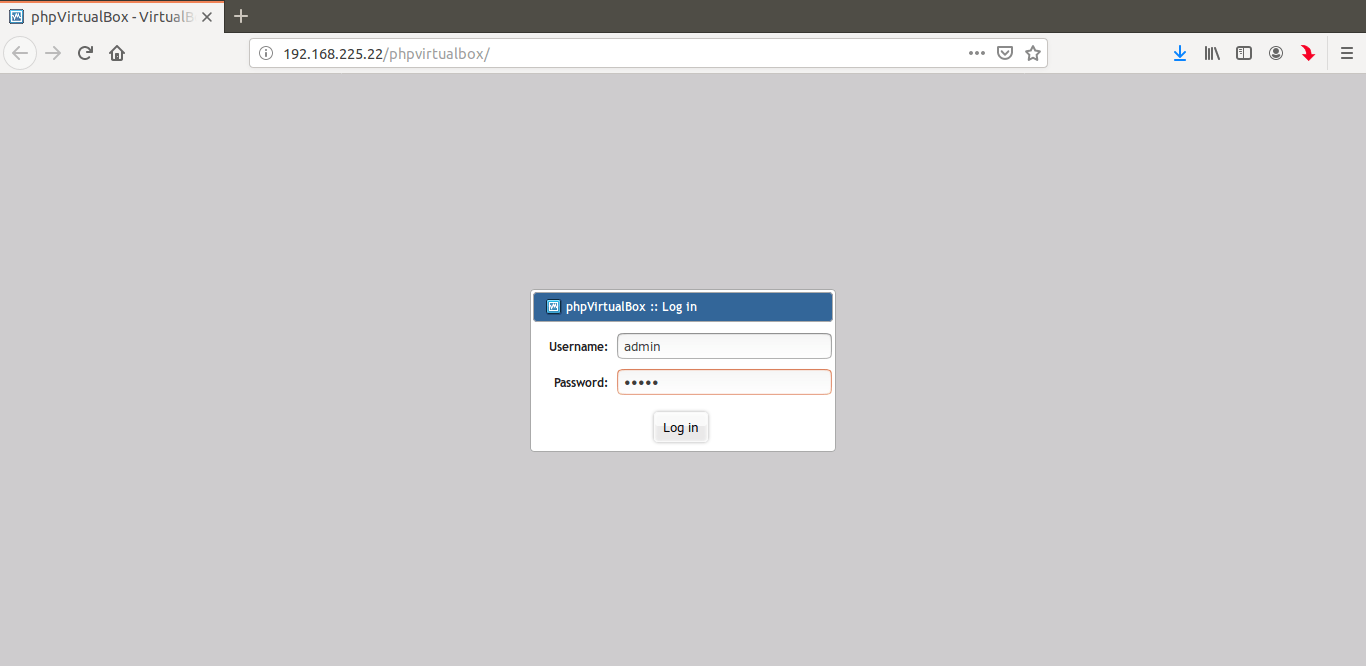
phpvirtualbox login page
Congratulations! You will now be greeted with phpVirtualBox dashboard.
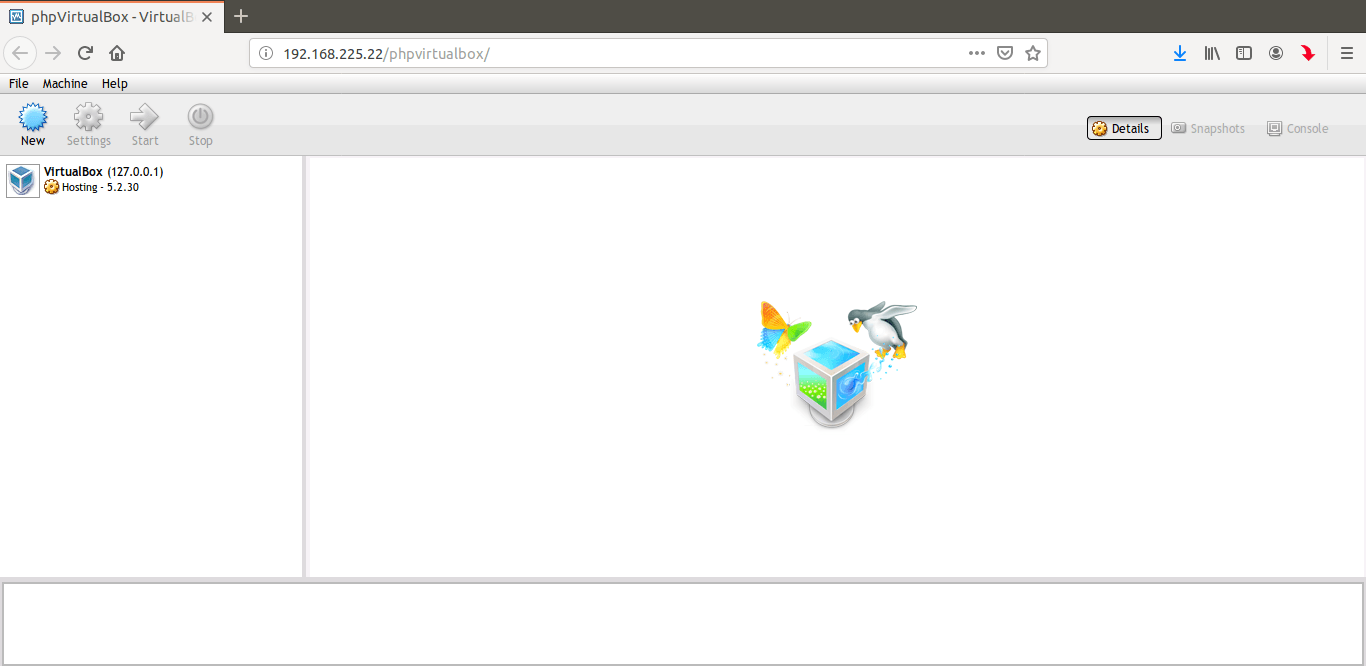
phpvirtualbox dashboard
Now, start creating your VMs and manage them from phpvirtualbox dashboard as the way you do in Virtualbox standalone application. As I mentioned earlier, You can access the phpVirtualBox from any system in the same network. All you need is a web browser and the username and password of phpVirtualBox.
I tested this guide on Ubuntu 18.04.2 LTS server and it worked just fine as described. However, If you ran into any problem, do check the comment section below. Some of our readers have provided a few tips to get this working on Ubuntu.
A note for installing 64-bit guest OS
If you haven't enabled virtualization support in the BIOS of host system (not the guest), phpVirtualBox allows you to create 32-bit guests only. To install 64-bit guest systems, you must enable virtualization in your host system's BIOS. Look for an option that is something like "virtualization" or "hypervisor" in your bios and make sure it is enabled.
Some of you might think why on earth anyone would use phpvirtualbox while we already have a better solution - KVM. This tutorial is mainly for those who get used to Oracle virtualbox. If you prefer KVM over Virtualbox, refer the following guide.
And, that's all. Hope this helps. If you find this guide useful, please share it on your social, professional networks and support us.
Reference links:
Thanks for stopping by!
Help us to help you:
- Subscribe to our Email Newsletter : Sign Up Now
- Support OSTechNix : Donate Via PayPal
- Download free E-Books and Videos : OSTechNix on TradePub
- Connect with us: Reddit | Facebook | Twitter | LinkedIn | RSS feeds
Have a Good day!!
47 comments
Hi,
Thanks for this excellent tutorial!!
Everything works fine, except the phpvirtualbox’s console.
Clicking on “Console” button, the error message “The Adobe Flash plugin is not installed” shows up.
I’m using Google Chrome browser (ver. 75.0 last update on July 5, 2019).
Thanks for any help.
Best regards
Install Adobe flash plugin in the system that you use to access phpvirtualbox and try.
Having trouble accessing the VMs using rdp. I have tried to create my own RDP connection, and I have clicked on the port number in phpvirtualbox to get a rdp config downloaded. I have updated the IP address to the servers real address, but still can not get a connection to run. I just get the following error.
1. Remote access to the server is not enabled
2. The Remote Computer is turned off
3. The remote computer is not available on the network.
Excellent guide.
Just completed installation of Ubuntu server on a ProLiant 380 box previously running VMware on which I installed VirtualBox.
The instructions made this task a piece of cake.
Thank you very much.
i would like to set this up on a ubuntu 18.04 LTS server headless thats running iredmail with lemp. how would these instructions differ if this is even possible? thanks Looks like a great tutorial.
Hello! I want to thank You for this article. It is great, thank You very much I have already install my vm with phpvirtualbox. Thanks a lot.
Glad I could help.
Excellent tutorial – however for me it doesn’t work 🙁
When I try to start phpVirtualBox I get a message box saying
“An unknown PHP error occurred. This is most likely a syntax error in config.php in phpVirtualBox’s folder. The most common errors are an unclosed quote or a missing semicolon in a configuration item that has been entered (e.g. location, username, or password).
Depending on your PHP configuration, navigating directly to config.php in your web browser may display the PHP error message.
If find that this is not the case, or have no idea what this error message means, please raise the issue at http://sourceforge.net/p/phpvirtualbox/discussion/help/”
with no help or indication of what to do.
I have changed all the ip addresses I can find from 127.0.0.1 to my host ip but that doesn’t work.
I’m running on ubuntu server 18.04
Any suggestions on finding and fixing the error message?
TIA
Martin
Thank you,
I am new to Linux and command lines but its fully working
With love
If you have set authentication is phpvirtualbox config.php, make sure to do:
passwd vbox
–> password
and set:
/* Username / Password for system user that runs VirtualBox */
var $username = ‘vbox’;
var $password = ‘password’;
hello, someone has the problem with the rdp connection (console) “Reason for disconnection: E: TCP: SECURITY_ERROR Error # 2048”
I can not open to make the instalation of any vms?
cordially
Please check this – https://github.com/phpvirtualbox/phpvirtualbox/issues/43
Unfortunately I also experience the issue where RDP connection to a VM doesn’t work, and therefore setup of any VM is impossible. I get the same error as others: E: TCP: SECURITY_ERROR Error # 2048. I have faffed and faffed with lots of suggestions, nothing has worked. It is rare that I end up defeated with no ideas. But this is one of those cases!