Arch Linux is a general purpose GNU/Linux distribution that provides most up-to-date softwares by following the rolling-release model. Unlike fixed-point release Linux distributions, Arch Linux allows you to use updated cutting-edge softwares and packages as soon as the developers released them. Initially, It supported both 32bit and 64bit systems. But, now the Arch Linux developers have dropped 32-bit support. Starting from Arch Linux 2017.03.01 version, the computers with 64-bit processor can only support Arch Linux.
This guide provides the step by step installation guidelines to install latest Arch Linux 2017.03.01 version.
Table of Contents
Step 1: Download latest Arch Linux version and boot your system
Download the latest version from the following location.
As of writing this tutorial, the latest version was 2017.03.01.
After downloading the ISO, make the bootable USB or DVD. To make bootable USB drive or SD cards, refer the following link.
And the, boot your system using the installation media.
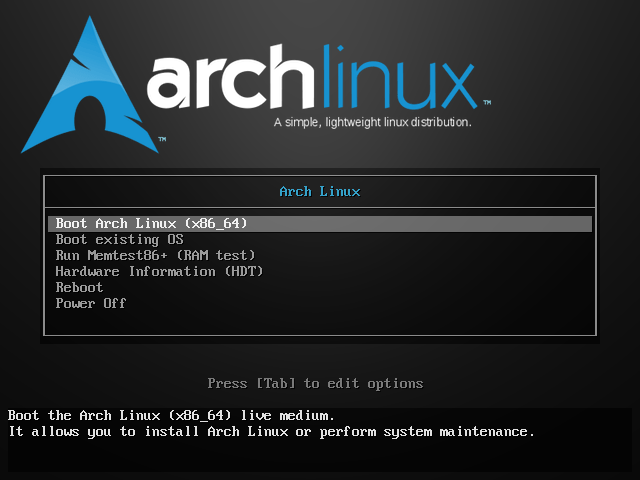
You'll be greeted with the following installer screen. Choose 'Boot Arch Linux (x86_64)' option and Hit ENTER key.
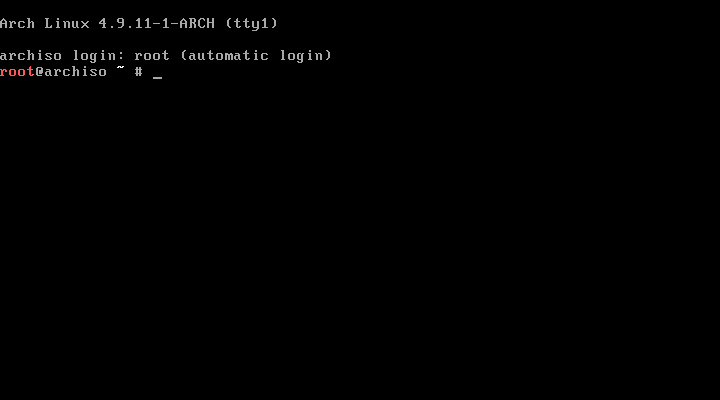
Once your system is booting, you'll be automatically logged in as root user by default.
Step 2: Configure Network
You must need an working Internet connection in order to install Arch Linux. Check if your Internet connection is working:
ping ostechnix -c 4
If you get reply, you're good to go. If you don't have DHCP enabled, you need to manually configure a static IP address as shown in the below link.
If you're using Wifi, run the following command to connect with your wifi networks.
wifi-menu -o wlp9s0
Replace wlp9s0 with your wireless network card name.
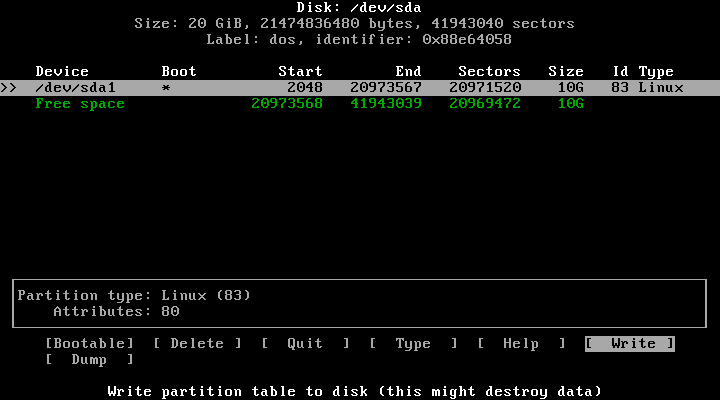
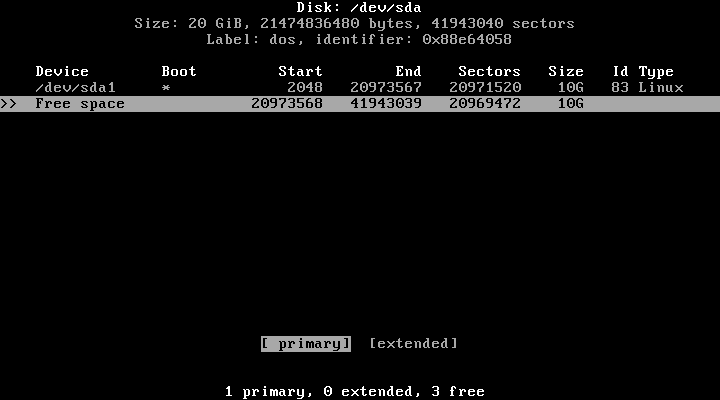
Step 3: Partition Hard drive
Next, we need to partition the hard drive.
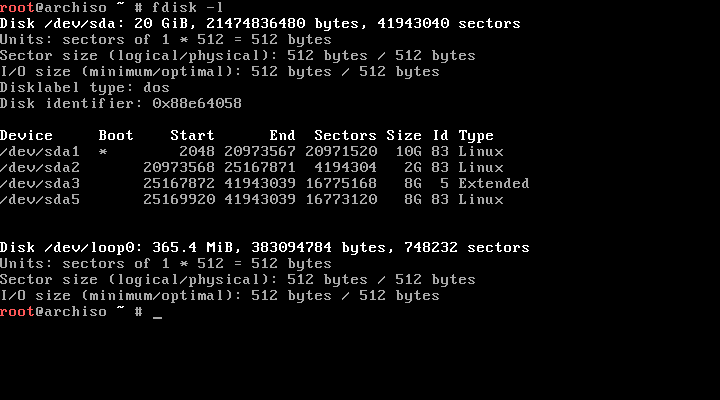
To check the partition table, run:
fdisk -l
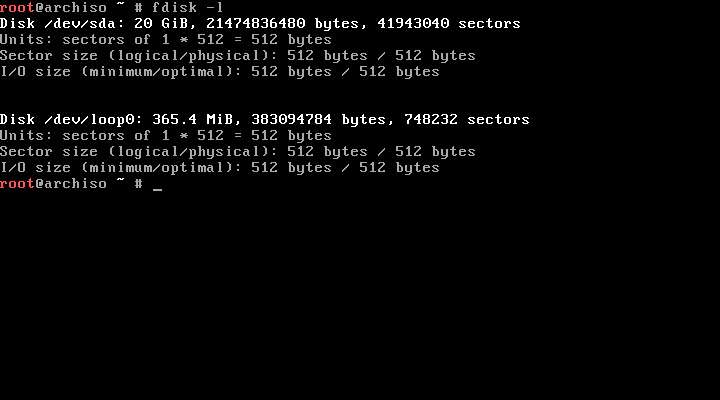
As you see above, I have 20 GB hdd. Let us go ahead and partition the hard disk. You can either use 'Fdisk' or Cfdisk' utilities to partition the hard drive.
For the purpose of this guide, I am going to use cfdisk.
We're going to create three partitions.
- Root partition, /dev/sda1, as primary bootable with size 10 GB and ext4 formatted.
- Swap partition, /dev/sda2, as primary with size 2xRAM size.
- Logical partition, Home, /dev/sda5, rest of the space and ext4 formatted.
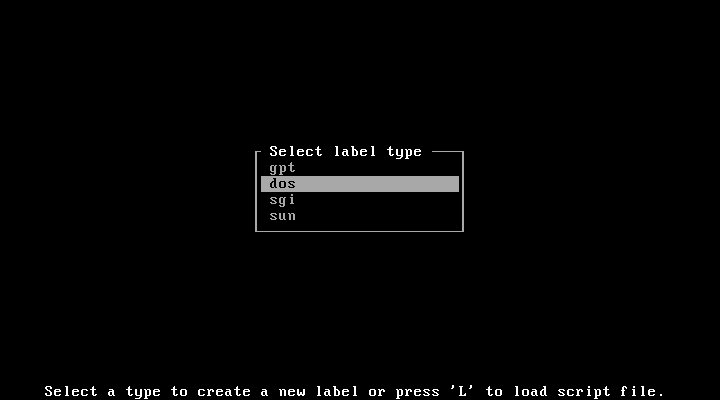
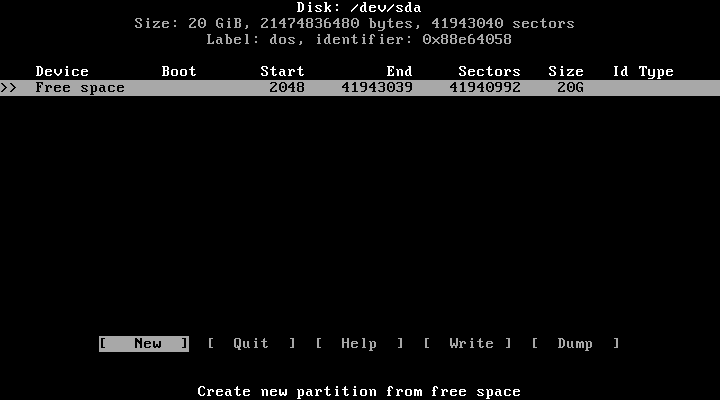
Type cfdisk in the command prompt. You should see the following screen.
cfdisk
Select label type as dos.
A. Create Primary partition
Select 'New'.
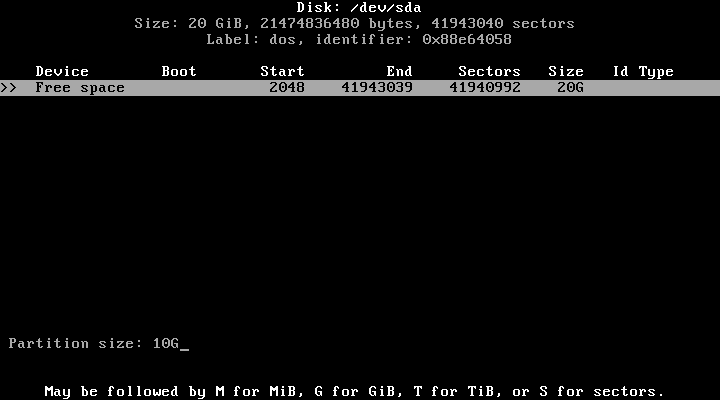
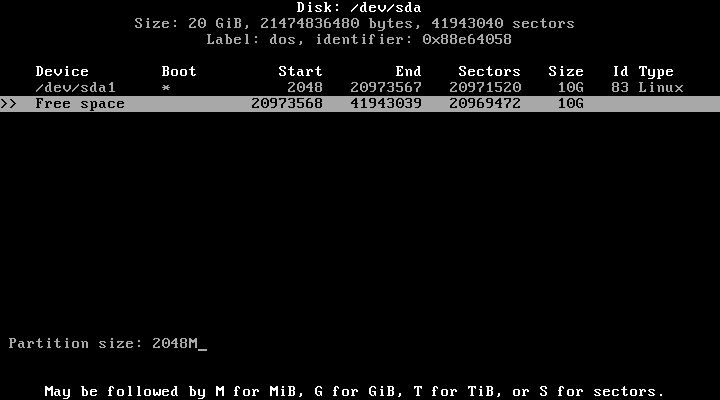
Enter partition size, in our case it is 10G (for 10 GB). You can specify size in MB using letter 'M'.
Then, we need to choose the type of the partition, primary, logical, swap etc. As I mentioned earlier, we make this partition as primary with bootable and ext4 formatted.
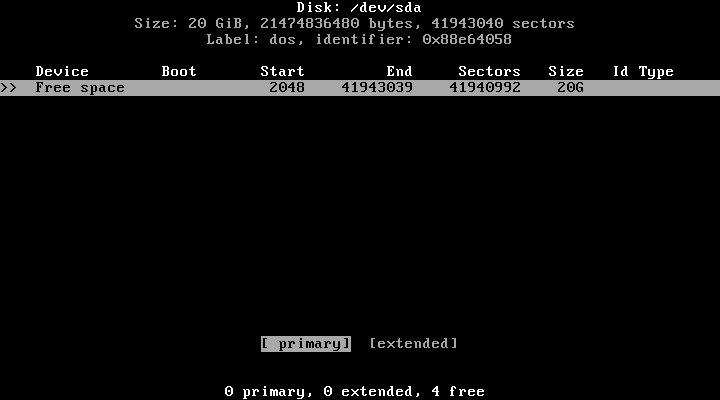
Next select 'Bootable' to make this partition as bootable partition.
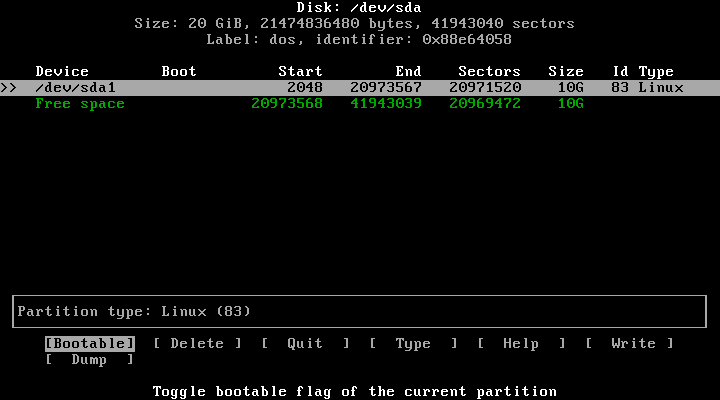
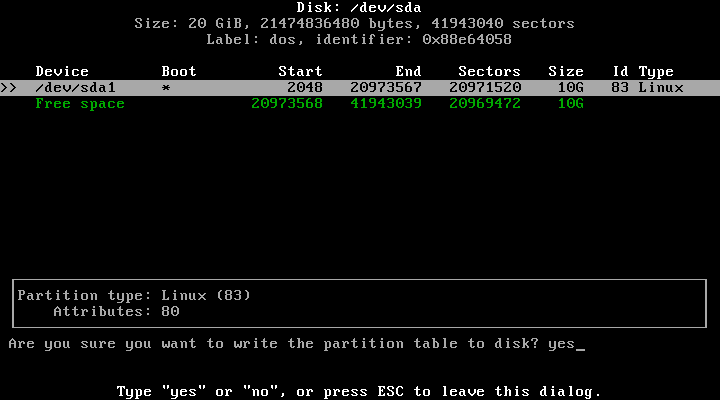
Then, select 'Write' using left/right arrow button to write the partition changes.
Type 'Yes' to save the changes.
B. Create Swap partition
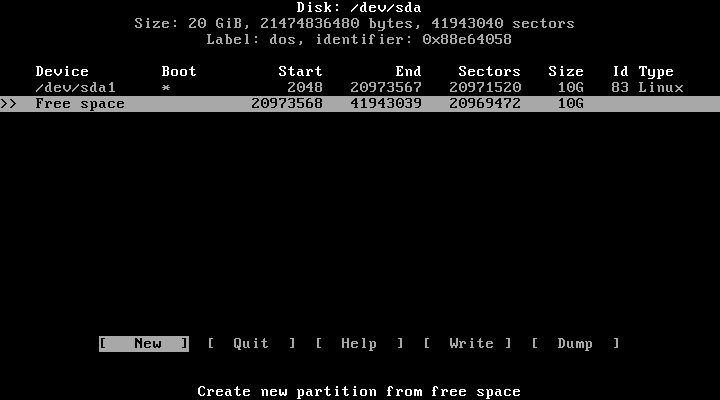
Select the free space using up/down arrow and select 'New'.
Enter Swap partition size, 2XRAM size. I have 1GB RAM, so I assigned 2048M as my swap partition size.
Select partition type as 'Primary'.
Select 'Write'.
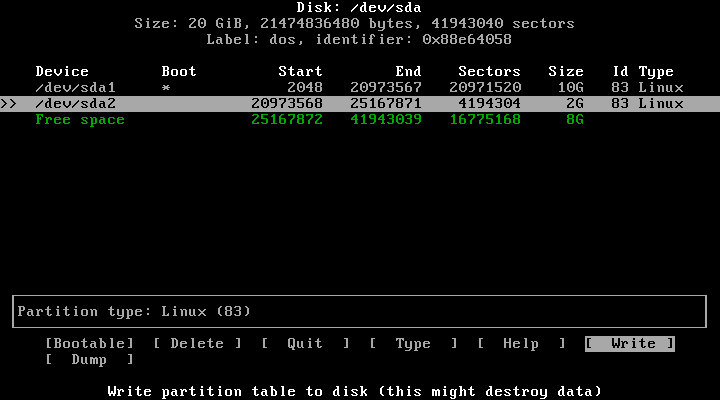
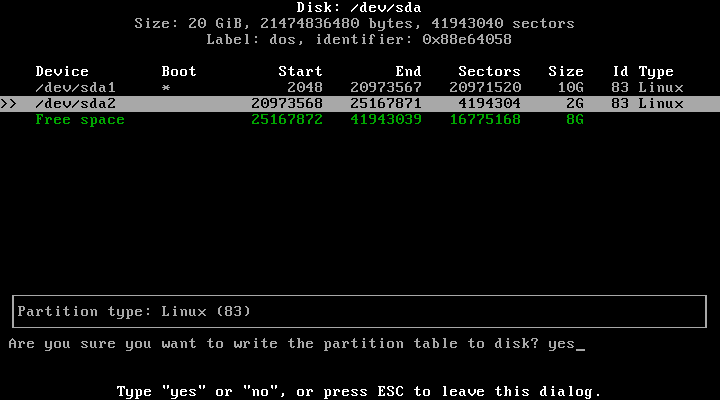
Type 'Yes' to save the changes.
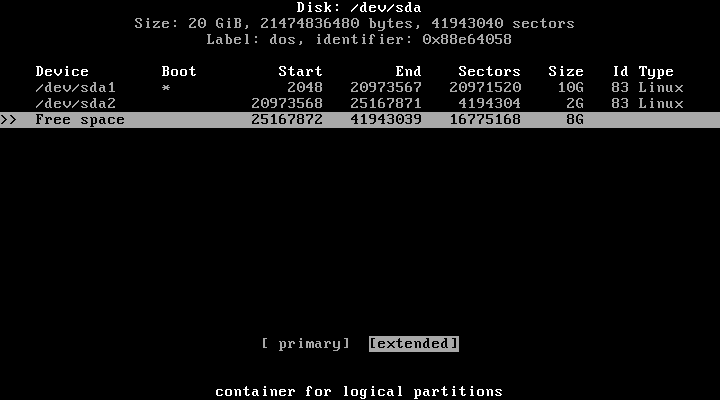
C. Create Logical (Extended) partition
Again, select the free space using up/down arrow key. And select 'New'.

Enter the partition size. Since It's my last partition, I want to assign the entire free space for this partition.
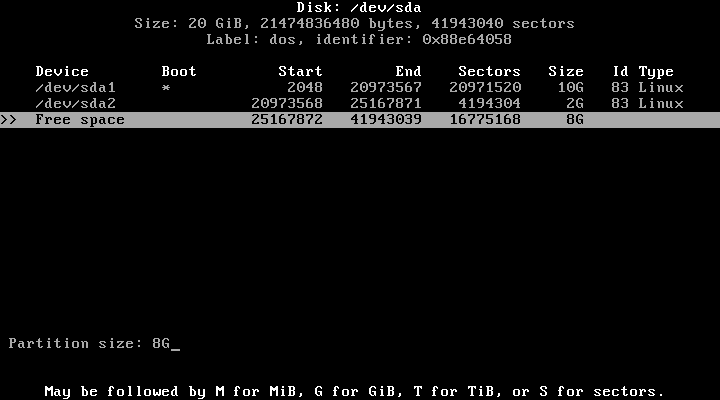
Hence It's my logical partition, so I chose 'Extended' option.
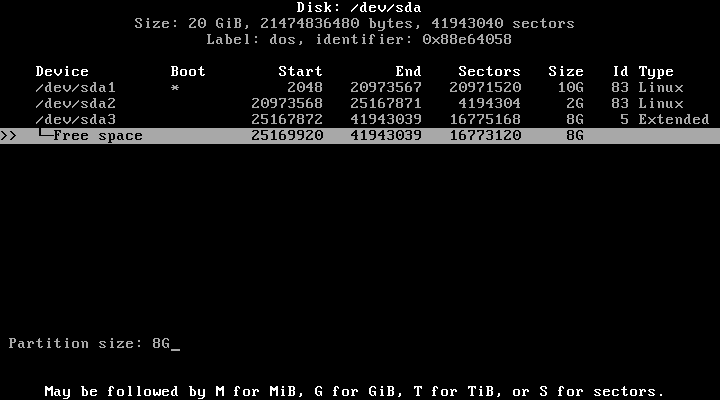
Then select the free space using down arrow for the Home partition and select 'New'.
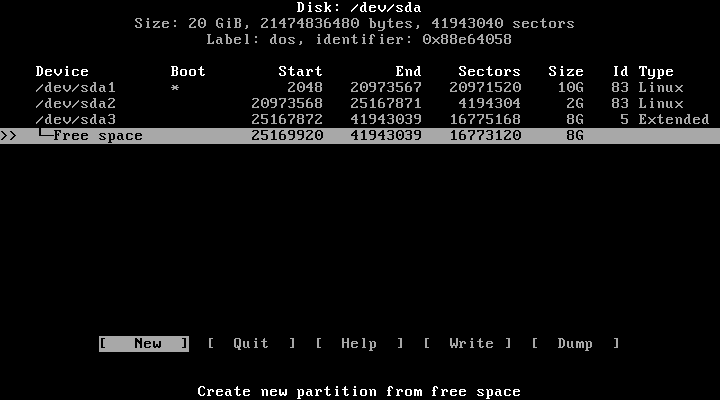
Again partition size for the Home.
Finally save the partition changes by selecting the 'Write' option.
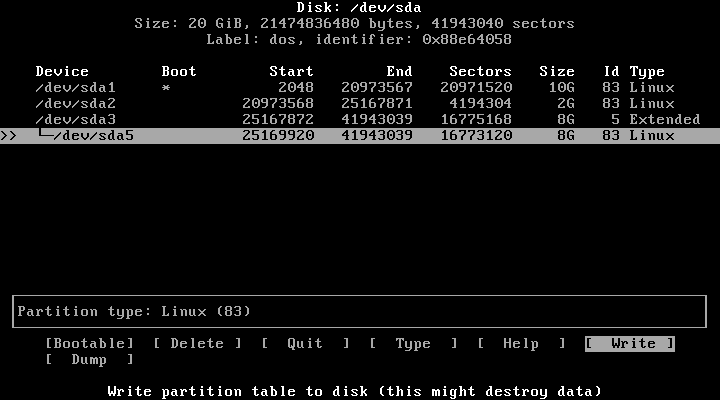
Type 'Yes' again to confirm the changes.
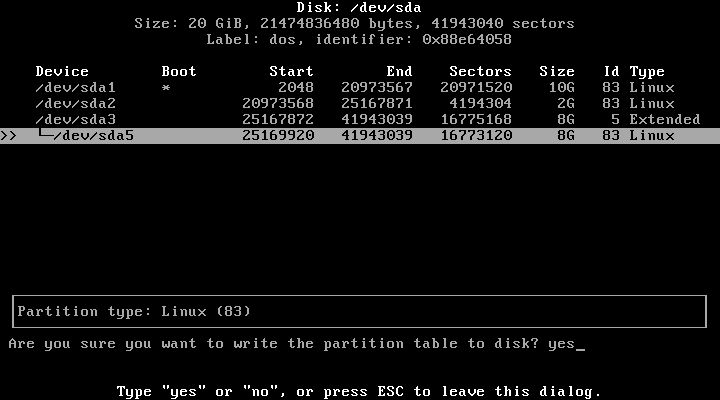
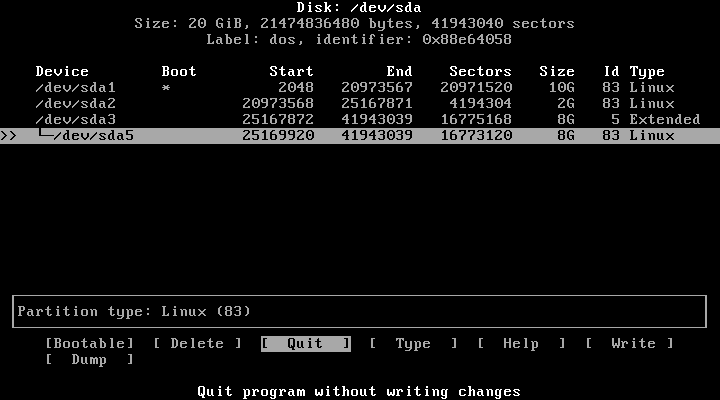
After creating the necessary partitions, select 'Quit' option and exit the partition manager.
You can verify the partition details using command:
fdisk -l
D. Format partitions
We have created the necessary partitions, but we didn't format them yet.
Format the primary partition using command:
mkfs.ext4 /dev/sda1

Similarly, format the logical partition using ext4 file system.
mkfs.ext4 /dev/sda5

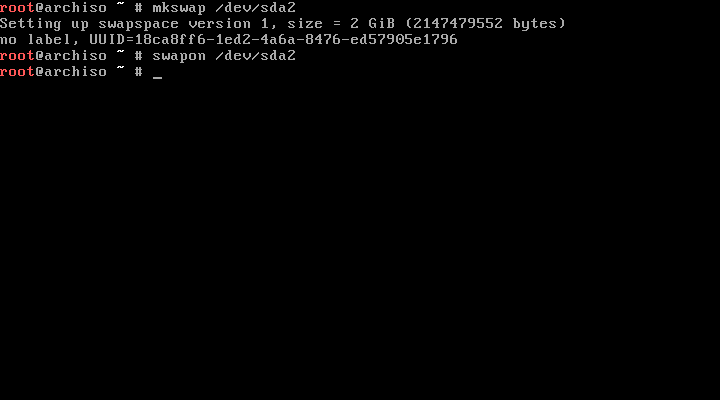
Then format and activate the Swap partition using the following commands:
mkswap /dev/sda2
swapon /dev/sda2
Step 4: Installing Arch Linux base system
We have created necessary partitions and formatted them. Now, we need to mount them in order to install Arch Linux base system.
I am going to mount Primary partition (/dev/sda1) in /mnt and Home partition in /mnt/home.
mount /dev/sda1 /mnt
mkdir /mnt/home
mount /dev/sda5 /mnt/home
Now, it is time to install Arch Linux base system.
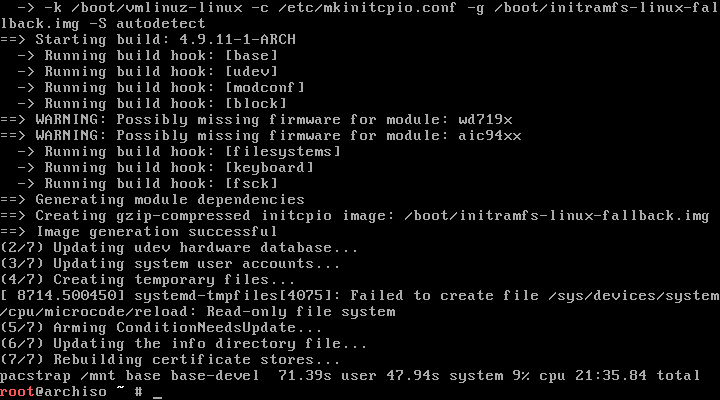
pacstrap /mnt base base-devel
This will take while depending upon your Internet speed.
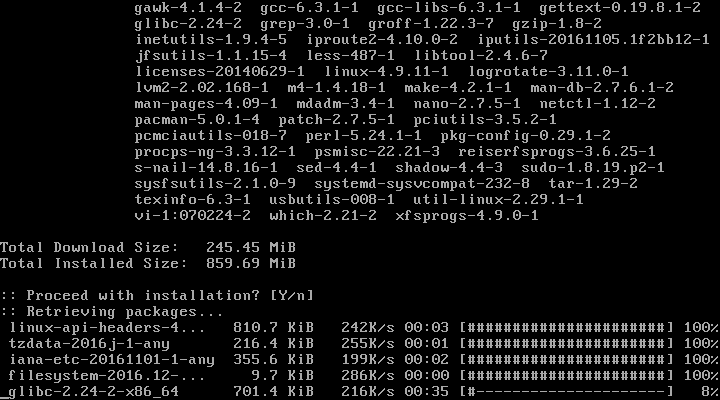
Congratulations! Arch Linux base installation is completed.
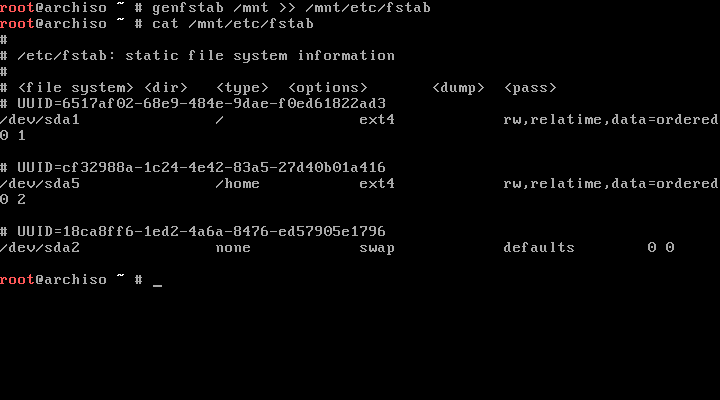
After base system installation, create fstab file using command:
genfstab /mnt >> /mnt/etc/fstab
Then verify the fstab entries using command:
cat /mnt/etc/fstab
Sample output:
Step 5: Arch Linux basic Configuration
Now, let us switch to the newly installed Arch Linux base system using command:
arch-chroot /mnt /bin/bash
The next step is to configure the system language.
To do that, edit /etc/locale.gen file:
vi /etc/locale.gen
Uncomment en_US.UTF-8 UTF-8, as well as other needed localisations.
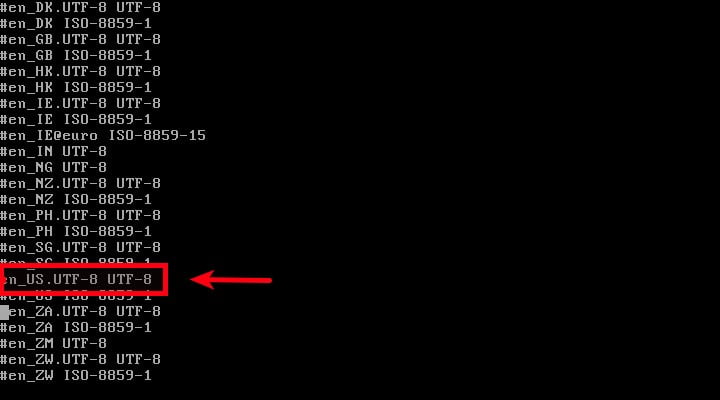
Save and close the file.
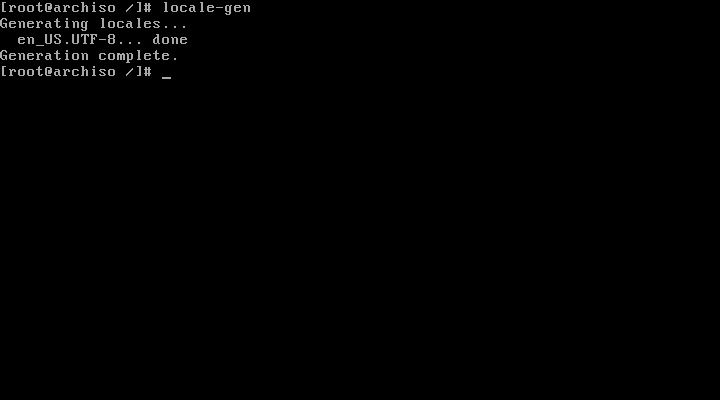
Then, generate the new locales using command:
locale-gen
Create /etc/locale.conf file,
vi /etc/locale.conf
Add the following line:
LANG=en_US.UTF-8
Save and close the file.
Then, we need to assign system's timezone.
List out the available timezones using command:
ls /usr/share/zoneinfo/
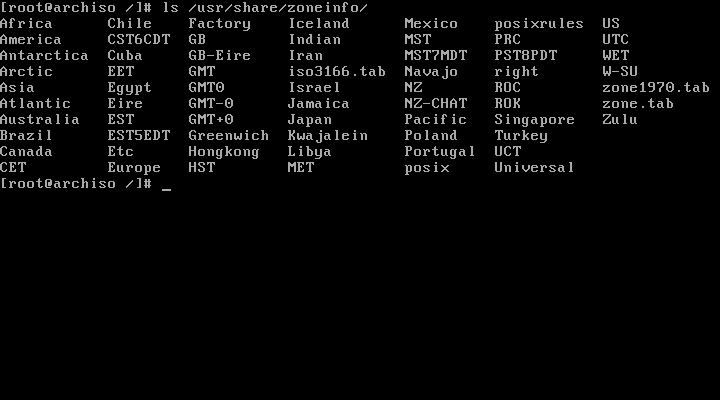
Since my time region is Asia/Kolkata, I ran the following command:
ln -s /usr/share/zoneinfo/Asia/Kolkata /etc/localtime
Set the time standard to UTC using command:
hwclock --systohc --utc
Set 'root' user password with command:
passwd
Step 6: Network configuration
Edit /etc/hostname file,
vi /etc/hostname
Set your Arch linux system name:
server
Save and close the file. Then, edit /etc/hosts file and set the hostname as well. Be mindful that you need to set the same hostname in the both files.
Then make Network connections persistent using commands:
systemctl enable dhcpcd
Step 7: Grub installation
We reached the final stage. Now, we need to install the boot loader for the newly installed Arch system.
To do that, run:
pacman -S grub os-prober
grub-install /dev/sda
grub-mkconfig -o /boot/grub/grub.cfg
Finally, exit from the chrrot, unmount the partitions and reboot your Arch Linux. Make sure you have removed the installation media too.
exit
umount /mnt
umount /mnt/home
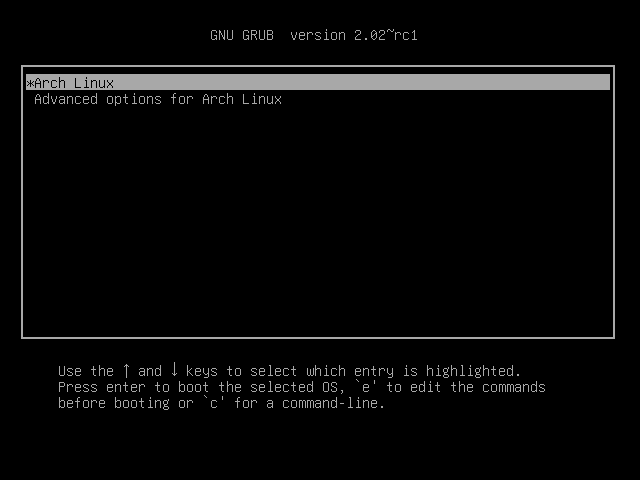
reboot
Select Arch Linux from the boot menu.
Log in to your newly installed Arch system as root user and password that you made during installation.
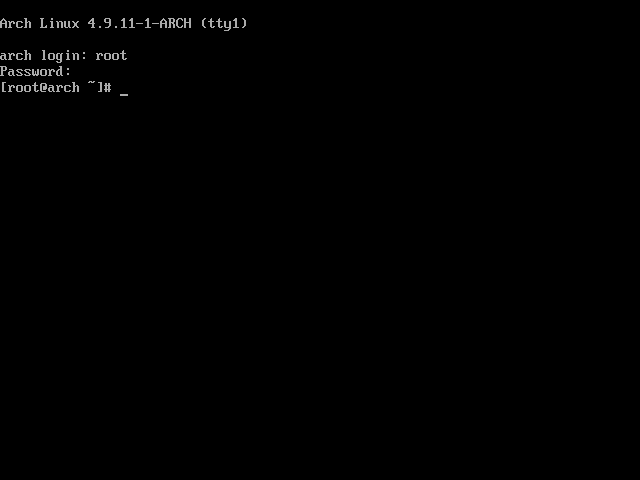
Congratulations! The Arch Linux system is ready to use.
Refer our next article to know about the basics things to do after Arch Linux fresh installation.
Also, check our Arch Linux maintenance guide.
If you are a beginner, then Arch Linux installation might be bit difficult for you. No worries, there is an another distro, called Arch anywhere, that has a graphical installer script that allows the users to easily install Arch Linux with a simple menu system.
Similarly, there is yet another Arch Linux graphical installer script called "Revenge installer" that helps you to easily install Arch Linux with GUI and other useful softwares.
That's all for now. If you find this tutorial useful, please share it on your social networks and support our site.
Reference:
Thanks for stopping by!
Help us to help you:
- Subscribe to our Email Newsletter : Sign Up Now
- Support OSTechNix : Donate Via PayPal
- Download free E-Books and Videos : OSTechNix on TradePub
- Connect with us: Facebook | Twitter | Google Plus | LinkedIn | RSS feeds
Have a Good day!!
27 comments
Hi, when installing Arch I created three partitions: 10gb ext4 linux; 1gb swap; 108gb ext4 linux (I didn’t see an option for “PRIMARY” or “EXTENDED”)
I don’t think I created a “logical” partition.
I just used the remaining harddrive space when creating the last partition, sda3.
Do you think this will cause problems or frustration in the future?
Thanks for the help. (:
It won’t cause any problem. The “Primary” and “Extended” options will be found on the bottom.
I’m using an older distro to install from (late 2016), there’s nothing at the bottom and some of the menus are different. I’ve tried using the newest arch distro but I’m having trouble even getting it to run from a usb.
I tried the latest ISO. I have no issues in Virtualbox at all. I am not sure about physical machine.
Interesting- I tried installing with Rufus instead of Universal USB installer and all of the options are there. Thanks. 😀
Thanks for the tutorial, I’m a total noob when it comes to linux but I got Arch installed and it’s working great. Super informative.
One confusion: the part that said “edit /etc/hosts file and set the hostname as well. Be mindful that you need to set the same hostname in the both files.” I wasn’t sure what “both files” was referring to (the /etc/hostname file as well as the /etc/hosts file?). Still, fantastic tutorial.
Nice article. I have been using Slackware and kind of just stayed away from Arch linux mostly due to the length of the instructions. I still consider myself a noob despite that but this article is so similar to slackware I think I will give it a try. I like that Arch has the rolling release which is what attracts me to it. I have tried other distros like Mint and Ubuntu but I have my suspicions about these distros, not Debian but anything Ubuntu based. This is the last windows pc in the house and once this goes, I won’t allow anymore windows pc’s in my home and I think Arch Linux may be the replacement. Cheers.
Glad I have helped you. Welcome to Arch Linux club. I have been using Arch Linux for the past two years as my primary desktop.
Doing “pacman -S grub os-prober” returns 3 warnings, that the database files for core, extra and community dont exist, and 2 errors, target not found for grub and os-prober.
What to do?
Edit: Yeah and what to do with the 6th step in the hosts file?
EDIT 2: I searched a bit on Google and found “pacman -Syu –debug”. I ran it and it downloaded something and step 6 worked.
Hai, thank you for nice article. I follow this article step by step, and successfully install Arch Linux on my machine.
Btw, you forgot to add command to install package “dialog” after install base and base-devel. 🙂
Anyway, great article!
Thanks. Chroot step failed though. I did some research and tried again and it worked after using the -U with “genfstab” command. A
Simple and easy to follow guide. But I have some question, I have laptop with 8GB RAM and SSD 240GB. Is there any special action to install arch on SSD? disable swap maybe? thanks before.
I never tried Arch Linux on SSD. May this guide might help. https://danynativel.com/2017/01/29/archlinux-installation-guide-on-encrypted-ssd-2017/
Oh man, what an article… Thanks for taking the time!
Love this guide! Arch does take longer to install then most Linux distros, but I like the feeling of having control on whats on my machine. One question: is there any benefits with making a logical/extended partition?
If you are using an older computer with a standard BIOS then you are limited to 4 primary partitions. That’s why we use extended partitions. Here is a good read if you’re interested to know more. https://www.lifewire.com/extended-partitions-2181304
Got stuck in
vi /etc/locale.gen
How can I leave that screen? No options appear in the screen, and ctrl O is not working
Type :wq to save and exit from vi editor.
Thank you for this guide!!
Found it very readable.
BTW, there is a small mistake on the last step:
* umount /mnt/home
* umount /mnt
It should be unmount “/mnt/home” first, and then unmount “/mnt”, or it would complain /mnt busy!
Or you can just do umount -R /mnt it will unmount /mnt/home and /mnt
The command should be
genfstab -U /mnt >> /mnt/etc/fstab
Please change. Otherwise the chroot step will not work, and there will be other configuration errors in the system.
One thing missing. There are no instructions to install a kernel. It is no longer part of base.
This guide is outdated. We will update this as soon as possible. Thanks for the reminder.
Please update it, I’d love to install thos
In new release Archlinux, you should install
dhcpcd
linux linux-firmware
when entering step 6 just before you enable dhcpcd service, this solved for me when stuck in GRUB> after finish installation & not connected to internet.
Thank you for the tip. I will test and update the guide soon.
Please update the guide, without installing the kernel arch won’t boot up. I saw your video on youtube and it was really helpful, but the latest version does not come with a kernel.